CP-7-series Verification System Instruction manual(2.0E).pdf - 第102页
1 1. Using the FULL AUTO Mode Edition 2.0 91 CP-7-series V erification System Instruction Manual 1 1.6.3 Device Check Procedure Using Scanner Using the Scanner differs fr om using PDT -3100 in that there is no device com…
11. Using the FULL AUTO Mode
Edition 2.0 90 CP-7-series Verification System Instruction Manual
11.6.2.1.8 When Feeders Have Been Set in All Relevant Slots
All the slot LEDs switch off when feeders have been set in all the slots which are to be
used.
11.6.2.1.9 Device Check Completion
Preparation for beginning production is completed when feeders have been set in all the
slots which are to be used, and all the slot LEDs are off.
11.6.2.2 Verification Without Using the “Device Check” Command
In the FULLAUTO mode, verification can be performed without executing the “Device
Check” command.
The setup sensor constantly monitors the feeder mount/demount status while the
device table is at the standby position. In the FULLAUTO mode, device setup consists
simply of setting feeders in the slots to be used, and setup can therefore be completed
without displaying the [Device Check] screen.
The only difference between displaying or not displaying the [Device Check] screen
during a setup, is that a device list displays at the PDT-3100 if the [Device Check] screen
is displayed.
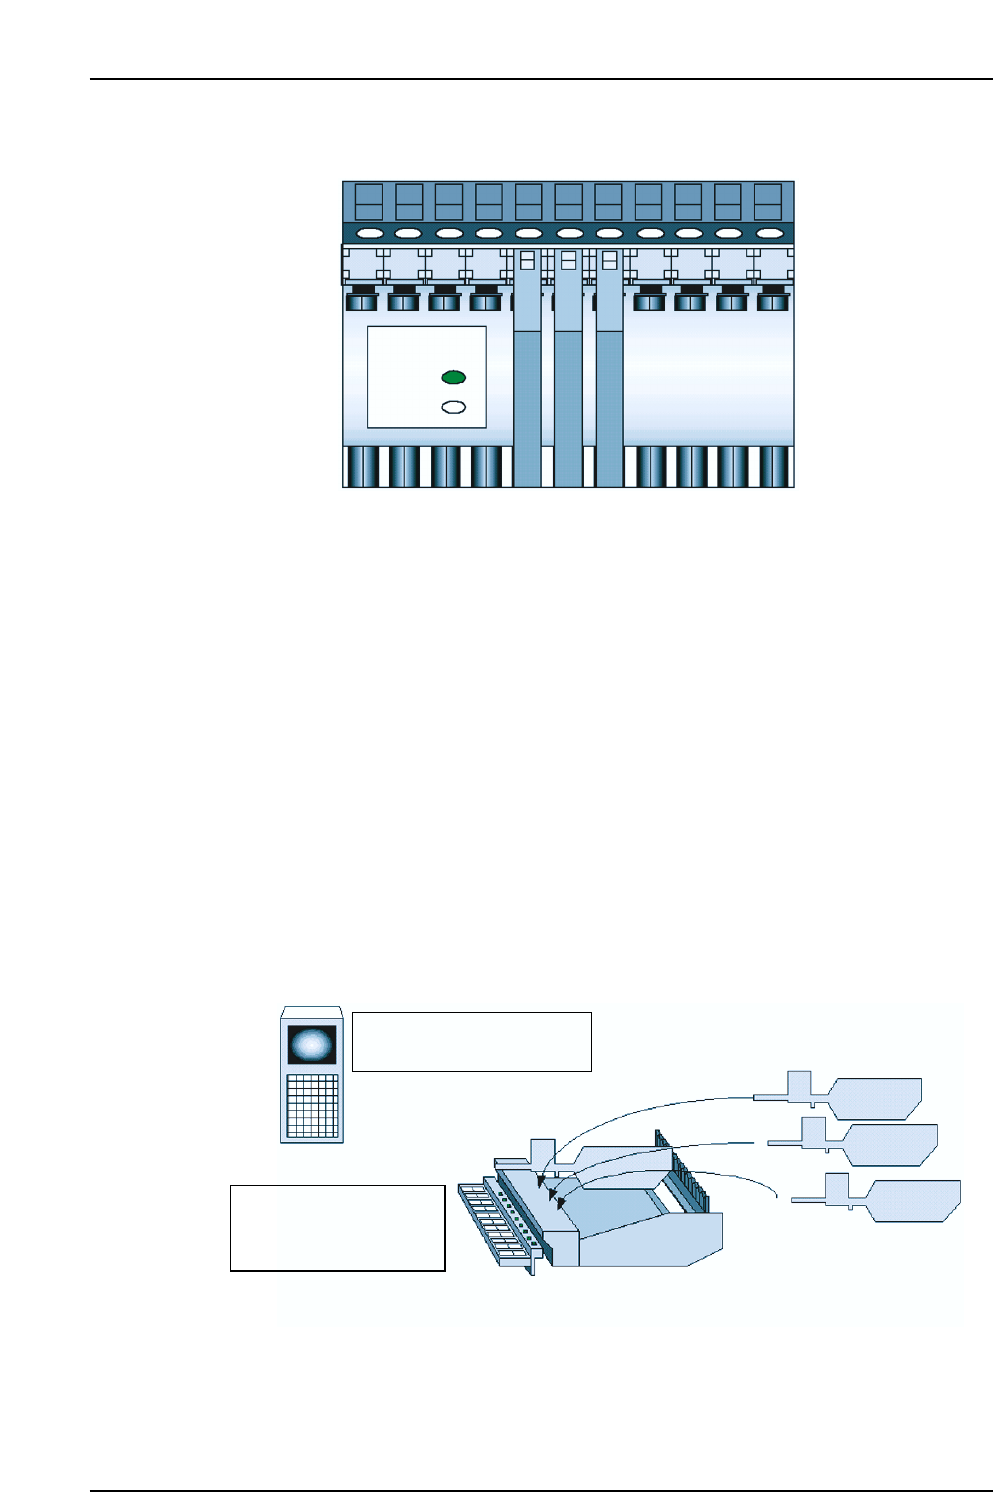
CP7V0062E
Device table at standby position
[Device List] screen does
not display at PDT-3100
Set the appropriate
feeders in slots where
LEDs are on
CP7V0061E
LED
ON
OFF
11. Using the FULL AUTO Mode
Edition 2.0 91 CP-7-series Verification System Instruction Manual
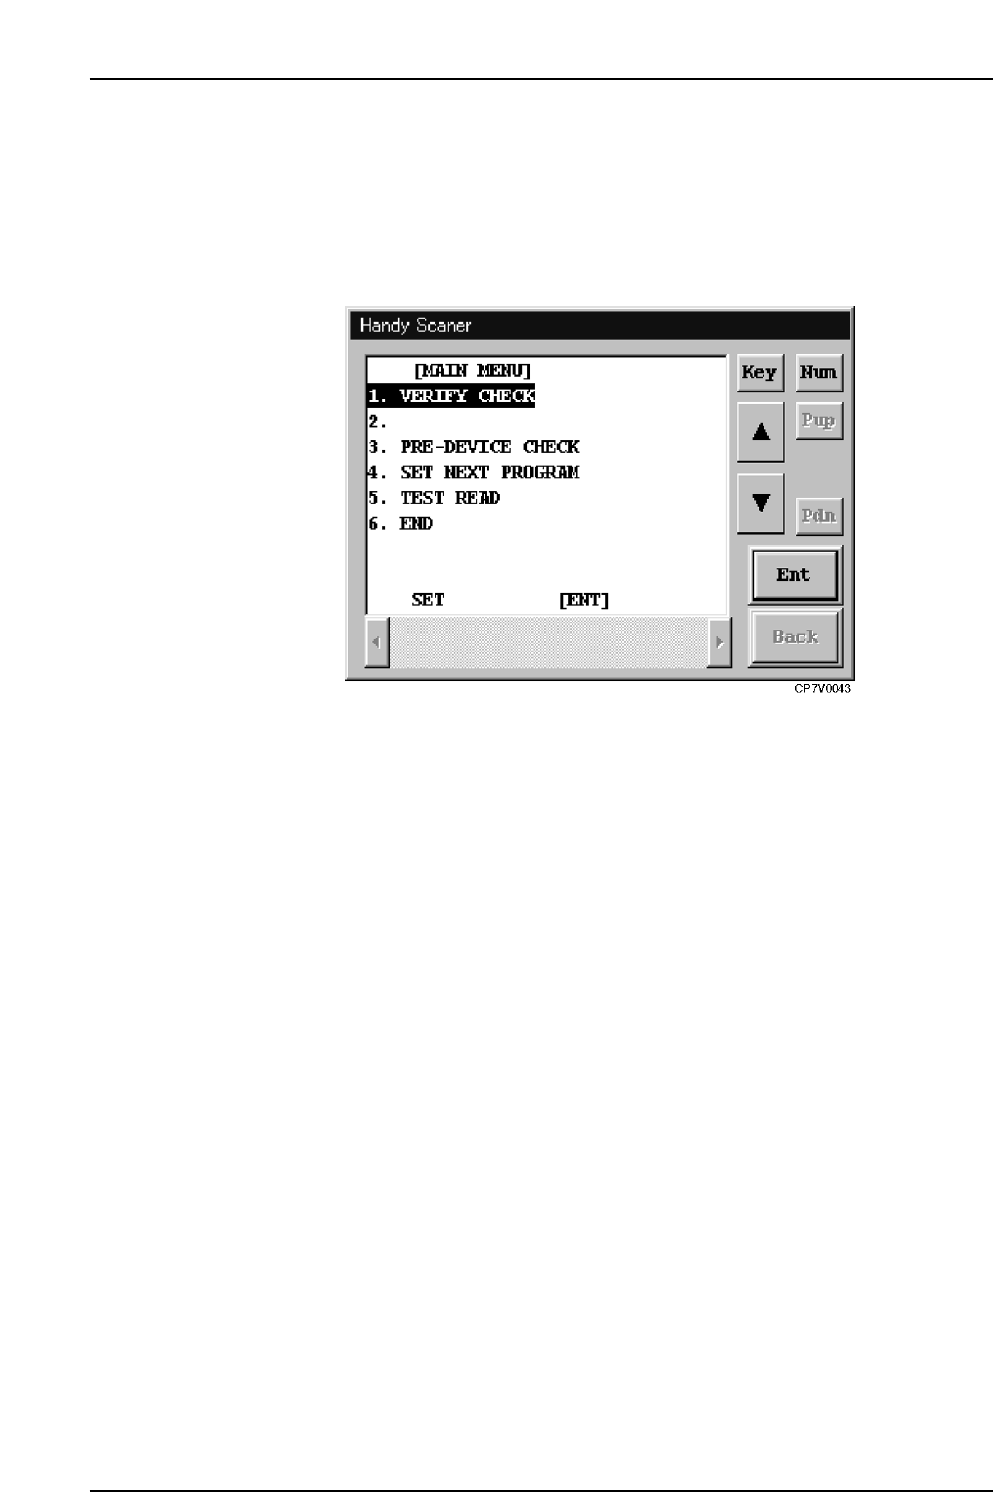
11.6.3 Device Check Procedure Using Scanner
Using the Scanner differs from using PDT-3100 in that there is no device comment list
display at the Handy Terminal screen.
When [Device Check] is selected at the machine control panel, the [Device Check] screen
displays, but the procedure from that point is the same as when performing a
verification from the PDT-3100 without using the “Device Check” command.
Note: When performing a FULL AUTO mode operation using the scanner, do not begin a device
check by reading the “1” barcode with the [Main Menu] displayed in the Handy Scanner
dialog box. If the “1” barcode is read, the device check will occur in the DC AUTO mode.
11.7 Changing to DC AUTO Mode
When a part related error (parts-out condition) occurs during quick verification mode
operation while using the feeder status monitoring function, the ID information (combination
information) must be re-registered at Fujitrax Verifier.
ID information (combination information) can be registered at Fujitrax Verifier on the machine
in the following two ways.
• By performing a DC AUTO mode operation.
• By creating the ID information (combination information) (by scanner only; see section 12.3).
The procedures for changing from the FULLAUTO mode to the DC AUTO mode is explained
below.
11.7.1 When Using the PDT-3100
When performing a quick verification mode operation with the device comment list
displayed at the PDT-3100, press the [ALPHP] button to enable an alphabetic input, then
enter [C] to change to the DC AUTO mode.
Once a change to the DC AUTO mode has occurred, it is only possible to return to the
FULLAUTO mode after verification has been completed or aborted.
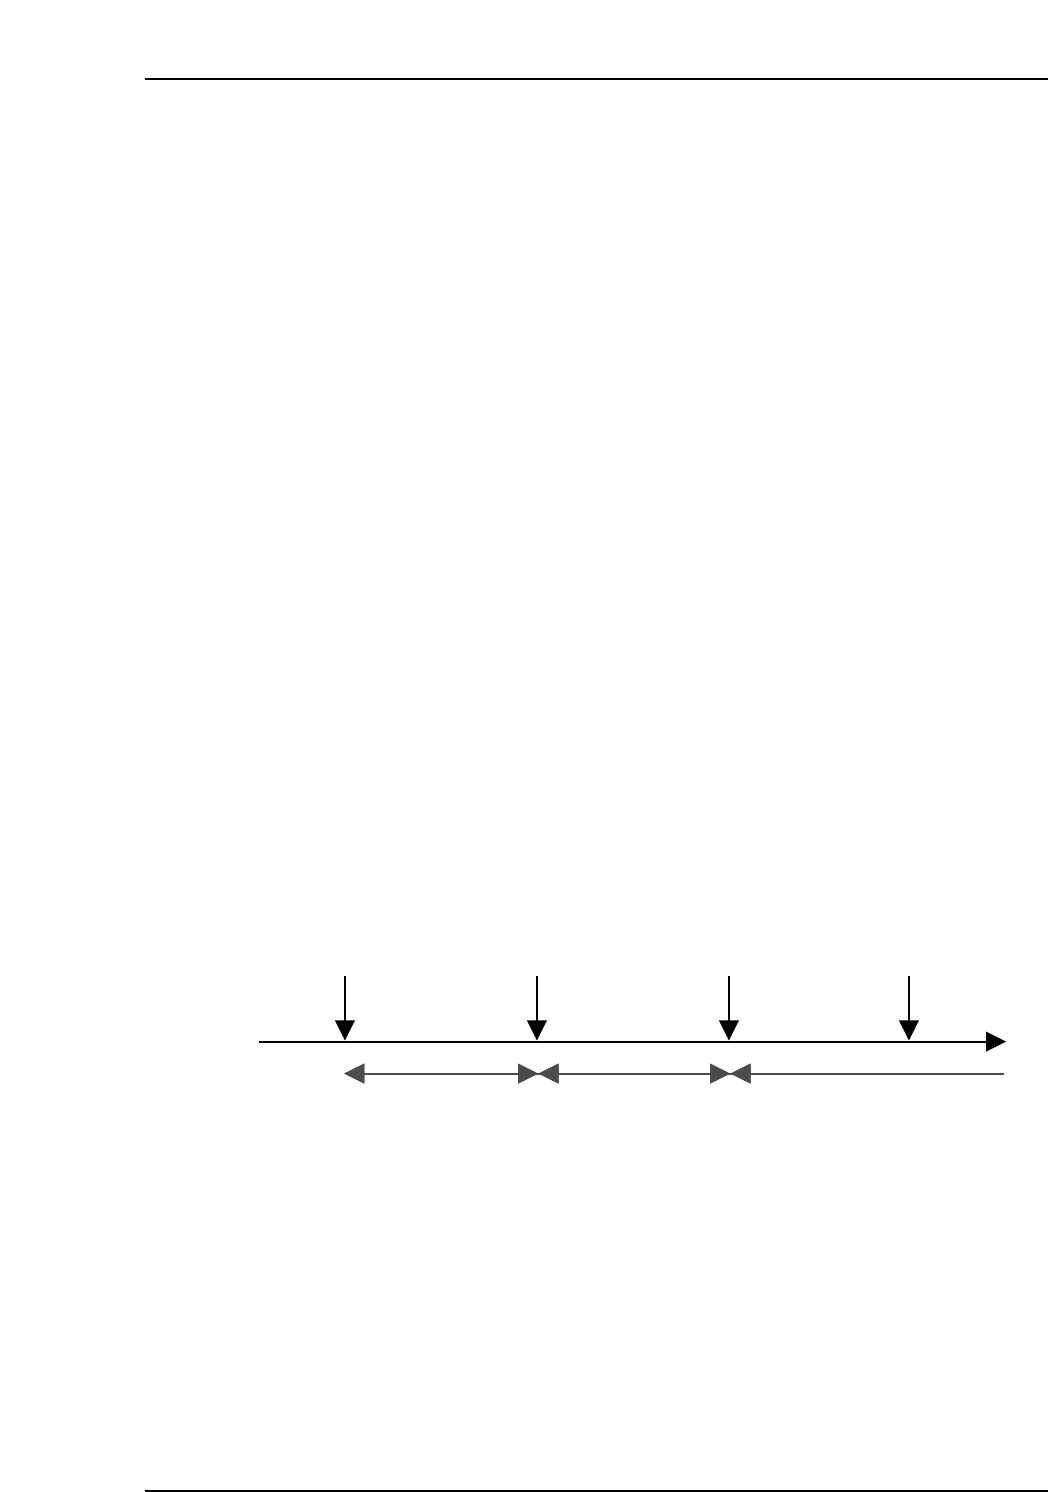
Verification begins Verification completed Verification beginsChange to DC
AUTO mode
Quick verification
mode
Normal verification
mode
Quick verification
mode
CP7V0063E
11. Using the FULL AUTO Mode
Edition 2.0 92 CP-7-series Verification System Instruction Manual
11.7.2 When Using the Scanner
When in the FULLAUTO mode, it is possible to change to the DC AUTO mode and
begin a verification operation simply by scanning the “1” barcode with the [Main Menu]
displayed in the Handy Scanner dialog box.
Once a change to the DC AUTO mode has occurred, it is only possible to return to the
FULLAUTO mode after verification has been completed or aborted.
Handy Scanner’s Main Menu