CP-7-series Verification System Instruction manual(2.0E).pdf - 第51页
9. Using The Normal V erification Mode Edition 2.0 40 CP-7-series V erification System Instruction Manual 9.2 Normal V erification Procedure 2 Device check start Stage to be checked is determined Slot to be checked is de…
9. Using The Normal Verification Mode
Edition 2.0 39 CP-7-series Verification System Instruction Manual
9. Using the Normal Verification Mode
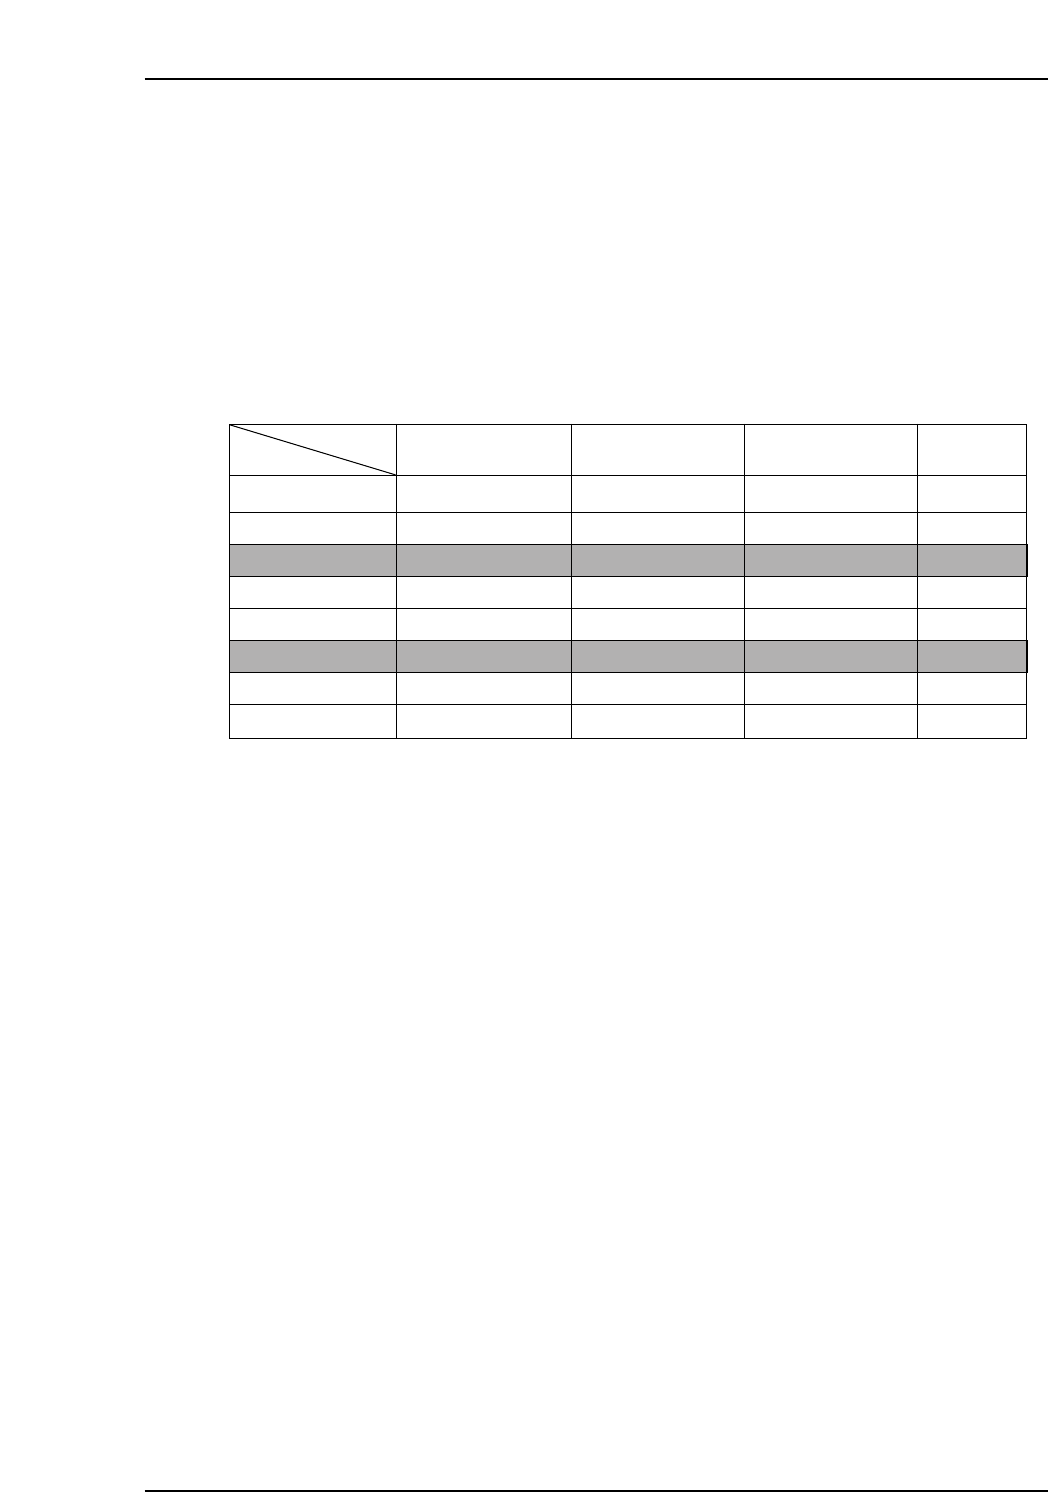
Verification operations vary somewhat, depending on the verification configuration (devices)
used. These devices can be selected at the [Parts Administration System] screen. The
following buttons are used to select the desired devices:
• [Use Handy Terminal]
• [Use Setup Sensor and LED system]
• [Use Fujitrax Verifier]
The table below shows the device combinations and corresponding procedures. Each of these
verification procedures is explained in the following pages.
Note: Configurations 3 and 6 are not yet supported as of January 15, 2002.
Examples of Handy Terminal display screens are shown in the following pages. When using
the PDT-3100 Handy Terminal, these screen images display on the PDT-3100 screen.
When using the “Scanner”, these screen images display at the machine control panel, in the
Handy Scanner dialog box.
9.1 Normal Verification Procedure 1
This procedure is used when none of the verification optional devices are selected. As no
devices are used, this procedure is not explained in this manual.
Configuration
N/A
✔
N/A
✔
N/A
✔
N/A
✔
N/A
N/A
✔
✔
N/A
N/A
✔
✔
N/A
N/A
N/A
N/A
✔
✔
✔
✔
Procedure 1
Procedure 2
Procedure 3
Procedure 4
Procedure 5
Procedure 6
Procedure 7
Procedure 8
Button
Use Handy Terminal
Use Setup Sensor
and LED system
Use Fujitrax-Verifier
Procedure
VT011Ea
Configuration 1
Configuration 2
Configuration 3
Configuration 4
Configuration 5
Configuration 6
Configuration 7
Configuration 8
9. Using The Normal Verification Mode
Edition 2.0 40 CP-7-series Verification System Instruction Manual
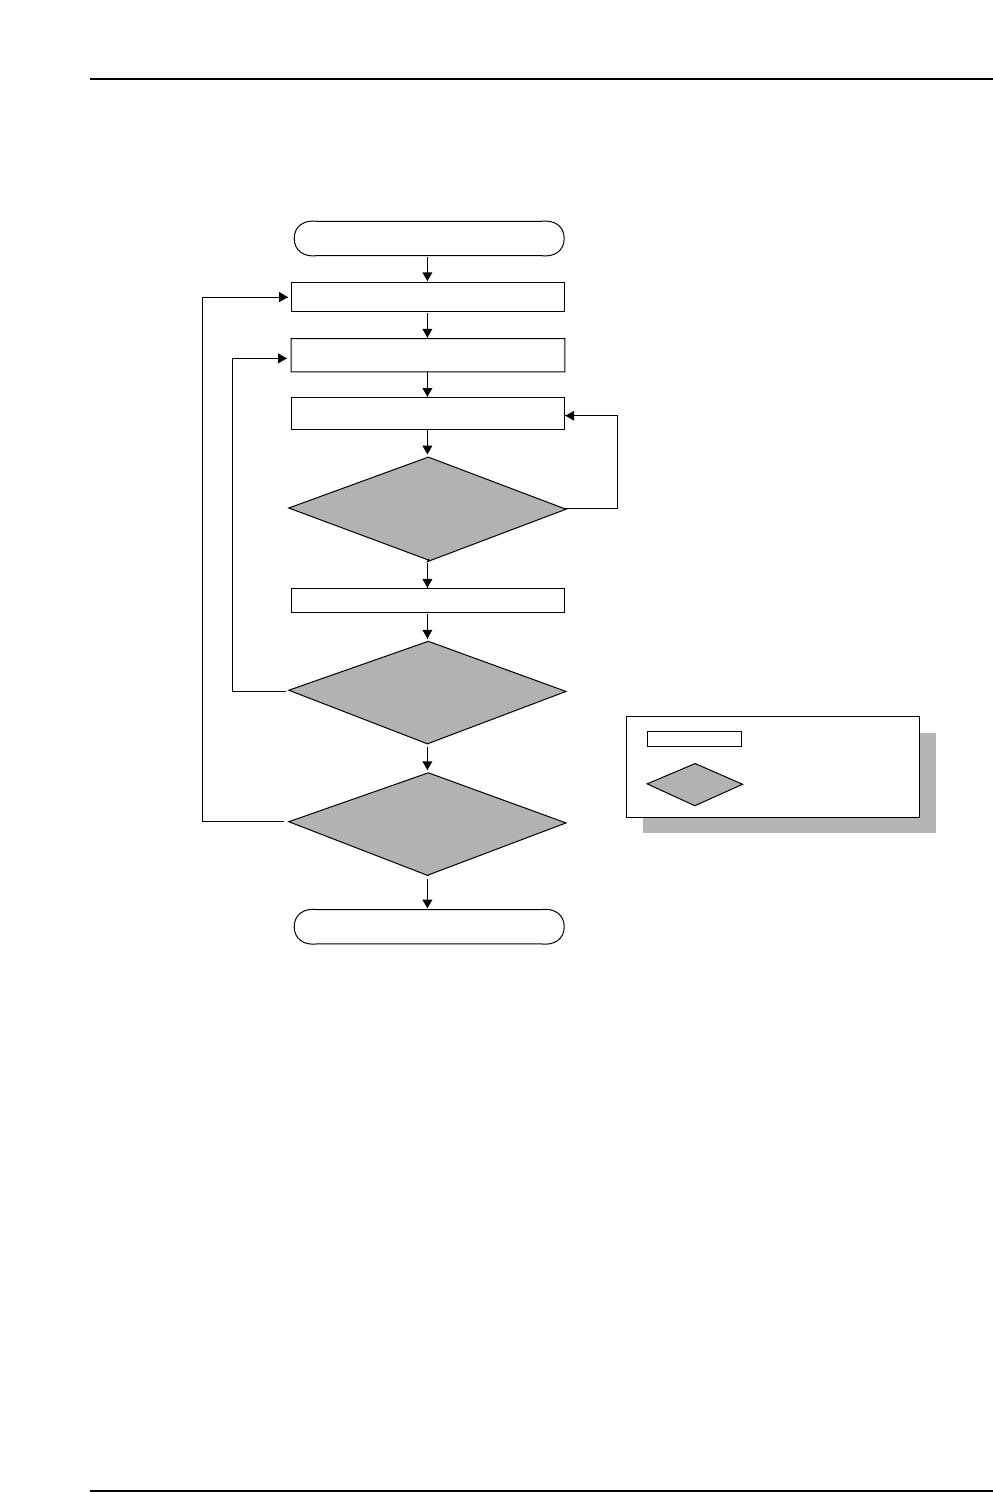
9.2 Normal Verification Procedure 2
Device check start
Stage to be checked is determined
Slot to be checked is determined
Device check completed
Device comment reading
Mismatch
CP7V0004E
Match
No
No
Yes
Yes
ID which was read is
compared with recipe’s device
comment
Feeder set
All device checks completed
at check subject stage?
Device checks completed
on both sides?
: Operator tasks
: Machine processing

9. Using The Normal Verification Mode
Edition 2.0 41 CP-7-series Verification System Instruction Manual
9.2.1 Device Check Start
• A device check can be started by either of the following three methods.
I. Select [Device Check] on the machine control panel.
II. Select [1. Verify Check] at PDT-3100’s “Main Menu” and then press [ENTER].
PDT-3100’s Main Menu
III. With the main menu displayed at the Handy Scanner dialog box, read the "1"
barcode, and select "1. VERIFY CHECK".
Handy Scanner’s Main Menu
ENTER
[MAIN MENU]
1. VERIFY CHECK
2. PRE VERIFY CHECK
3. SET VERIFY RECIPE
4. PALLET SUPPLY
5. TEST READ
SELECT NO.=v
▼▲
CP7V0005