N7201A304E05(1)_0.pdf - 第137页
NPM LNB 4.3 Advanced Setting EJM9BE-MB-04L-20 Page 4-7 Setting the data to extract When the production data extract fun ction is enabl ed, you can set the production data to extract. 1 Click [Move to the extraction dat…
NPM
LNB
4.3 Advanced Setting
Page 4-6 EJM9BE-MB-04L-20
4.3 Advanced Setting
4.3.1 Production Data Extract Setting
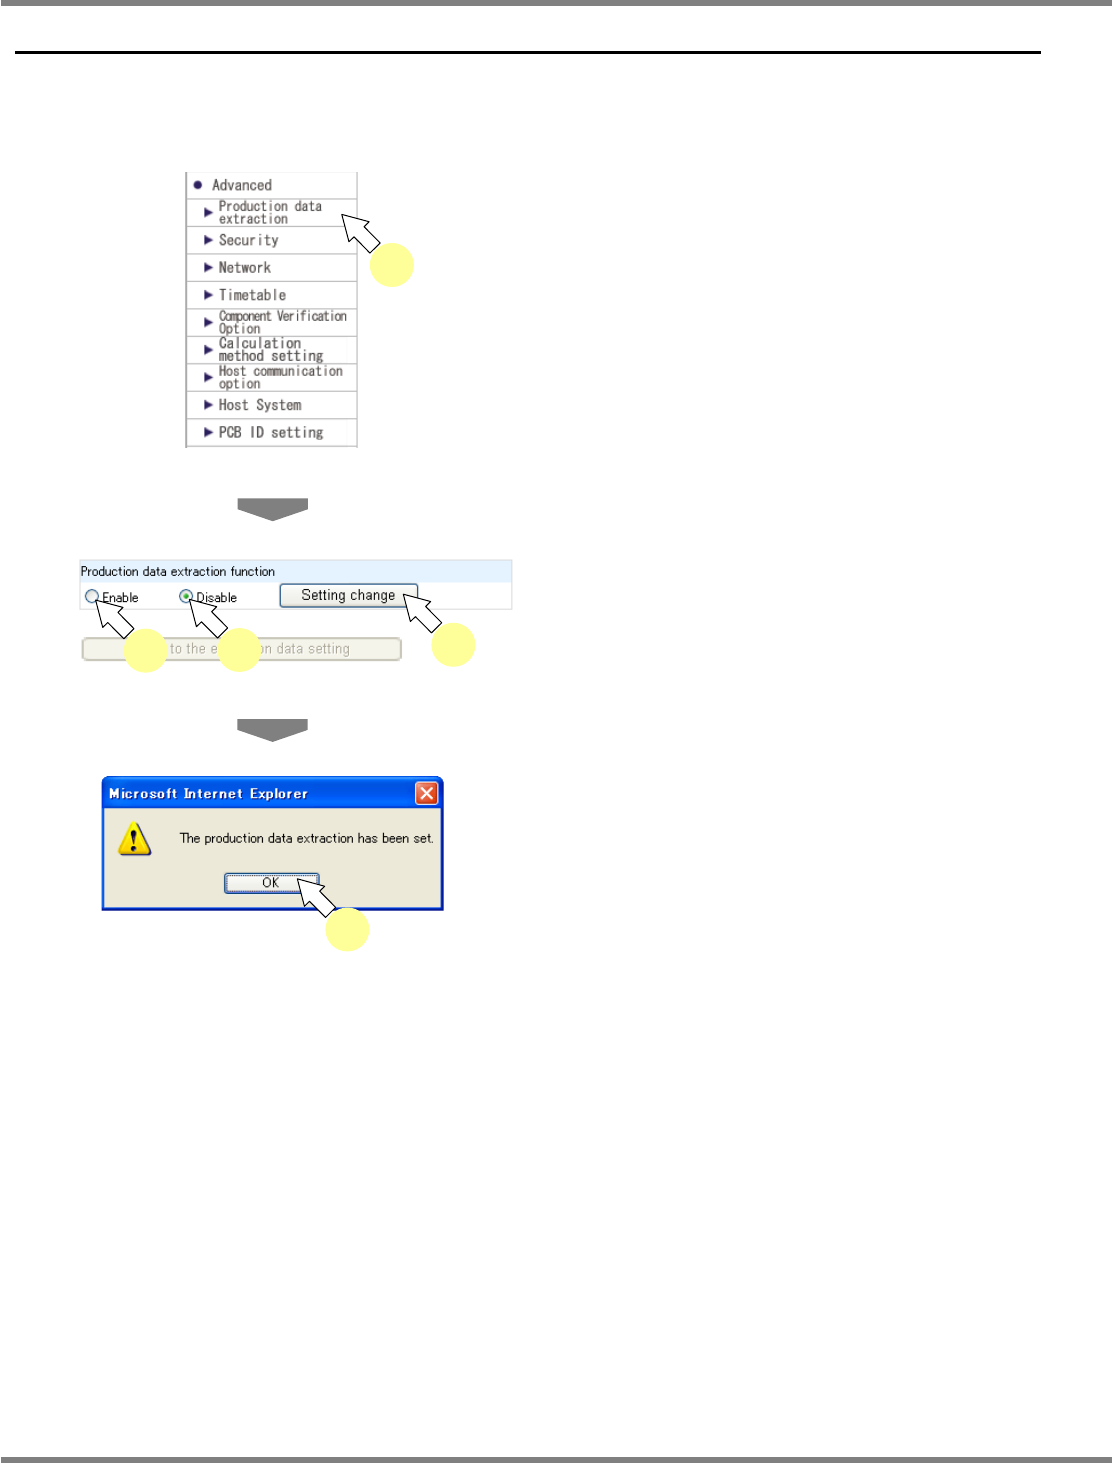
You can set the production data extract function.
1
Choose [Production data extraction]
in [Advanced] from the menu.
•
The <Production data extraction function>
screen is displayed.
2
Select
‘
Enable
’
or
‘
Disable,
’
and click [Setting change].
•
The message of production data extract
setting completion appears.
3
Click [OK].
lnb4-3001_e
1
lnb4-3002_e
2
2
2
lnb4-3003_e
3
NPM
LNB
4.3 Advanced Setting
EJM9BE-MB-04L-20 Page 4-7
Setting the data to extract
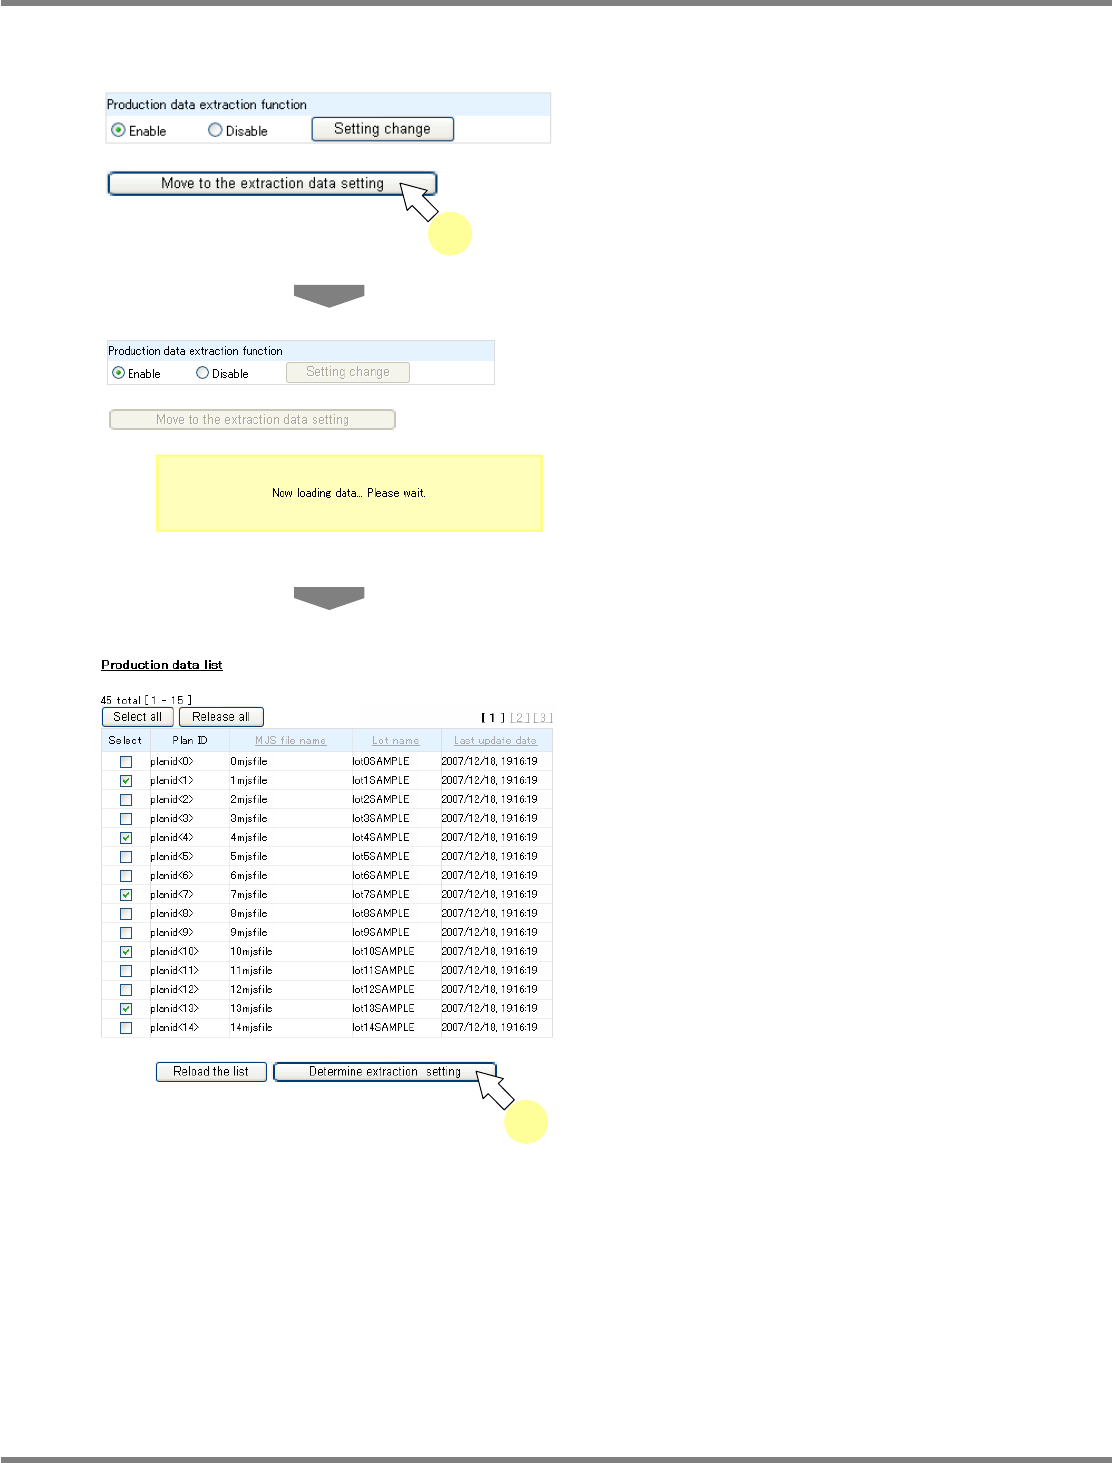
When the production data extract function is enabled, you can set the production data to extract.
1
Click [Move to the extraction data
setting] on the <Production data
extraction function> screen.
•
Only when the production data extract
function is ‘Enable,’ [Move to the extraction
data setting] is active and can be clicked.
•
The message “Now loading data... Please
wait.” appears.
•
The <Production data list> screen is
displayed.
2
Check off the
‘
Select
’
box of the
production data to extract, and click
[Determine extraction setting].
•
When you click [Select all], the select boxes of
all production data are checked off. When you
click [Release all], the select boxes of all
production data are unchecked.
•
When you click [Reload the list], production
data is reacquired.
lnb4-3005_e
lnb4-3004_e
1
lnb4-3006_e
2
NPM
LNB
4.3 Advanced Setting
Page 4-8 EJM9BE-MB-04L-20
4.3.2 Security Setting
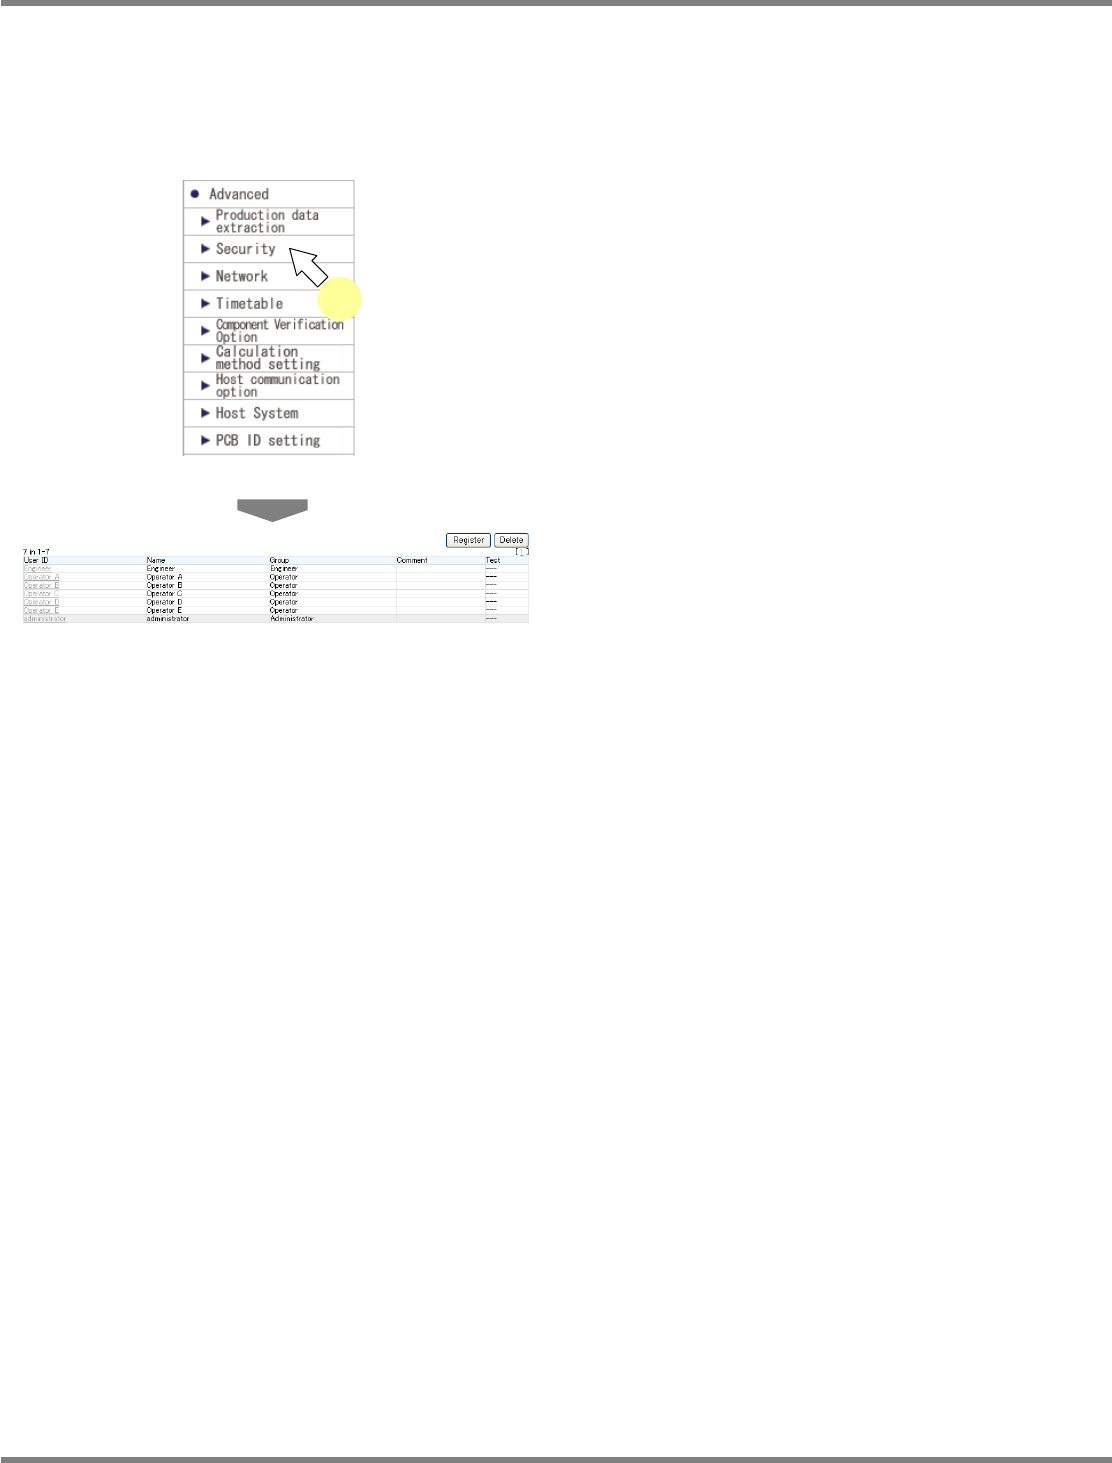
You can manage the user information.
Since user information is shared between LNB and NPM, you can use this function to set the
information. LNB uses this information when logged in from LWS. NPM, on the other hand, uses
this information for general operation of the machine.
1
Choose [Security] in [Advanced] from
the menu.
•
The <User List> screen is displayed.
The following describe how to register, delete, and change the user.
lnb4-3007_e
lnb4-3001_e
1