N7201A304E05(1)_0.pdf - 第142页
NPM LNB 4.3 Advanced Setting Page 4-12 EJM9BE-MB-04L-20 C) Referring/Changing user information You can browse and ch ange the registered user information. 1 Click the desired user ID on the <User List> screen. • Th…
NPM
LNB
4.3 Advanced Setting
EJM9BE-MB-04L-20 Page 4-11
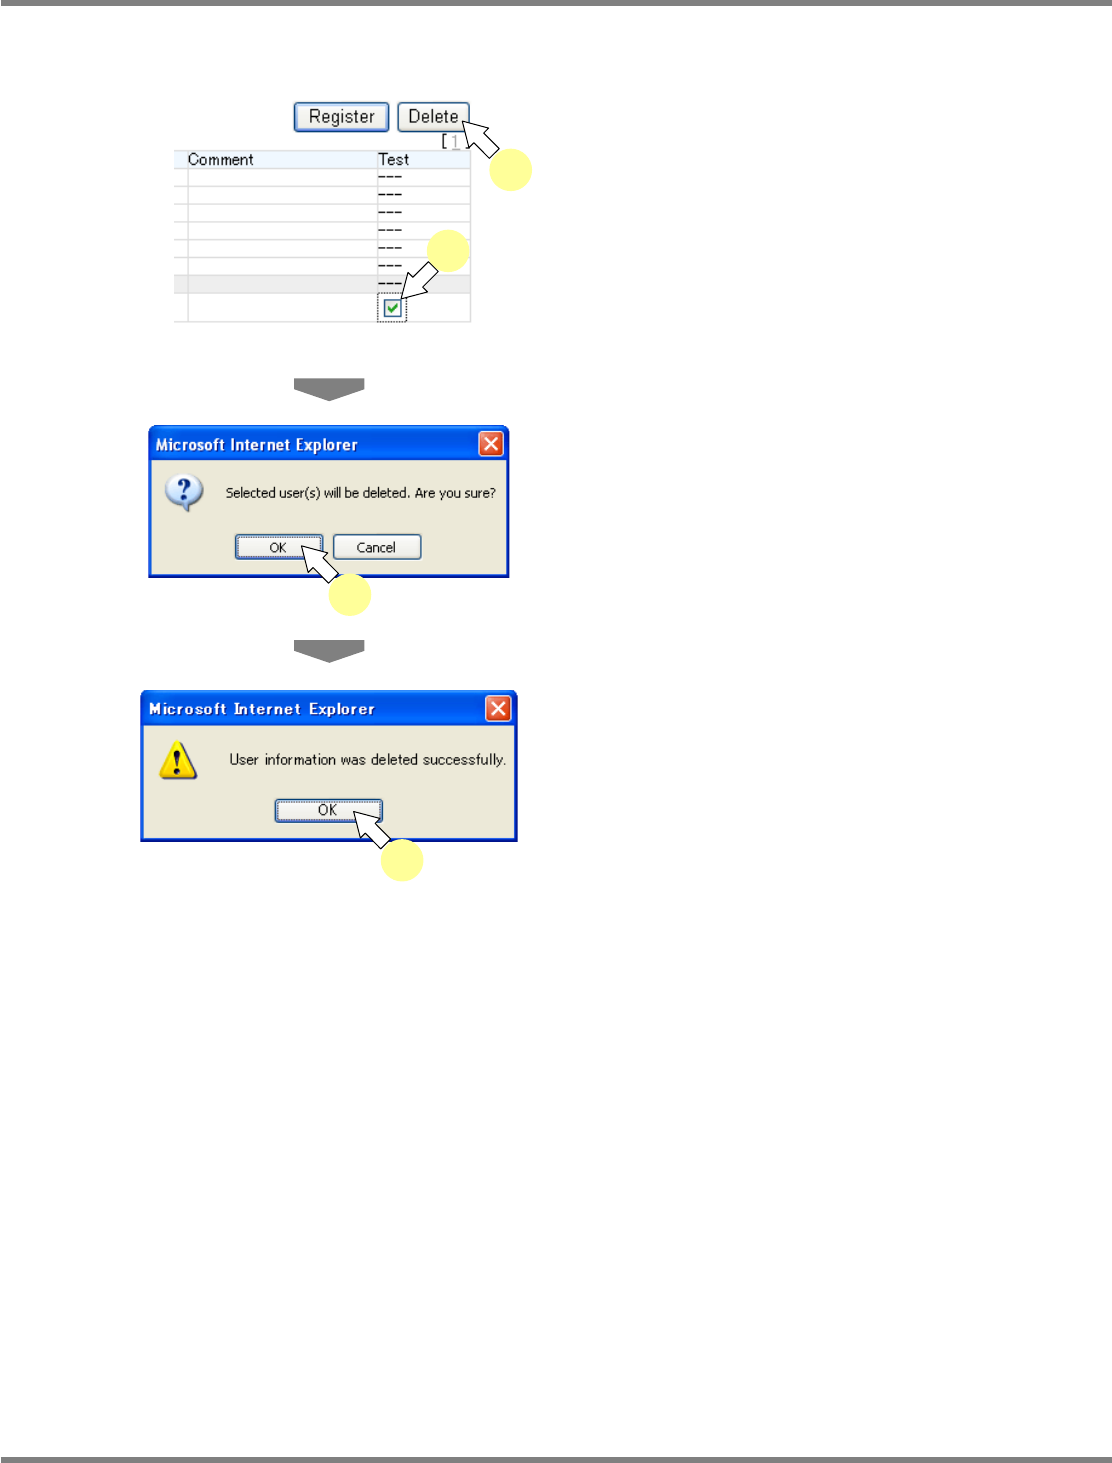
B) Deleting the user information
You can delete the registered user.
1
Check off the desired user on the
<User List> screen, and click [Delete].
•
It is not possible to delete the default users
(administrator, engineer, operator A–E)
created in installation.
•
The dialog of deletion confirmation opens.
2
Click [OK].
•
The message of user deletion completion
appears.
3
Click [OK].
Security precautions
①
In initial introduction, ‘administrator’ is registered.
Change the password periodically in order to maintain the LNB security.
②
The user information in security settings should be managed on your own responsibility. In the case
of retirement, transfer, or the like, leaving unused users unattended can cause the leakage of user
information. We strongly recommend deleting unused users.
lnb4-3012_e
2
lnb4-3011_e
1
1
lnb4-3013_e
3
NPM
LNB
4.3 Advanced Setting
Page 4-12 EJM9BE-MB-04L-20
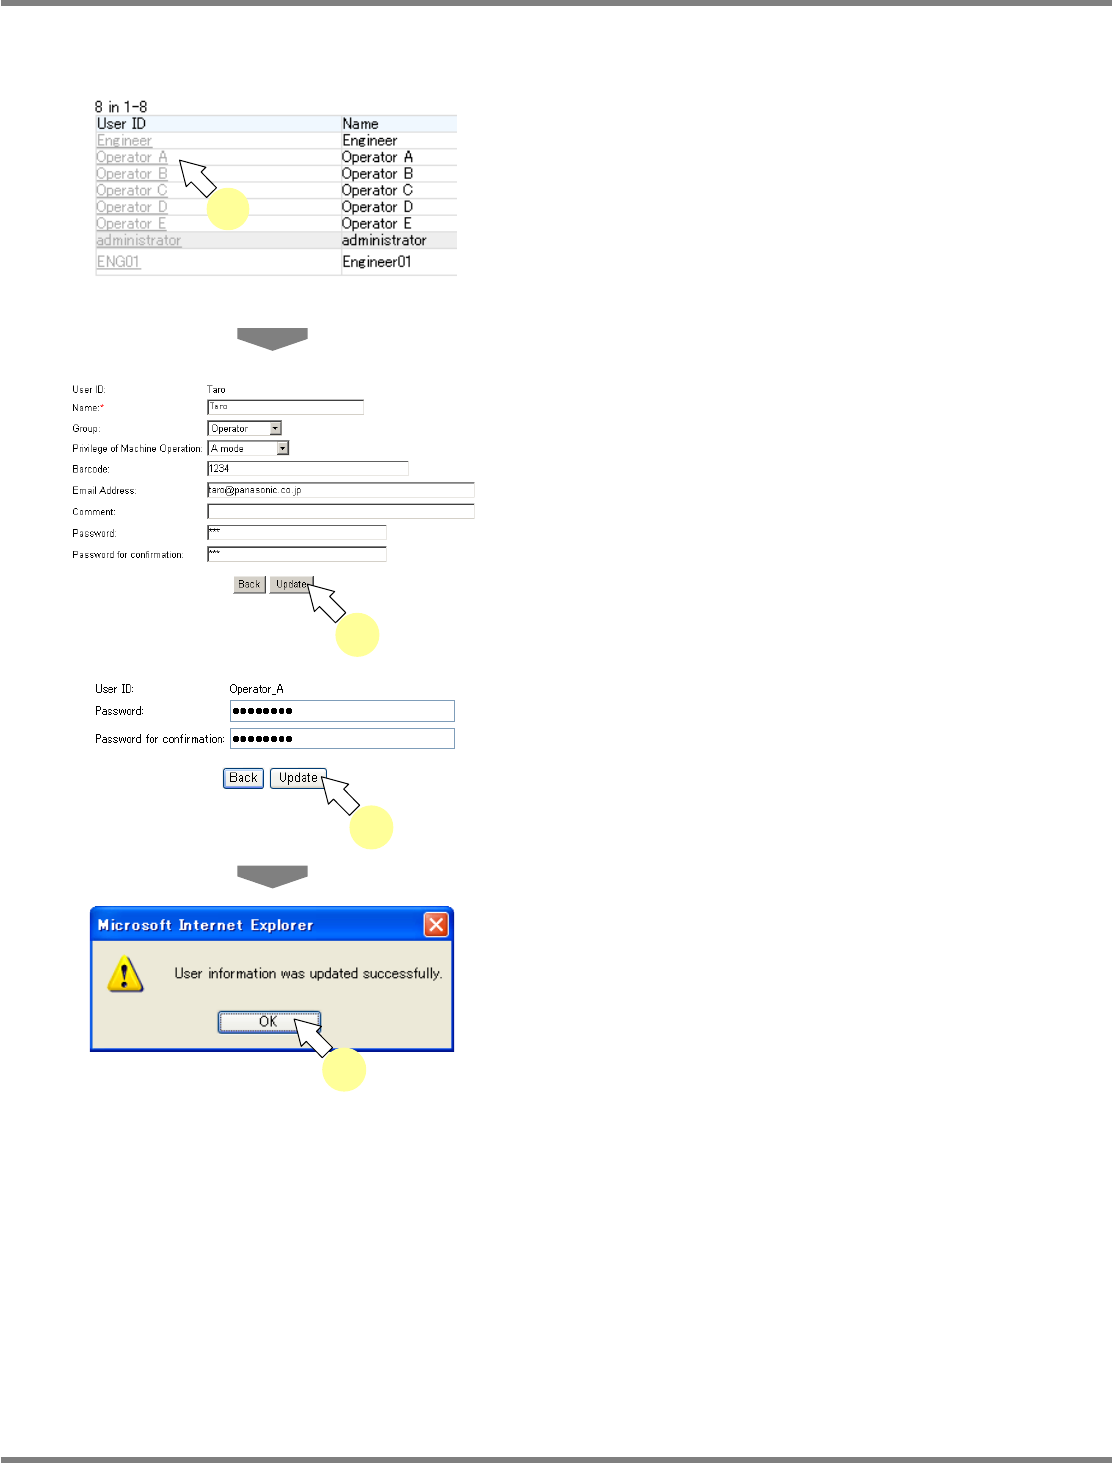
C) Referring/Changing user information
You can browse and change the registered user information.
1
Click the desired user ID on the <User
List> screen.
•
The user information is displayed.
2
Enter the new information in the
desired items, and click [Update].
•
Clicking [Back] returns to the <User List>
screen.
•
For the default users (engineer, operator A–E)
created in installation, the left user information
screen is displayed, and you can only change
the password.
•
The message of user information update
completion appears.
3
Click [OK].
lnb4-3014_e
1
lnb4-3017_e
3
lnb4-3016_e
2
lnb4-3015_e
2
NPM
LNB
4.3 Advanced Setting
EJM9BE-MB-04L-20 Page 4-13
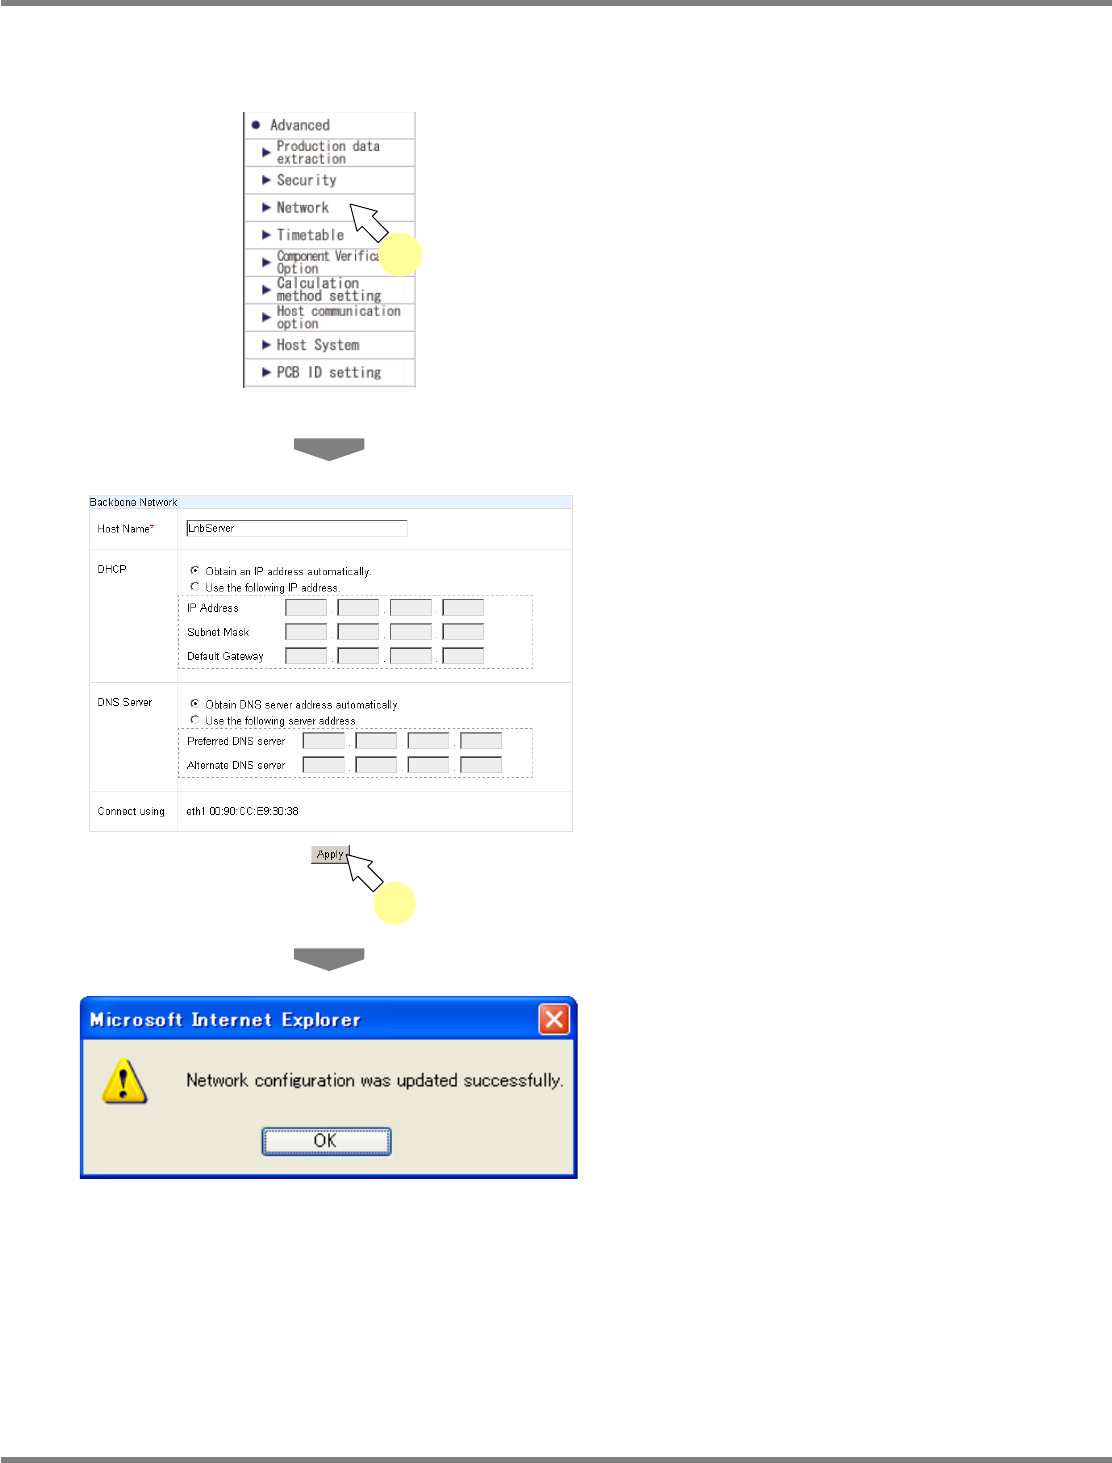
4.3.3 Network Setting
You can configure the LNB settings necessary for network connection.
1
Choose [Network] in [Advanced] from
the menu.
•
The <Backbone Network> screen is
displayed.
2
Enter the new data in the desired
items (host name, DHCP, DNS server
information), and click [Apply].
•
The message of network setting update
completion appears.
lnb4-3018_e
2
lnb4-3019_e
lnb4-3001_e
1