N7201A304E05(1)_0.pdf - 第143页
NPM LNB 4.3 Advanced Setting EJM9BE-MB-04L-20 Page 4-13 4.3.3 Network Setting You can configure the LNB settings necessary for network connection. 1 Choose [Network] in [Advanced] from the menu. • The <Backbone Networ…
NPM
LNB
4.3 Advanced Setting
Page 4-12 EJM9BE-MB-04L-20
C) Referring/Changing user information
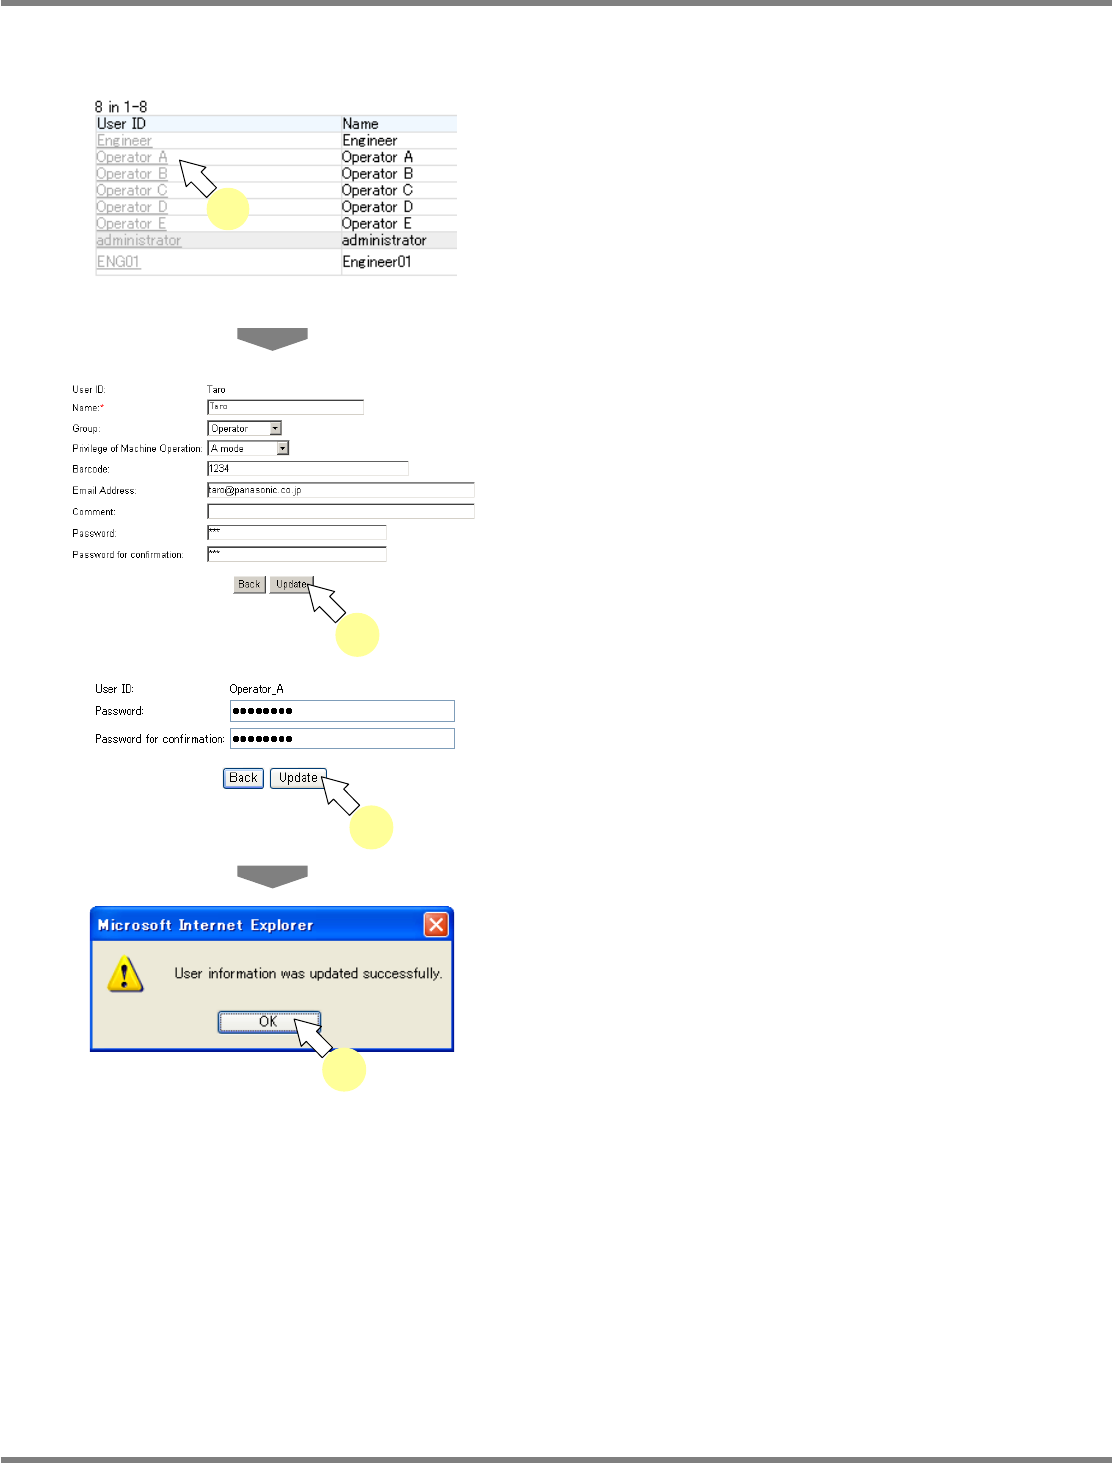
You can browse and change the registered user information.
1
Click the desired user ID on the <User
List> screen.
•
The user information is displayed.
2
Enter the new information in the
desired items, and click [Update].
•
Clicking [Back] returns to the <User List>
screen.
•
For the default users (engineer, operator A–E)
created in installation, the left user information
screen is displayed, and you can only change
the password.
•
The message of user information update
completion appears.
3
Click [OK].
lnb4-3014_e
1
lnb4-3017_e
3
lnb4-3016_e
2
lnb4-3015_e
2
NPM
LNB
4.3 Advanced Setting
EJM9BE-MB-04L-20 Page 4-13
4.3.3 Network Setting
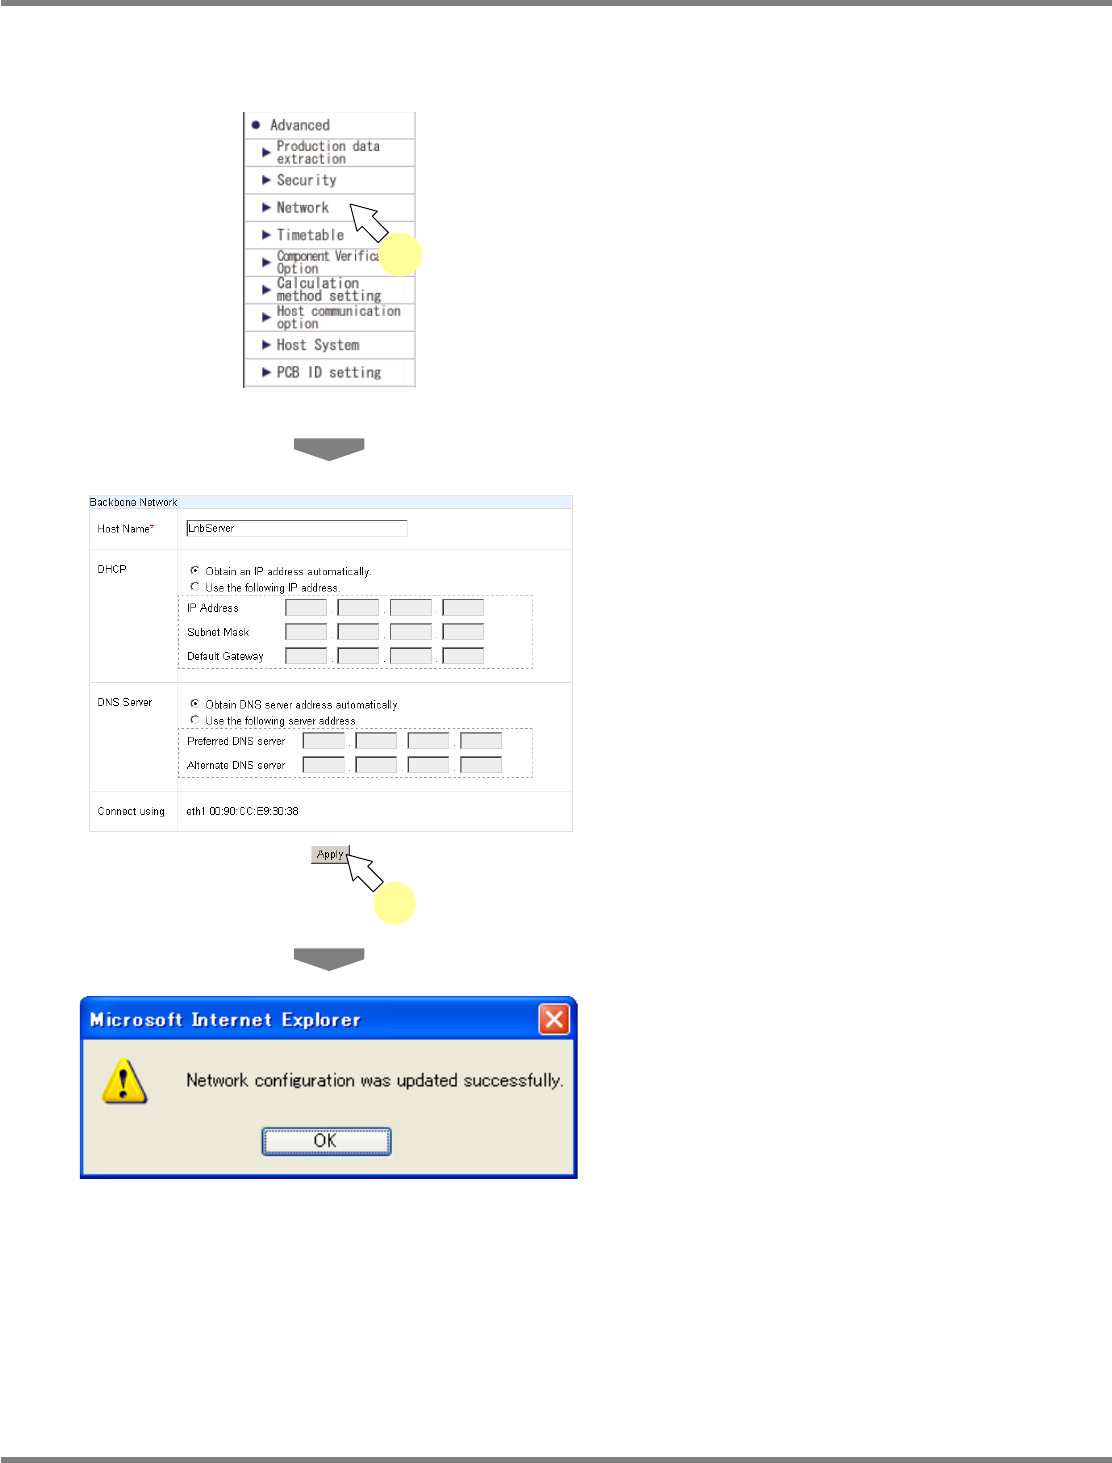
You can configure the LNB settings necessary for network connection.
1
Choose [Network] in [Advanced] from
the menu.
•
The <Backbone Network> screen is
displayed.
2
Enter the new data in the desired
items (host name, DHCP, DNS server
information), and click [Apply].
•
The message of network setting update
completion appears.
lnb4-3018_e
2
lnb4-3019_e
lnb4-3001_e
1
NPM
LNB
4.3 Advanced Setting
Page 4-14 EJM9BE-MB-04L-20
4.3.4 Timetable Setting
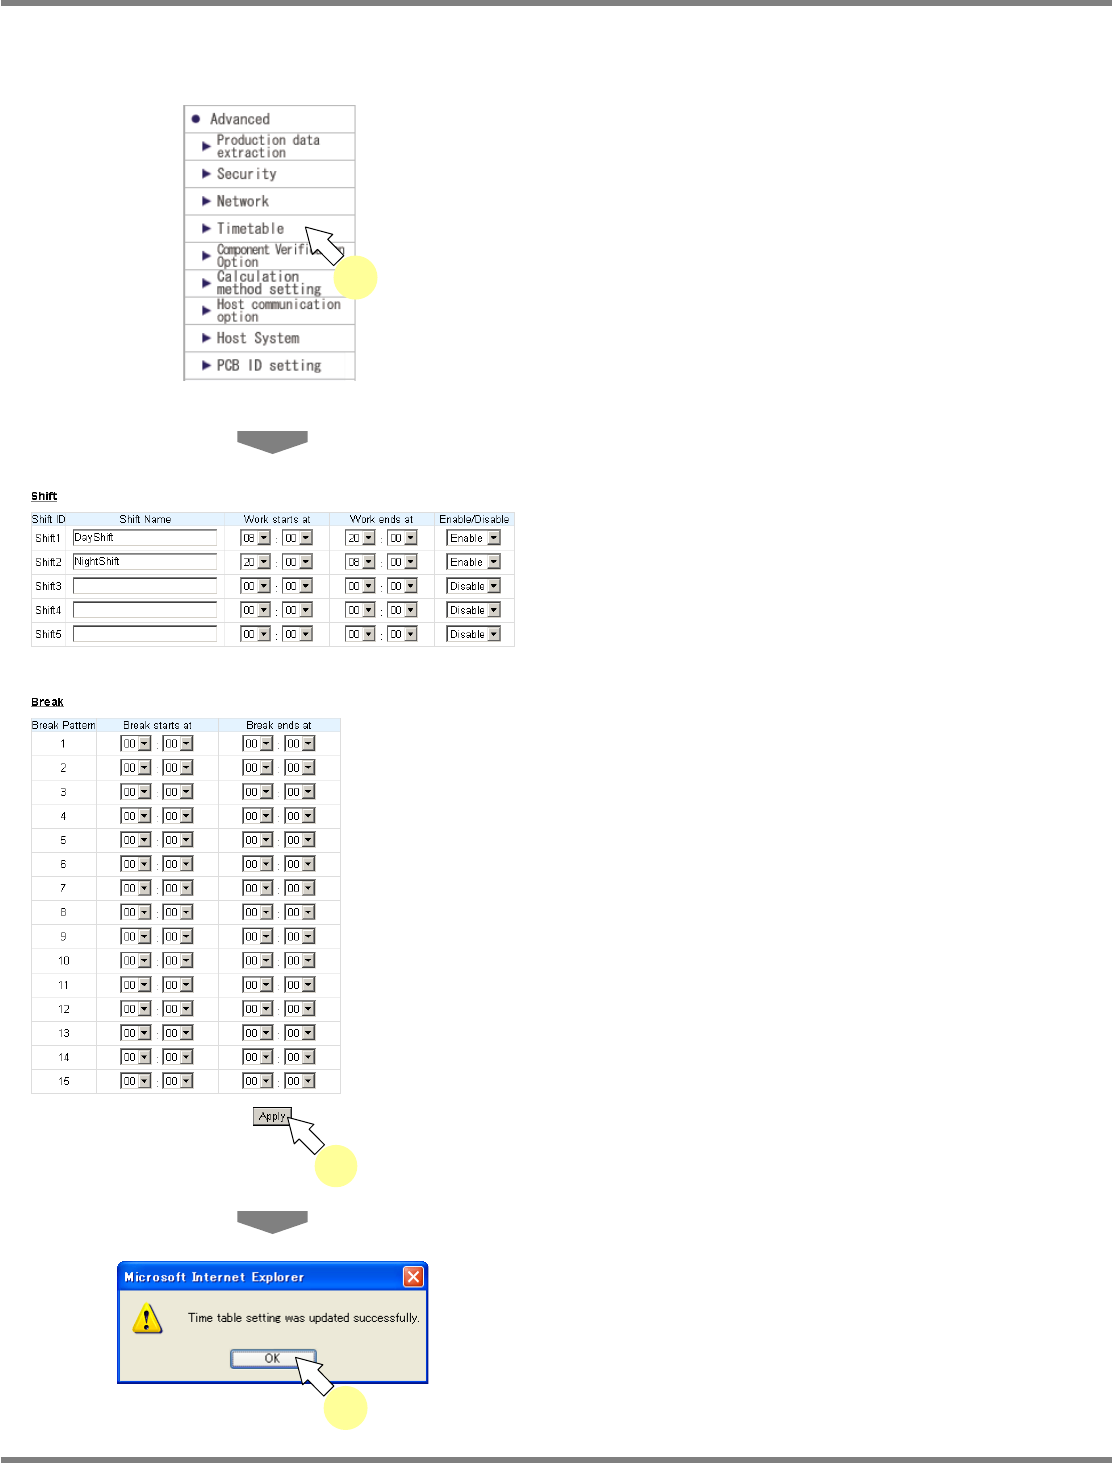
You can set the timetable (shift, break).
1
Choose [Timetable] in [Advanced]
from the menu.
•
The <Timetable> screen is displayed.
2
Set the desired shift and break, and
click [Apply].
•
The message of timetable setting update
completion appears.
3
Click [OK].
lnb4-3020_e
2
lnb4-3021_e
3
lnb4-3001_e
1