SIPLACE-SX4-DX4-用户手册.pdf - 第199页
Service Work 3.12.10 Replacing the Control Valve [03003489-xx] Docking Station for X-Series Compo nent Trolley Service Manual SIPLACE SX4/DX4 199 3.12.10 3 . 1 2 . 1 0 R e p la c in g t h e C o n t r o l V a lv e [ 0 3 0…
Service Work
Docking Station for X-Series Component Trolley 3.12.9 Replacing the Unlocking Pushbutton [00334095-XX]
198 Service Manual SIPLACE SX4/DX4
3.12.9
3.12.9 Replacing the Unlocking Pushbutton [00334095-XX]
Replacing the Unlocking Pushbutton [00334095-XX]
Parts, equipment and tools
▪ Unlocking pushbutton [00334095-xx]
Overview
Removal/installation
► Loosen the four screws (5) fastening the cover (3). The cover is clamped in place with the help of
the bar (4).
► Pull the cover (1) out of the docking station.
► Take care not to damage the earth connection.
► Loosen the screw fastening the terminal block (6) of the pushbutton.
► Turn the terminal block and extract it from its fixtures.
► Label the connection leads and disconnect these from the terminal block.
► Connect the connection cables to the new pushbutton.
► Fit the new pushbutton.
► Refit the cover.
► Connect the power pack connection cable and press the ON/OFF button to switch on.
► Check the function of the pushbutton, by trying out the unlocking procedure.
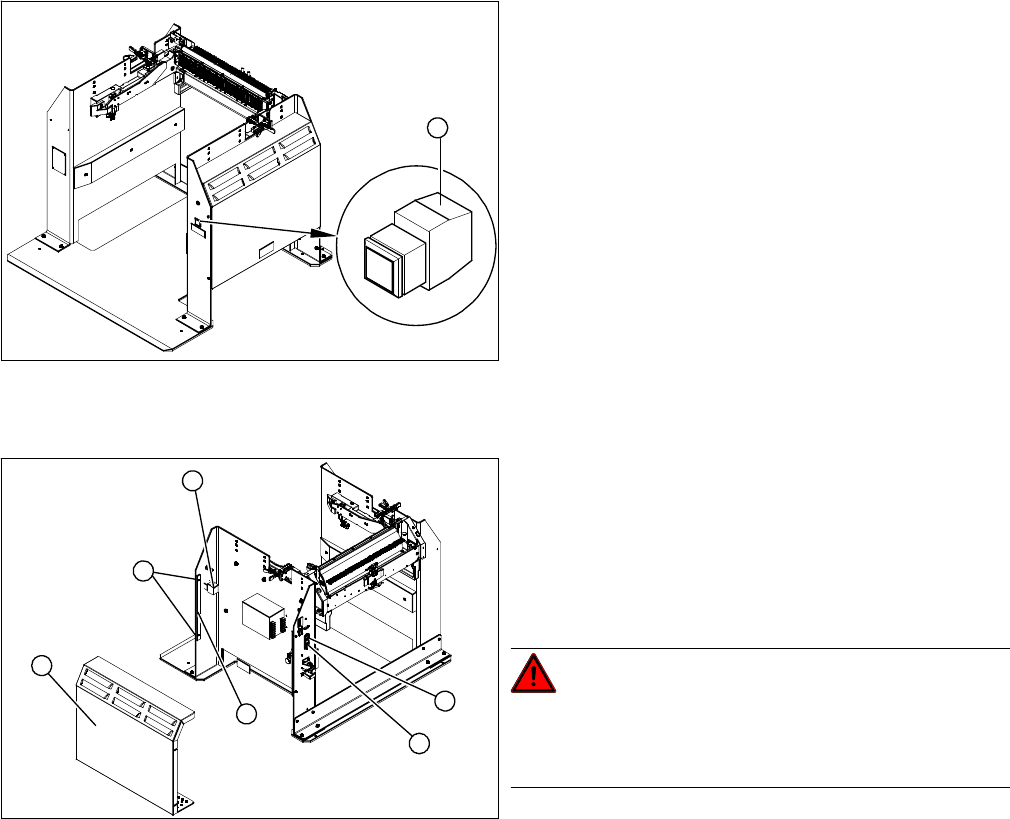
1. Unlocking pushbutton
1
1. ON / OFF switch
2. Power supply plug
3. Cover
4. Bar for clamping the cover
5. Four screws fastening the cover
6. Terminal block for pushbutton
DANGER!
Switch off the voltage supply
Press the ON/OFF button (1) to switch off, and then un-
plug the power supply (2).
4
6
5
1
3
2
Service Work
3.12.10 Replacing the Control Valve [03003489-xx] Docking Station for X-Series Component Trolley
Service Manual SIPLACE SX4/DX4 199
3.12.10
3.12.10 Replacing the Control Valve [03003489-xx]
Replacing the Control Valve [03003489-xx]
Parts, Equipment and Tools
▪ Control valve [03003489-xx]
Removal/Installation
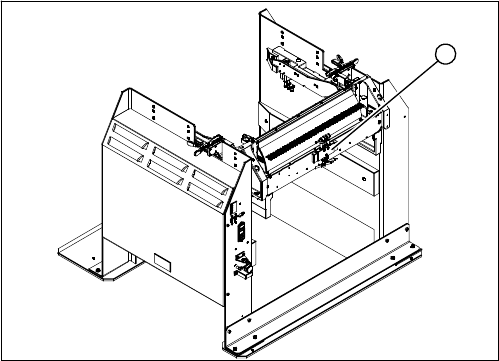
► Unplug the electricity and compressed air cables
from the control valve (1).
► Loosen the fastening screws and remove the control
valve.
► Install the new control valve.
► Reconnect to the electrical and compressed air sys-
tems.
1
Service Work
Manual Table (DX4) 3.13.1 Replacing the Guide Profile (Omega Profile)
200 Service Manual SIPLACE SX4/DX4
3.13
3.13 Manual Table (DX4)
Manual Table (DX4)
3.13.1
3.13.1 Replacing the Guide Profile (Omega Profile)
Replacing the Guide Profile (Omega Profile)
Parts, equipment and tools
▪ Guide profile on front section: guide profile L=150 mm [03081674-xx]
▪ Guide profile on back section: guide profile L=280 mm [03084321-xx]
Overview
Removal
► Loosen the screws fastening the guide profile on the underside of the table.
► Remove the guide profile.
Installation
► Follow the removal instructions in reverse order for installation. Also observe the following instruc-
tions:
CAUTION
Back part, dummy feeder
Do not operate the machine without the back part of the manual table or without the dummy
feeder.
NOTICE
Always replace together
We recommend that you always replace the guide profiles which belong together (on the front
and back parts) at the same time.
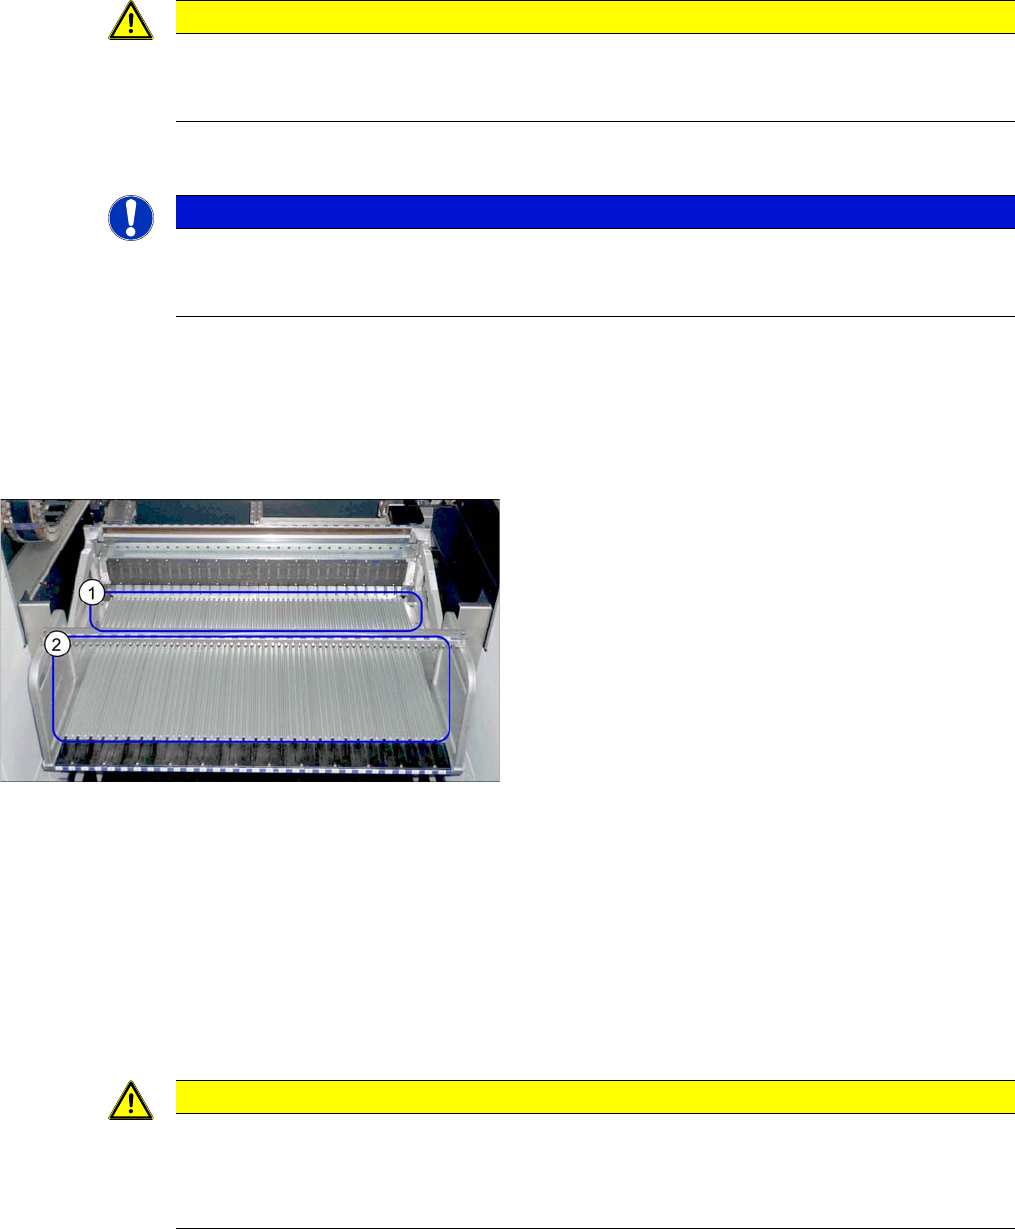
Guide profiles (using example of DX1/DX2)
1. Guide profiles on the front section
2. Guide profiles on the back section
CAUTION
Installation instructions
► To correctly align the guide profiles from the front to the back part (removable), we recom-
mend proceeding as follows:
Place a feeder to the left and right of the guide profile and then screw the guide profiles tight.