SIPLACE-SX4-DX4-用户手册.pdf - 第87页
Service Work 3.5.6 Replacing the Y Axis Buffer Gantries Service Manual SIPLACE SX4/DX4 87 3.5.6 3 . 5 . 6 R e p la c in g t h e Y A x is B u f f e r Replacing the Y Axis Buffer 3.5.7 3 . 5 . 7 R e p la c in g t h e X S c…
Service Work
Gantries 3.5.5 Replacing the Trailing Cable
86 Service Manual SIPLACE SX4/DX4
See also
3.5.5.1.1 Handling the Hose Unlocking Tool [03047090-xx] [ ➙ 78]
► Fit the trailing cable mount (2) onto the machine
base.
Connect the pneumatic hoses to the pneumatic distribu-
tor in the machine base.
The pneumatic hoses are run to the pneumatic distributor
in the machine base. The existing pneumatic hoses,
which are run in the machine, need to be severed and
connected to the trailing cable (1) at the exact position,
with the help of hose couplings [03049770-01].
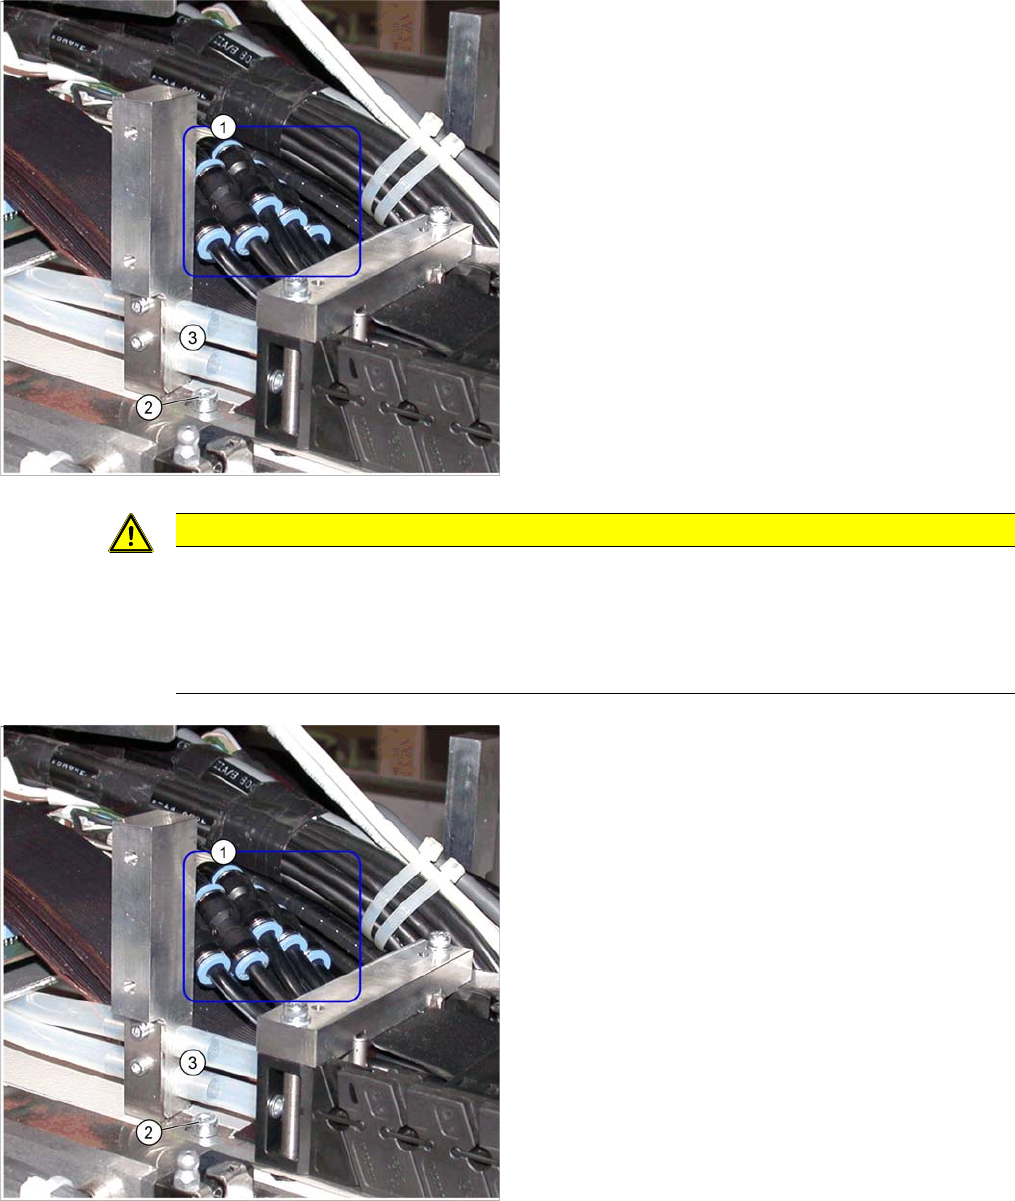
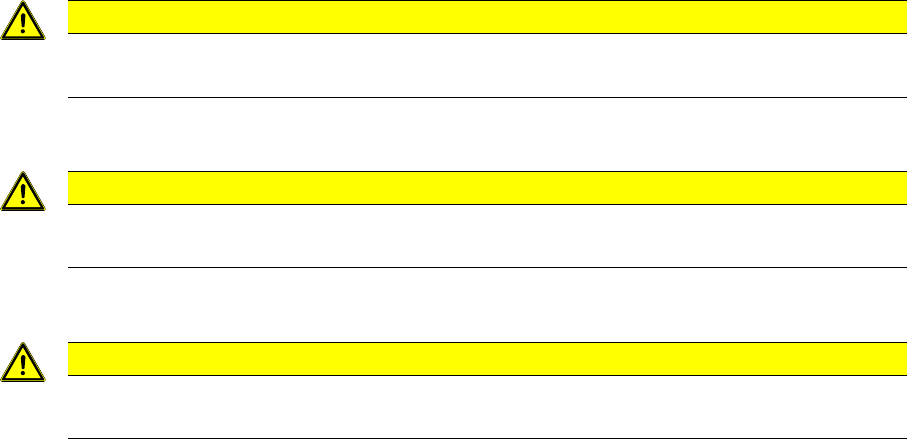
► Place the gauge at the stopper edge of the mount and
label the pneumatic hoses for the trailing cable. See
also "3.5.5.2.3 Preparing the Trailing Cable" [ ➙ 79].
CAUTION
Shortening and connecting the pneumatic hoses
► Label the order of pneumatic hoses as shown on the gauge (from 1 to 7 – inside to outside).
This is important to ensure that the hoses are then correctly connected again after cutting.
► Make sure that you use the correct gauge for your gantries and that you do not cut the pneu-
matic hoses too short.
► Cut the pneumatic hoses of the new trailing cable at
the marked points.
► The 7 hoses of the new trailing cable are connected
to one another. Carefully separate these from one
another, up to the mount.
► Connect the pneumatic hoses for the trailing cable
with the hose couplings (1). Observe the labeling (1-
7 from inside to outside).
► Reconnect the Y motor cooling tubes (3) to the con-
nection pieces.
► Reconnect the cooling tubes to the Y motor.
► If you have the "Vacuum pump" option, reconnect the
pneumatic hoses.
► Fasten new cable ties at the original points.
► Replace all dismantled cover plates in their original
positions.
Service Work
3.5.6 Replacing the Y Axis Buffer Gantries
Service Manual SIPLACE SX4/DX4 87
3.5.6
3.5.6 Replacing the Y Axis Buffer
Replacing the Y Axis Buffer
3.5.7
3.5.7 Replacing the X Scale
Replacing the X Scale
3.5.8
3.5.8 Replacing the Y Scale
Replacing the Y Scale
CAUTION
SIPLACE Service
This service work may only be performed by SIPLACE service technicians.
CAUTION
SIPLACE Service
This service work may only be performed by SIPLACE service technicians.
CAUTION
SIPLACE Service
This service work may only be performed by SIPLACE service technicians.
Service Work
Gantries 3.5.9 Replacing the Trailing Cable Interface
88 Service Manual SIPLACE SX4/DX4
3.5.9
3.5.9 Replacing the Trailing Cable Interface
Replacing the Trailing Cable Interface
Parts, Equipment and Tools
▪ Trailing cable interface gantry 2 and 4 assembly [03071356-xx] or
▪ Trailing cable interface gantry 1 and 3 assembly [03071355-xx]
Overview
Removal
► Switch off the machine, disconnect it from the power supply and secure it to prevent unauthorized
reactivation. Observe the instructions in section "1.2 Preparatory Work..." [ ➙ 12].
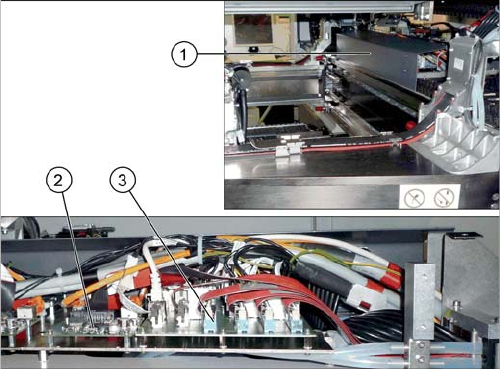
► Loosen the screws fastening the cover on the trailing cable interface and remove the cover.
► Unplug the electrical connections to the trailing cable interface. You may want to mark their positions,
to make clear assignment easier later on.
► Loosen the two screws fastening the trailing cable interface and remove the interface from the ma-
chine.
Installation
► Follow the removal instructions in reverse order for installation.
1. Cover on the trailing cable interface
2. Vision hotlink adapter
3. Trailing interface