SIPLACE-SX4-DX4-用户手册.pdf - 第35页
Service Work 3.1.3 Replacing the Cover Fan [03056479-xx] Basic Machine Service Manual SIPLACE SX4/DX4 35 3.1.3 3 . 1 . 3 R e p la c in g t h e C o v e r F a n [ 0 3 0 5 6 4 7 9 - x x ] Replacing the Cove r Fan [03056479-…
Service Work
Basic Machine 3.1.2 Replacing the Cover Switch [03055263-xx]
34 Service Manual SIPLACE SX4/DX4
3.1.2
3.1.2 Replacing the Cover Switch [03055263-xx]
Replacing the Cover Switch [03055263-xx]
Parts, equipment and tools
▪ Safety switch AZ 16-03zvrk-M16 3Oe [03055263-xx]
Overview
Removal
► Switch off the machine, disconnect it from the power supply and secure it to prevent unauthorized
reactivation. Observe the instructions in section "1.2 Preparatory Work..." [ ➙ 12].
► Unplug the connection cable from the cover switch.
► Loosen the screws fastening the cover switch and remove the cover switch.
Installation
► Follow the removal instructions in reverse order for installation. Also observe the following instruc-
tions:
See also
3.1.1 Replacing the Gas Pressure Shock Absorber on the Cover [03086743-xx] [ ➙ 31]
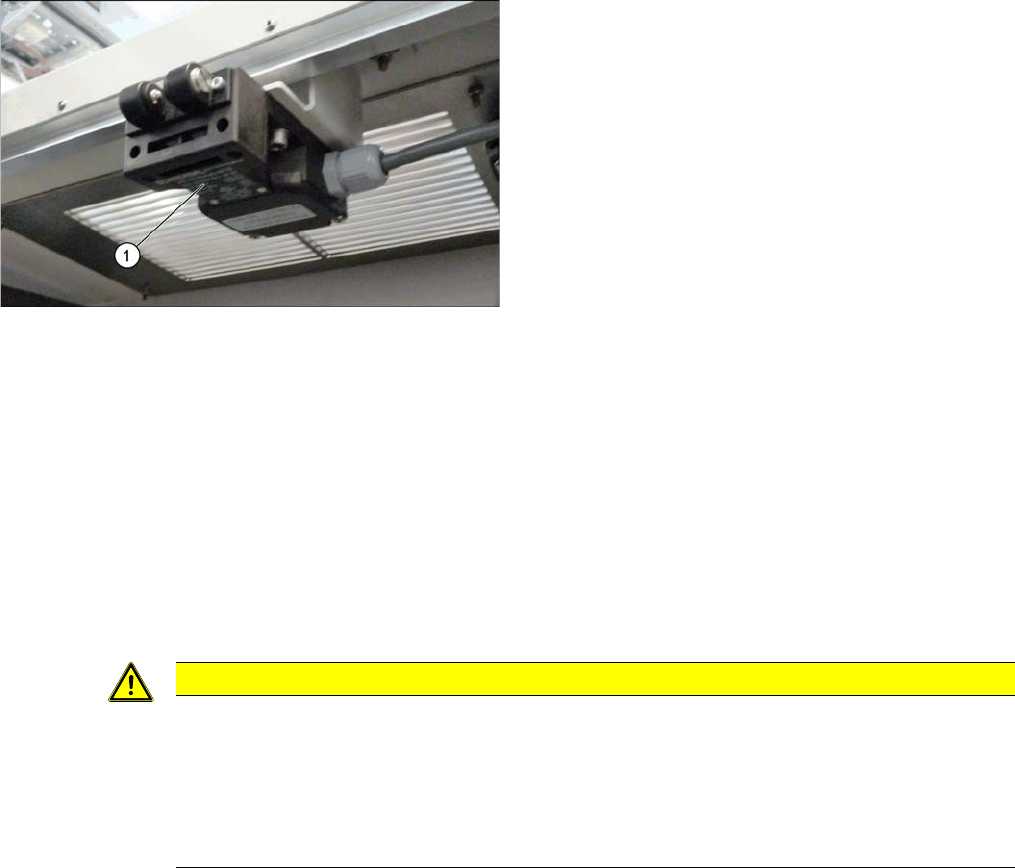
Cover switch (using example of SX1/SX2)
1. Cover switch
CAUTION
Installation instructions
► The cover switch must be set to the cover. Make sure that the cover switch is clean and
switches properly. The cover switch needs to be set so that even a minimal opening of the
cover will trigger the safety circuit.
► Switch the machine on and make sure that the cover switch activates the safety circuit,
when the protective covers are opened.
Service Work
3.1.3 Replacing the Cover Fan [03056479-xx] Basic Machine
Service Manual SIPLACE SX4/DX4 35
3.1.3
3.1.3 Replacing the Cover Fan [03056479-xx]
Replacing the Cover Fan [03056479-xx]
Parts, equipment and tools
▪ Axial fan type 4414 FNN [03056479-xx]
▪ Sealing varnish Loctite 241 [02101037-xx]
Overview
Removal
► Switch off the machine, disconnect it from the power supply and secure it to prevent unauthorized
reactivation. Observe the instructions in section "1.2 Preparatory Work..." [ ➙ 12].
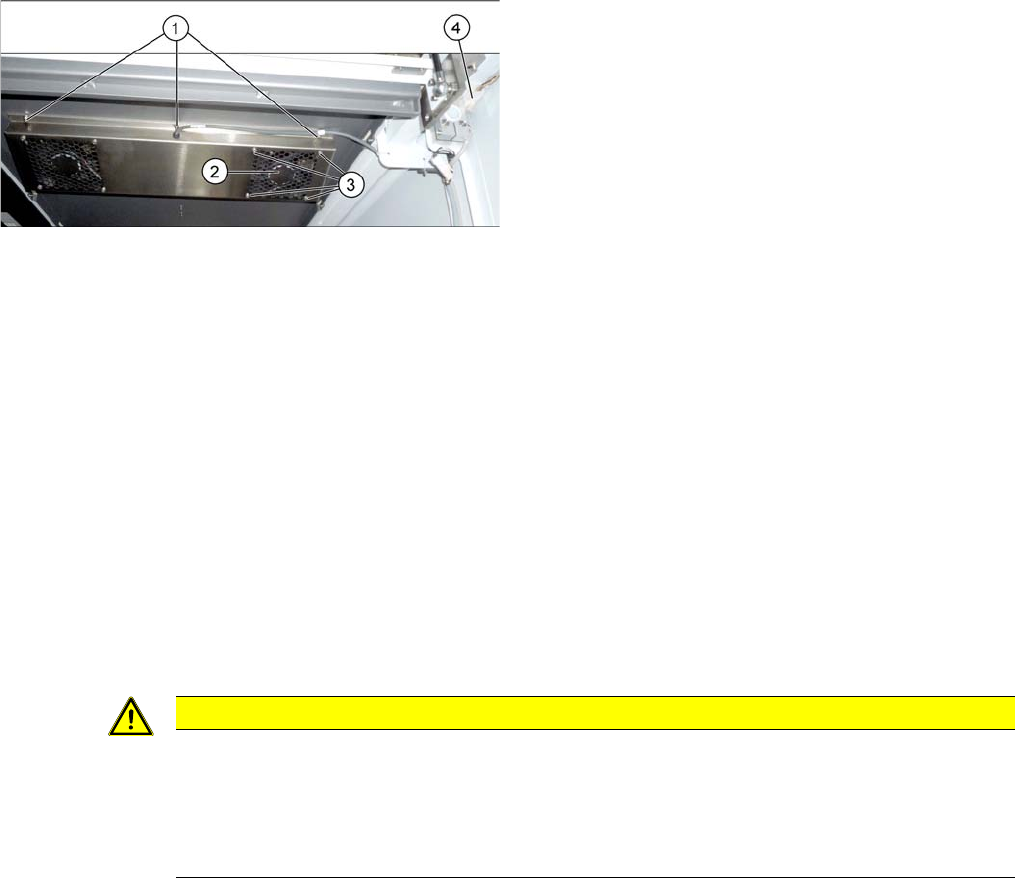
The fans are fastened to the cover plate, inside. First dismantle the cover plate:
► Loosen and unplug the connection cable (4).
► Loosen the 6 screws fastening the cover plate and remove the cover plate. Make sure that the wash-
ers and contact disks are not lost. You may want to mark their positions, to make clear assignment
easier later on.
► Loosen the four screws fastening the cover fan. Make sure that the washers are not lost.
► Unplug the cover fan connection cable and remove the cover fan from the machine.
Installation
► Follow the removal instructions in reverse order for installation. Also observe the following instruc-
tions:
1. Screws for fastening the cover plate
2. Cover fan
3. Fastening crews for cover fan
4. Connection cable for cover fan
CAUTION
Installation instructions
► When fitting the fan, note the correct direction of the air blown. If necessary, you can use
the adjacent fan as a guide. The direction of air blown is shown by an arrow on the side of
the fan housing.
► Secure the six screws fastening the cover plate with Loctite 241.

Service Work
Basic Machine 3.1.4 Guide Rollers on the Covers
36 Service Manual SIPLACE SX4/DX4
3.1.4
3.1.4 Guide Rollers on the Covers
Guide Rollers on the Covers
Parts, equipment and tools
▪ Per machine:
– 4x roller assembly - pack of 20 [03078561-xx]
– 4x DIN915-M8x16 - pack of 10 [00304354-xx]
or
4x DIN EN ISO4026-M8x16-A2-21H - pack of 10 [03025582-xx]
▪ Open-ended wrench, size 10
▪ Allen key
Procedure
► Open the two gantry changer doors and move the covers out of the guidance.
This makes the following work easier.
► Loosen the screwed fixture on the roller (fork wrench size 10). Unscrew as far as required.
► From the inside, screw on a setscrew as lock and tighten it.
Verification
► Check whether the cover can be easily moved along the whole area. Adjust the cover if necessary
(see "5.1.1 Setting the Machine Covers" [ ➙ 227]).
See also
1.2 Preparatory Work... [ ➙ 12]
NOTICE
Example
The following sections are described using the example of an SX1/SX2 machine. The proce-
dure is the same for other machines. Any relevant differences will be mentioned explicitly.
NOTICE
Covering
Between the roller and the guidance there must be at least 75% coverage.