00197395-03_AI_3D_Sensor-Koplan_X-Serie_S_DE_EN.pdf - 第114页
3 Installation 3.9 Installing the LAN card in the station computer (from Hxxxx) 114 Assembly Instructions / Montageanleitung SIPLACE X-Series S 3D-Sensor 06/2020 3.9 In s ta l li n g t he LA N c a rd in th e s t at i on …
3 Installation
3.8 Connecting the Cable to 3D Coplanarity Module
Assembly Instructions / Montageanleitung SIPLACE X-Series S 3D-Sensor 06/2020 113
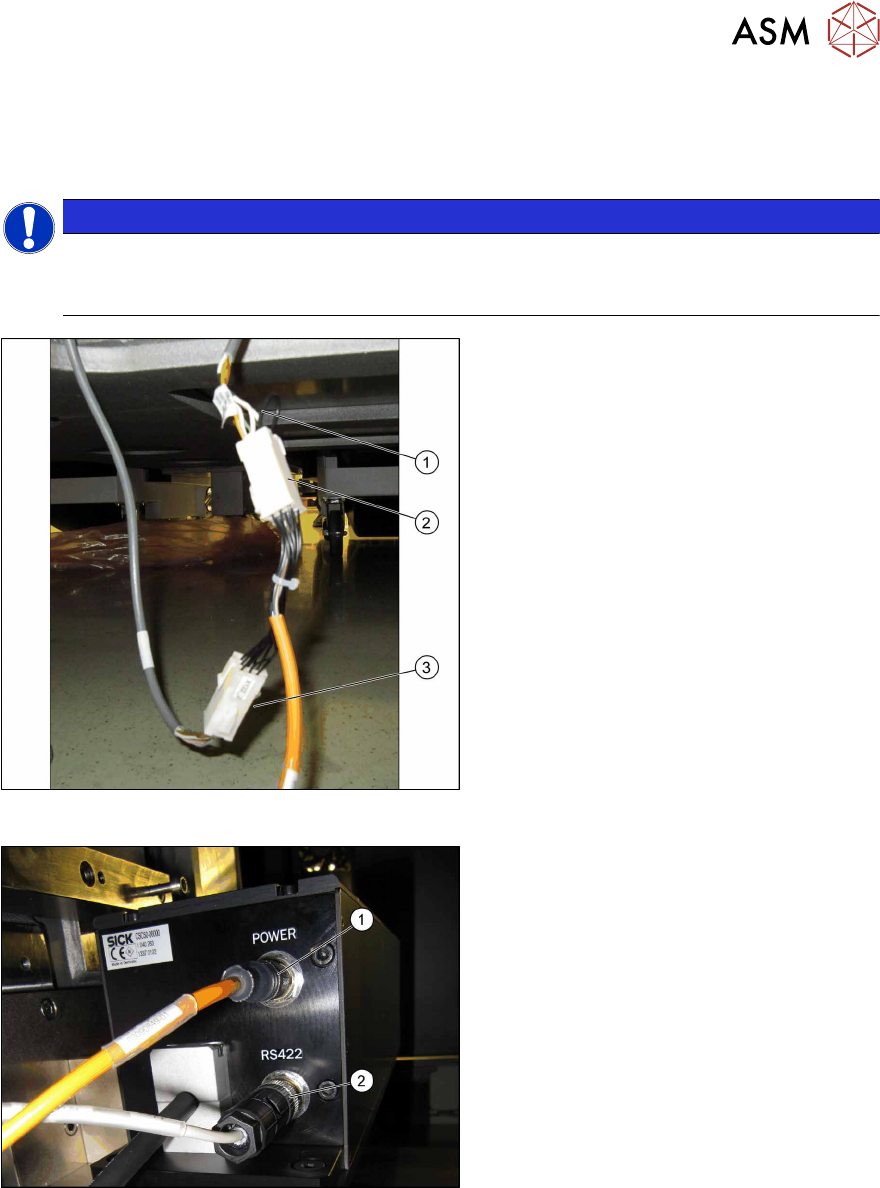
3.8 Connecting the Cable to 3D Coplanarity Module
► From the 3D Coplan module, pull the camera link cable through the machine frame to the in-
stallation location of the coplanarity computer at location1.
NOTICE
Maintenance
Run the cable over the power supply plate, so that this can be removed for maintenance
purposes.
Fig.34: Adapter
► Go to the COT insert and look for the
cable [03076491-xx](2)
marked x122.
► Unplug the connectors from the COT
insert(1)
and(3) and fit the adapter (2)
between the connectors.
Fig.35: Connecting the cables
► Run the orange cable from one open-
ing to the other and connect it to the 3D
coplanarity module(1).
► Connect the "Axis signals 3D sensor"
cable to the RS422 connector(2)
.
► At this stage, continue to install the sta-
tionary IC camera.
► Fit the used tape chute at location2.
See also
2 3.2 "Preparing the Installation of the IC Camera (Type 33)" [}99]
2 4.1.1 "Replacing the waste tape slide" [}137]
3 Installation
3.9 Installing the LAN card in the station computer (from Hxxxx)
114 Assembly Instructions / Montageanleitung SIPLACE X-Series S 3D-Sensor 06/2020
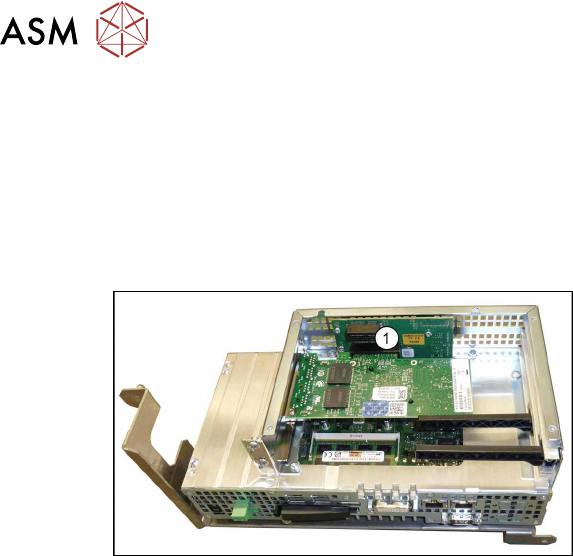
3.9 Installing the LAN card in the station computer (from Hxxxx)
If a 3D Coplan or a barcode scanner is installed, the "LAN card PCI Express 2x Gigabit
LAN" [03118416-xx] is needed in addition.
This LAN card is fitted in the "BoxPC 427D" [03114177‑xx] from serial no. Hxxxx. Older machines
do not require this LAN card.
Overview
Fig.36: Station computer (BoxPC 427D)
1. Free slot for the LAN card
Installation
► Open the covers above the plug-in cards.
► Insert the LAN card into the free slot. Make sure that it fits correctly.
► Refit the cover.
3 Installation
3.10 Fitting the station computer (from Hxxxx)
Assembly Instructions / Montageanleitung SIPLACE X-Series S 3D-Sensor 06/2020 115
3.10 Fitting the station computer (from Hxxxx)
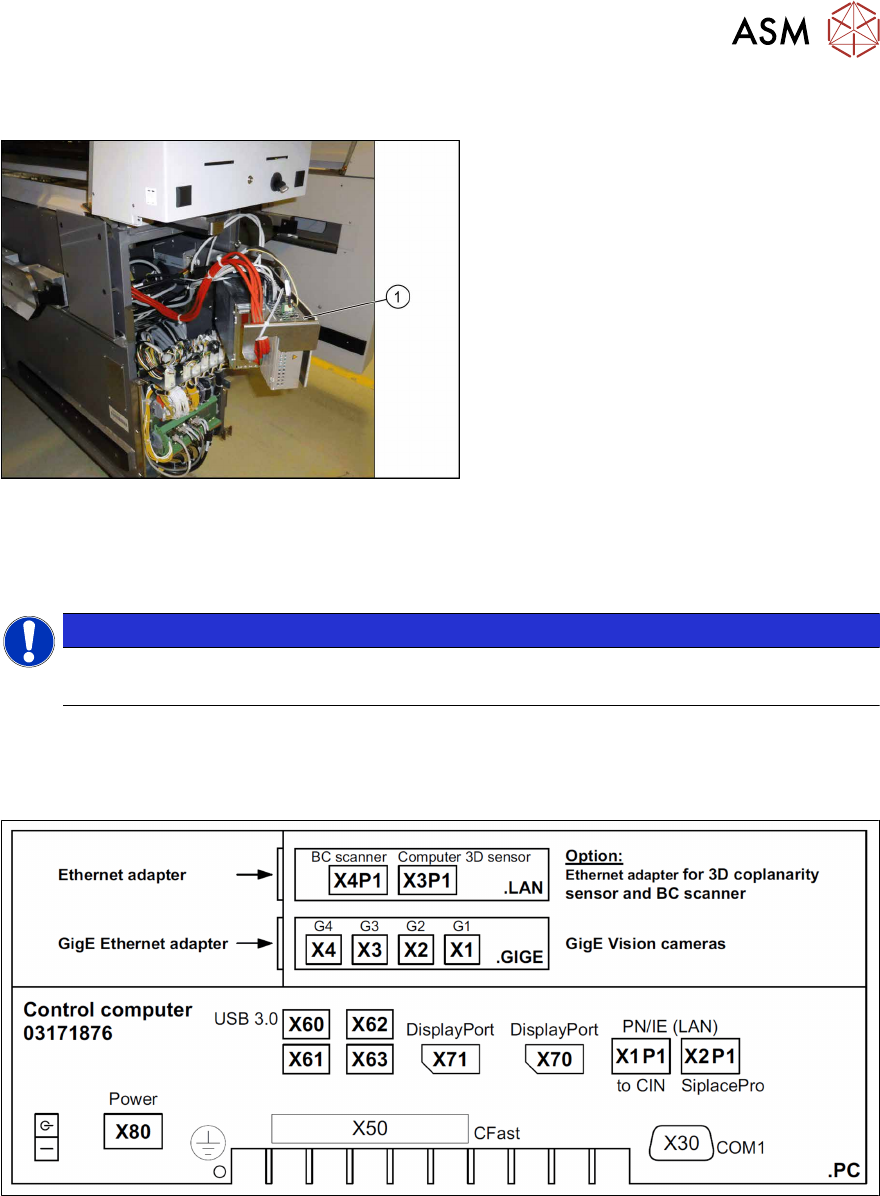
Fig.37: BoxPC
► Reinsert the BoxPC(1) and fix it into
place.
Connecting the cables to the station computer
► Reestablish all connections to the BoxPC.
NOTICE
Monitor
Do not plug in the monitor cable yet.
► Connect the LAN cable from the coplanarity computer with the connection X4 (X4P1) for the
"LAN card PCI-Express 2x Gigabit-LAN" [03118416‑xx].
Overview of connections for BoxPC 427D
Fig.38: BoxPC 427D connections