00197395-03_AI_3D_Sensor-Koplan_X-Serie_S_DE_EN.pdf - 第127页
3 Installation 3.17 Commissioning with SW 70x Assembly Instructions / Montageanleitung SIPLACE X-Series S 3D-Sensor 06/2020 127 3.17.2 Calibrating the Stationary Camera SST33 Fig.67: Calibration tool ► Place the calibra…
3 Installation
3.17 Commissioning with SW 70x
126 Assembly Instructions / Montageanleitung SIPLACE X-Series S 3D-Sensor 06/2020
3.17 Commissioning with SW 70x
3.17.1 Adapting the Configuration
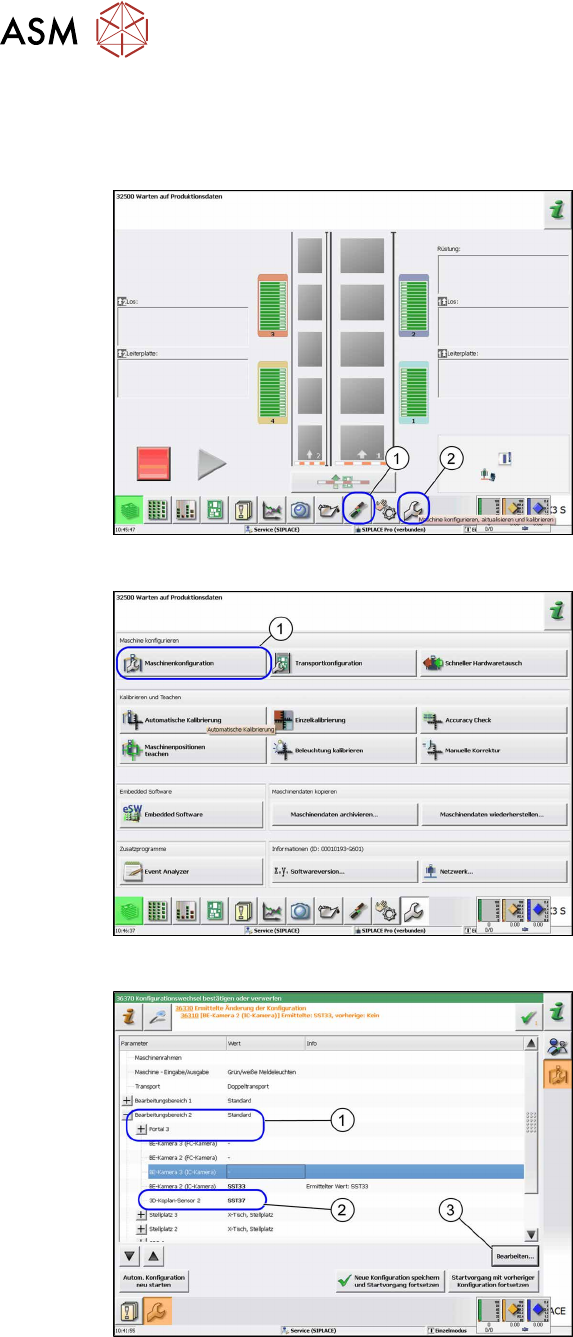
Fig.64: Start screen
► Switch on the machine.
► Reboot the station computer.
► Click on the Settings and Options (1)
icon.
► Log in as Service.
► Click on the Configure, update and
calibrate the machine (2) icon.
ð The Configure, update and cali-
brate the machine view will be
shown.
Fig.65: Machine configuration
► Go to Configure machine and click on
Machine Configuration
(1).
ð The Machine Configuration view
will be shown.
Fig.66: Example of SIPLACE X2 S, X3 S
► Switch over to the processing area 2
(1).
► Switch over to 3D coplanarity sensor
2.
► Click on the Edit (3) button or click in
the (2)
field to open a list.
► Click SST37 (2) in the list.
► Click on the Save changes and re-
start machine button.
3 Installation
3.17 Commissioning with SW 70x
Assembly Instructions / Montageanleitung SIPLACE X-Series S 3D-Sensor 06/2020 127
3.17.2 Calibrating the Stationary Camera SST33
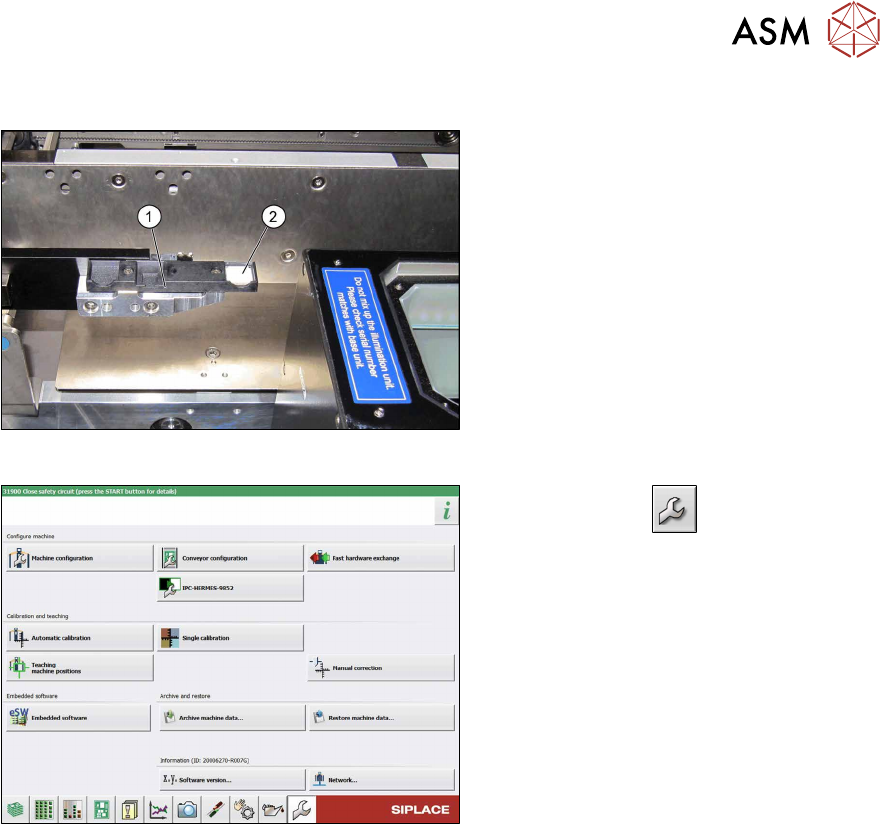
Fig.67: Calibration tool
► Place the calibration tool (2) into the
calibration tool repository (1)
.
Fig.68: Service menu
► Use the button to switch to the
Service menu.
► Click the Automatic calibration but-
ton.
3 Installation
3.17 Commissioning with SW 70x
128 Assembly Instructions / Montageanleitung SIPLACE X-Series S 3D-Sensor 06/2020
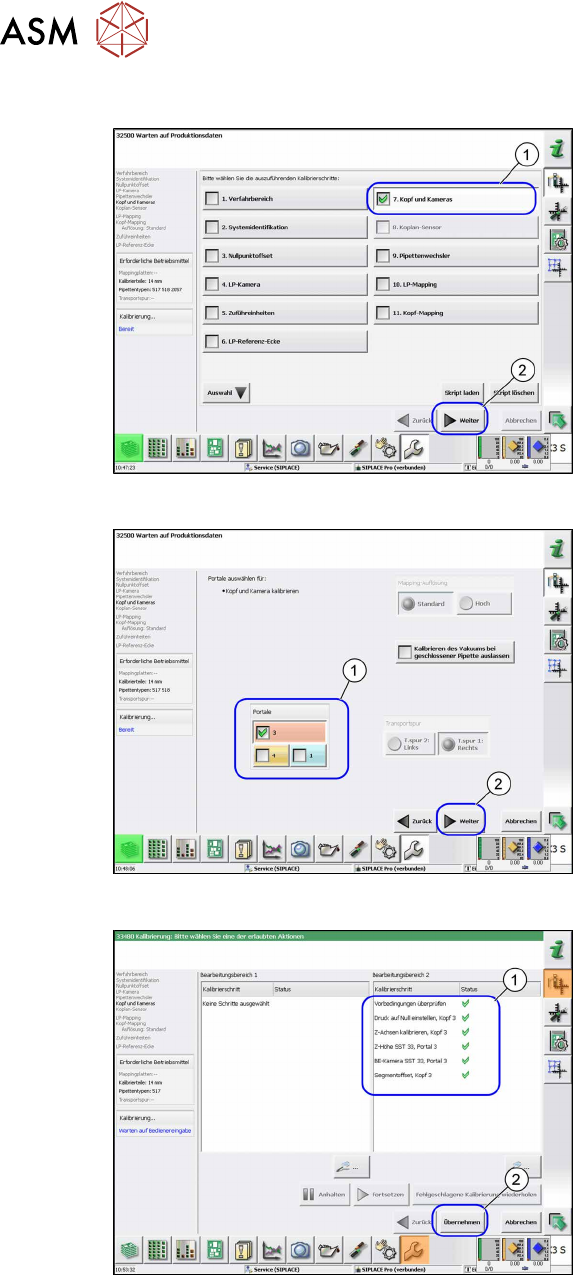
Up to SW 711.x
Fig.69: Head and Cameras
► Select the Head and cameras(1) but-
ton.
► Select the Next(2) button.
ð The Head and Cameras view will
be shown.
Fig.70: Gantry selection
► Select the relevant gantry (1).
► Select the Next(2) button.
ð The calibration will be started.
Fig.71: Calibration values
► Select the Accept(2) button, to accept
the calibration values shown(1)
.