00197395-03_AI_3D_Sensor-Koplan_X-Serie_S_DE_EN.pdf - 第126页
3 Installation 3.17 Commissioning with SW 70x 126 Assembly Instructions / Montageanleitung SIPLACE X-Series S 3D-Sensor 06/2020 3.17 Commissioning with SW 70x 3.17.1 Adapting the Configuration Fig.64: Start screen ► Swi…
3 Installation
3.15 Reconnecting the Station Computer
Assembly Instructions / Montageanleitung SIPLACE X-Series S 3D-Sensor 06/2020 125
3.15 Reconnecting the Station Computer
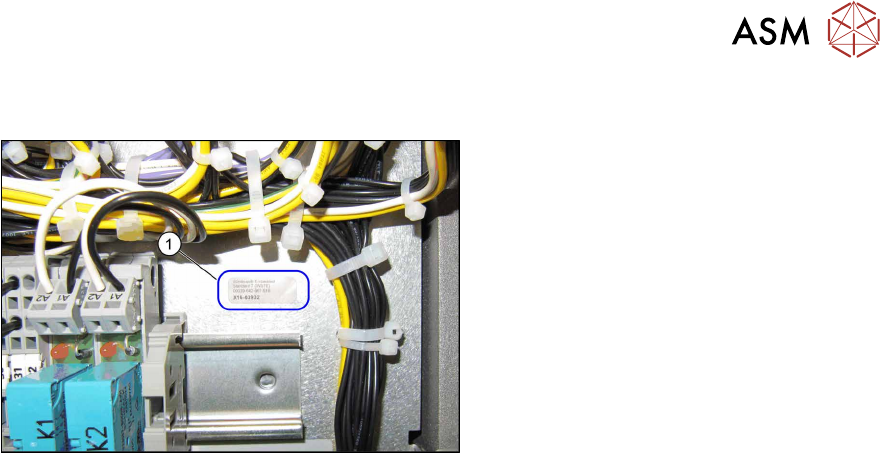
Fig.63: Win7 adhesive label
► Reconnect the monitor and keyboard to
the station computer.
► Wire the machine according to the ori-
ginal configuration.
► Switch the station computer on again.
► Stick the Win7 label (1) supplied onto
the supply unit, so that it is easily seen,
next to or under the coplanarity com-
puter label.
3.16 Configuring the LAN card in the station computer (from
Hxxxx)
► Switch on the machine.
On the station computer, configure the IP settings for the LAN card as follows:
► Log on as administrator.
► Connect the LAN cable of the coplanarity computer [03103204‑xx] to X3 (see overview of con-
nections3.10
"Fitting the station computer (from Hxxxx)" [}115]).
ð In the Control Panel → Network and Internet → Network Connections menu, you now
find two new network connections (Local Area Connection).
ð The connection that is not connected is indicated by a red cross.
► The connection that is connected does not have a red cross. Rename this connection into
"Connection to machine LAN".
► Configure the IP address 192.168.255.249 and the subnet mask 255.255.255.240 for this
connection.
3 Installation
3.17 Commissioning with SW 70x
126 Assembly Instructions / Montageanleitung SIPLACE X-Series S 3D-Sensor 06/2020
3.17 Commissioning with SW 70x
3.17.1 Adapting the Configuration
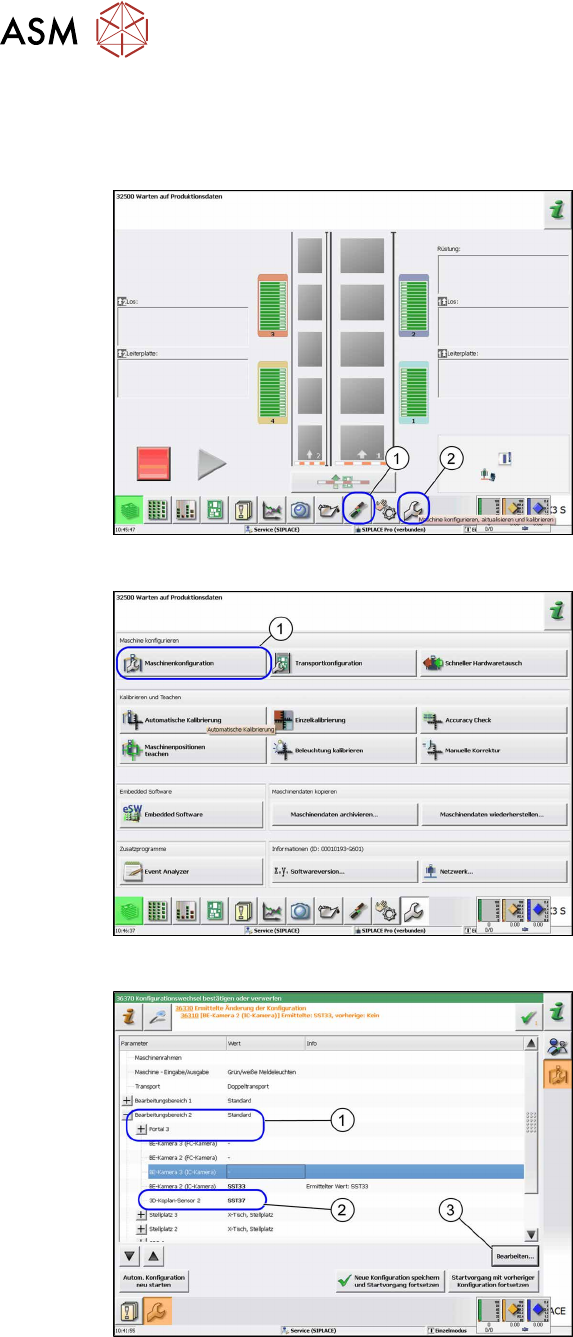
Fig.64: Start screen
► Switch on the machine.
► Reboot the station computer.
► Click on the Settings and Options (1)
icon.
► Log in as Service.
► Click on the Configure, update and
calibrate the machine (2) icon.
ð The Configure, update and cali-
brate the machine view will be
shown.
Fig.65: Machine configuration
► Go to Configure machine and click on
Machine Configuration
(1).
ð The Machine Configuration view
will be shown.
Fig.66: Example of SIPLACE X2 S, X3 S
► Switch over to the processing area 2
(1).
► Switch over to 3D coplanarity sensor
2.
► Click on the Edit (3) button or click in
the (2)
field to open a list.
► Click SST37 (2) in the list.
► Click on the Save changes and re-
start machine button.
3 Installation
3.17 Commissioning with SW 70x
Assembly Instructions / Montageanleitung SIPLACE X-Series S 3D-Sensor 06/2020 127
3.17.2 Calibrating the Stationary Camera SST33
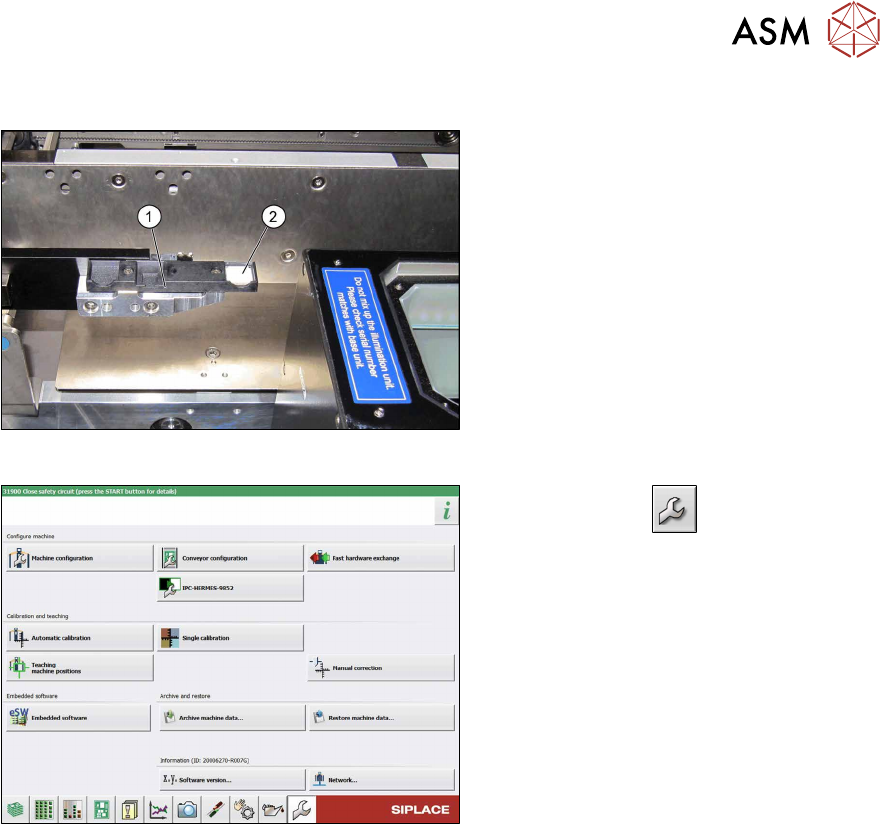
Fig.67: Calibration tool
► Place the calibration tool (2) into the
calibration tool repository (1)
.
Fig.68: Service menu
► Use the button to switch to the
Service menu.
► Click the Automatic calibration but-
ton.