00197395-03_AI_3D_Sensor-Koplan_X-Serie_S_DE_EN.pdf - 第153页
4 Appendix 4.4 Circuit Diagrams Assembly Instructions / Montageanleitung SIPLACE X-Series S 3D-Sensor 06/2020 153 4.4 Circuit Diagrams 4.4.1 Circuit diagrams (up to Gxxxx) Fig.119: BoxPC 627C and GCU2
4 Appendix
4.3 Excerpt from the assembly instructions "SIPLACE X-Series S - stationary camera type
25/33" [00197397‑xx]
152 Assembly Instructions / Montageanleitung SIPLACE X-Series S 3D-Sensor 06/2020
IC Camera Type 33: Fixing the Camera Module
Fig.117: Markings for different installation heights (1)
► Hook the camera on its screws onto the
spacer plates.
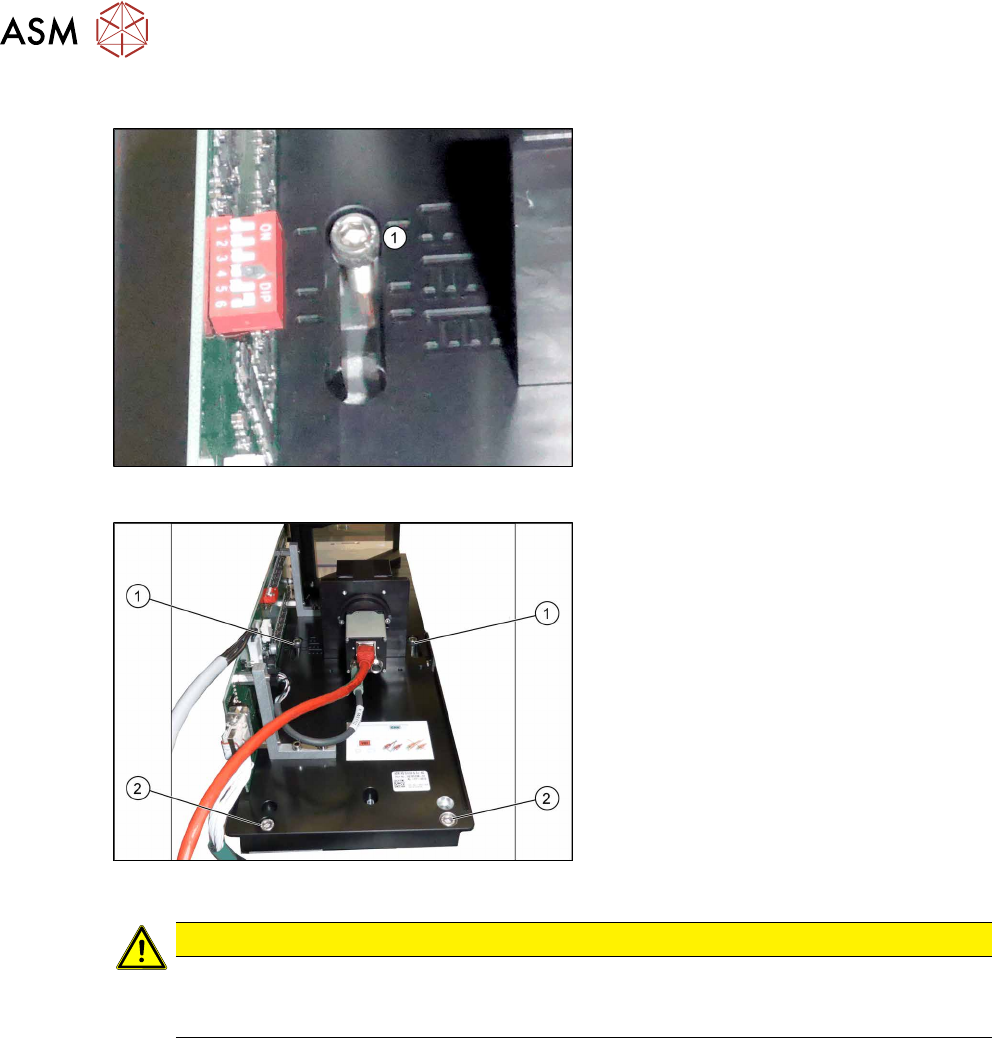
Fig.118: Lower section of camera
► Hook the upper holes (1) on the lower
section of the camera onto these two
screws. (Key hole principle for cameras
of type 33 from version 06.)
► Use the two lower screws (2) to adjust
the lower section of the camera to the
correct installation height at position I
(1)
and tighten all four screws.
CAUTION
Observe the installation height
When fitting the camera, observe the correct installation height. Otherwise there is the
danger of a crash!
Locations 2 and 3
► If you do not have to install an FC camera at the same location, continue by attaching the
camera cables (see section Electrical connections).
► If you need to install an FC camera at the same location, continue with section Fitting the FC
Camera of Type 25 - Location 2 and 3
Locations 1 and 4
► Continue by attaching the camera cables (see section Electrical connections).

4 Appendix
4.4 Circuit Diagrams
Assembly Instructions / Montageanleitung SIPLACE X-Series S 3D-Sensor 06/2020 153
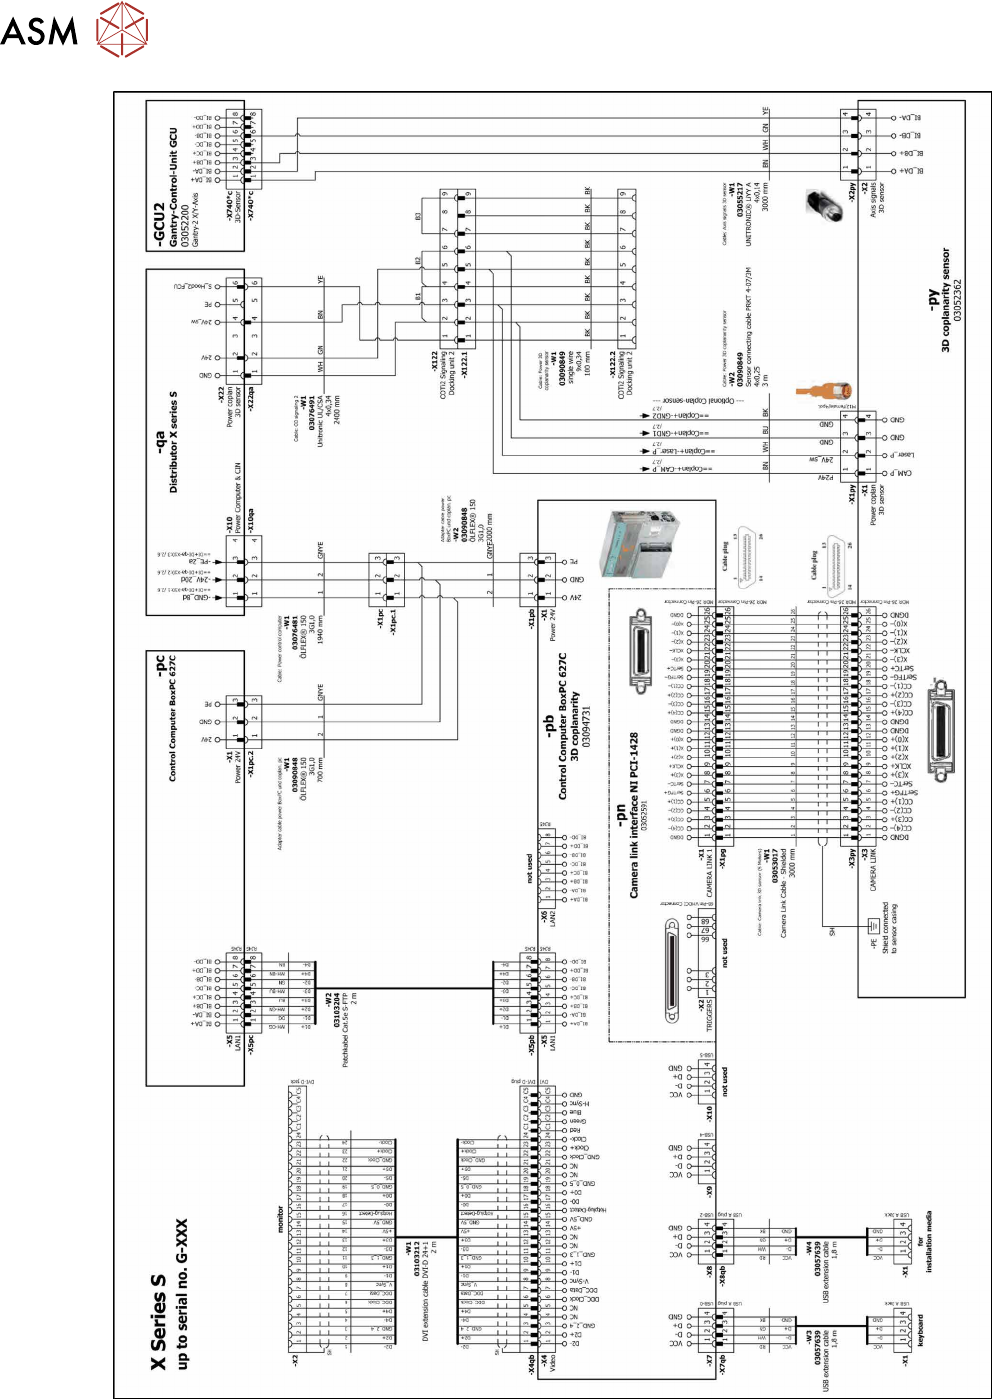
4.4 Circuit Diagrams
4.4.1 Circuit diagrams (up to Gxxxx)
Fig.119: BoxPC 627C and GCU2
4 Appendix
4.4 Circuit Diagrams
154 Assembly Instructions / Montageanleitung SIPLACE X-Series S 3D-Sensor 06/2020
Fig.120: BoxPC 627C and GCU2