CP7 Series Level3 Tutorial Manual.pdf - 第120页
7.1.1 Mark Camera Removal Procedure: 1 . With the machine powered OFF, remove the mark camera by disconnecting the video cable from the power supply unit (refer to the figure below). 2. Remove the four (4) CCD module mou…
Affected Calibration data: Mark Read Position X → MC0MPX
Mark Read Position Y → MC0MPY
Mark Camera Pixel Size X → MC0MCPX
Mark Camera Pixel Size Y → MC0MCPY
Mark Camera Rotation → MC0MCR
Caution
Ensure that a back-up of calibration data is taken prior to adjusting the
camera.
CN003
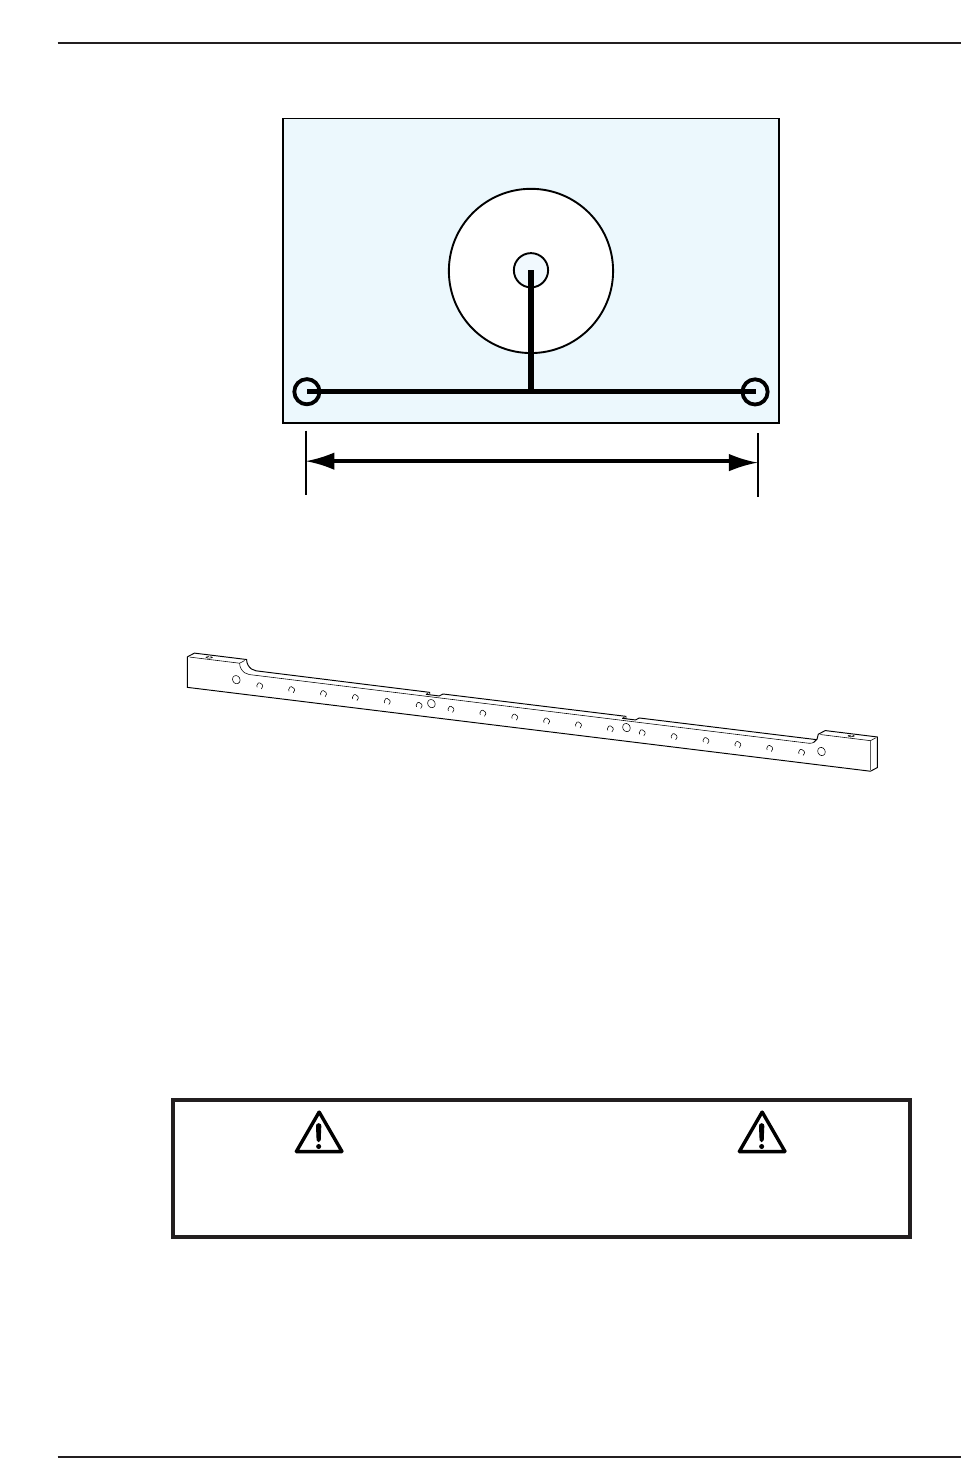
Pin holder jig (Z9426DCPJ4451)
jig plate AJPJ0062
100 mm
XR - 49.998
XL - 50.000
Y - 50.001
CP7T37002
CP-732E Only
Chapter 7 7.1 The Mark Camera
Edition 2.0 7-2 CP-7-series Level 3 Tutorial

7.1.1 Mark Camera Removal
Procedure:
1. With the machine powered OFF, remove the mark camera by
disconnecting the video cable from the power supply unit (refer to the
figure below).
2. Remove the four (4) CCD module mounting bolts and physically remove
the camera CCD module from the machine (refer to the figure below).
Note: In the case of the CP-742E(ME), it is also necesary to remove the 3 bolts holding the
aluminium plate over the CCD Module mounting bolts.
3. Unscrew the aluminum housing to gain access to the lens unit.
Note: The lens unit and CCD camera have been pre-assembled. Therefore, it is not necessary to
adjust the half mirror.
CCD Module
Mounting Bolts
CP7T37004
CP7T37003
Chapter 7 7.1 The Mark Camera
Edition 2.0 7-3 CP-7-series Level 3 Tutorial

7.1.2 Mark Camera Installation
Procedure:
1. Use a small amount of glue (Loctite 425) when reattaching the aluminum
housing to the camera unit, and tighten using a torque wrench (torque:
4–5 Nm).
2. Reattach the camera unit with the four (4) module mounting bolts and
reconnect the video cable to the power supply.
Chapter 7 7.1 The Mark Camera
Edition 2.0 7-4 CP-7-series Level 3 Tutorial