EUKYX-199-2100_G5S2_Instruction_Vol2_E.pdf - 第234页
EUKYX 5-10 199-2100 6.2 "RECOG IMAGE" Confirmation Window [ 1 ] Di splayed Image Operation Button Us ing the fol lowi ng buttons, the mode is cha nged to perform the enla rgement or movemen t operation of the i …
EUKYX
5-9199-2100
6.2 "RECOG IMAGE" Confirmation Window
6.2 "RECOG IMAGE" Confirmation Window
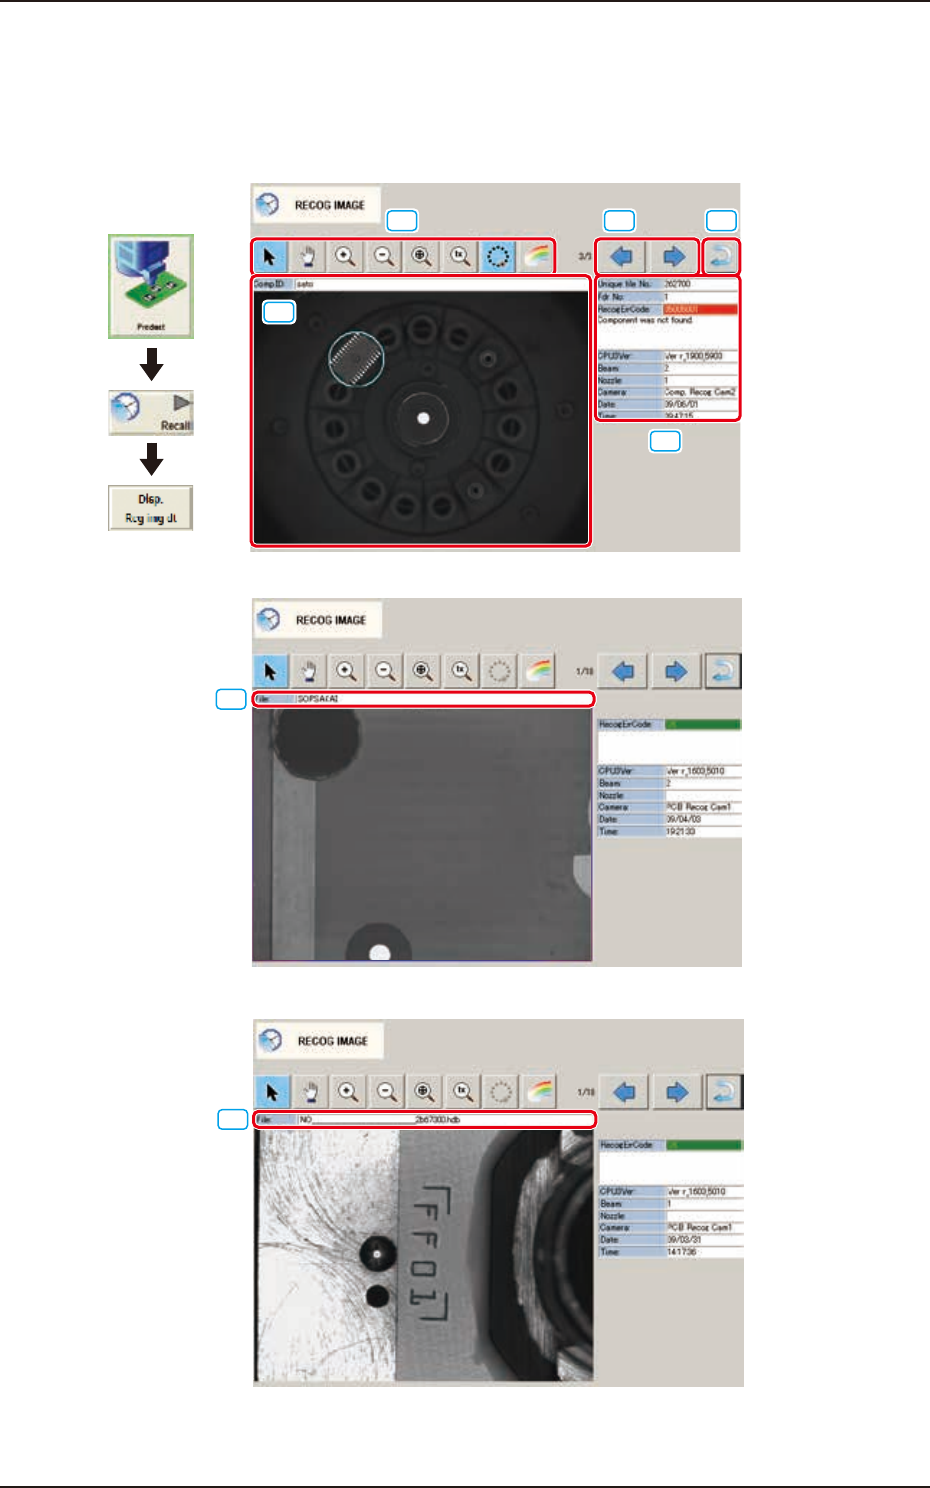
When the recognized image displayed in the "RECOG IMAGE" window is selected, the following
window appears.
[1]
[2]
[3] [4]
[5]
[2]
[6]
[6]
[6]
[7]
■ Component recognition
■ PCB recognition
■ Nozzle ID recognition
Graphic
Development
F2E10
EUKYX
5-10199-2100
6.2 "RECOG IMAGE" Confirmation Window
[1] Displayed Image Operation Button
Using the following buttons, the mode is changed to perform the enlargement or movement
operation of the image displayed in the Recognized Image Display Area [2].
[
] Button: Normal Operation Mode
[
] button: Image Enlargement Mode
After changing to the image enlargement mode using the [
] button (the shape of the pointer is
changed to
), when the image to be enlarged is touched, or the left button of the mouse is
clicked on the image, the image is enlarged from the pointer position as the center. When the image
is to be enlarged with its position fixed, place the pointer on the center of the image before the
enlargement operation.
[
] Button: Image Reduction Mode
After changing to the image reduction mode using the
[
] button (the shape of the pointer is changed to ) when the image to be reduced is
touched, or the left button of the mouse is clicked on the image, the image is reduced from the
pointer position as the center. When the image is to be reduced with its position fixed, place the
pointer on the center of the image before the reduction operation.
[
] Button: Image Movement Mode
After changing to the image movement mode using the [
] button (the shape of the pointer is
changed to
mark), drag the desired image (with the left button on the mouse pressed).
[
] Button: Image Real-Size Display Mode (Captured image is displayed in real-size.)
After changing to the image real-size display mode using the [
] button (the shape of the pointer
is changed to
), when the image to be displayed in real-size is touched, or the left button of the
mouse is clicked on the image, the image is displayed in real-size from the pointer position as the
center. When the image is to be displayed in real-size with its position fixed, place the pointer on
the center of the image before the image real-size display operation.
[
] Button: Image Fitting Mode (the image is displayed fully using the recognition image
display domain).
After changing to the image fitting mode using the [
] button (the shape of the pointer is
changed to
), when the image to be fit is touched, or the left button of the mouse is clicked on
the image, the image is displayed fully using the recognition image display domain, from the pointer
position as the center. When the image is to be displayed in the image fitting mode with its position
fixed, place the pointer on the center of the image before the image fitting operation.
EUKYX
5-11199-2100
6.2 "RECOG IMAGE" Confirmation Window
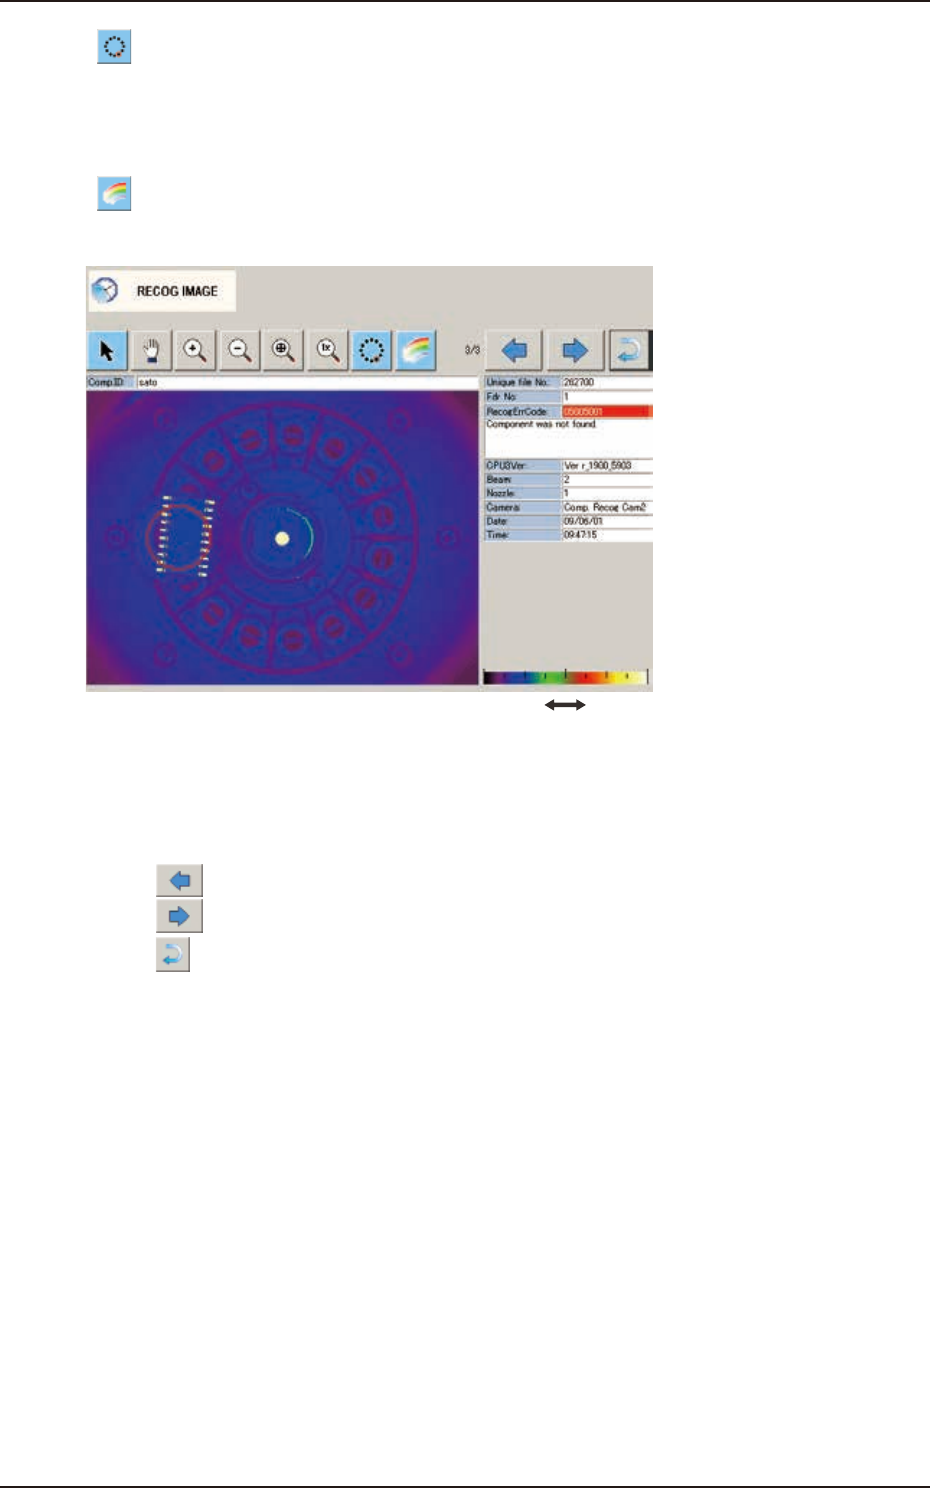
[
] Button
The currently selected component is displayed.
Blue Circle : It shows that the component is recognized normally.
Red Circle : It shows that there is an error in the component recognition.
[
] Button
Using this button, the black and white recognized image is changed to color display for easy to see.
Dark Bright
F2E13
[2] Recognized Image Display Pane
In this pane, the recognized image is displayed.
[3] Recognized Image Change Button
[
] Button : When pressed, the preceding component is displayed.
[
] Button : When pressed, the next component is displayed.
[4] [
] Button
When pressed, the window returns to the "RECOG IMAGE" window.
[5] Recognized Image Details
The details of the recognized image are displayed.