EUKYX-199-2100_G5S2_Instruction_Vol2_E.pdf - 第274页
EUKYX 6-37 199-2100 7.2 "Place Pos T each" Window (6) When new pla cement p osition is to be registered for mally , press th e [Save /End] but ton. (T he "Confirmation to S aving " window will appe ar…
EUKYX
6-36199-2100
7.2 "Place Pos Teach" Window
►
Manual (Manual Axis Operation) Teaching
(1) Move to the teaching step with the following 3 procedures.
• [Cycle run] button
Press the [START] button on the operation panel within 10 seconds after pressing the [Cycle run]
button to start the automatic movement.
After the X/Y beam has moved to the object step for the teaching operation, stop the beam with the
[STOP] button on the operation panel.
• [Back Step] button, [Select Step] button, or [Next Step] button
Press the [START] button on the operation panel within 10 seconds after pressing the [Back Step]
button, [Select Step] button, or [Next Step] button. Repeat this until the X/Y beam moves to the
object step for the teaching operation.
• Selecting teaching step manually
Use the vertical scroll bar in the "Step Data" pane or select the object step for the teaching
operation with the [Dsig Step] button.
(2) Press the START button on the operation panel in 10 seconds after the [TEACH] button.
(3) Using the graphic image move buttons, match the component outer shape shown in the
recognition area with the PCB pattern captured in the recognition memory image, and
when the position is decided, press the [OK] button to determine the position.
(4) Press the [Return] button to display the “Place Pos Teach“ window. Check the new teach
result (X and Y) in “Teac Res“ cells.
(New placement position is registered temporarily and written in the file.)
(a) The Temp Entry function of the new placement position saves the temporary file for the
data for operation and pattern program file, but does not overwrite the data on the
original file.
(b) The temporarily entered step data can be cancelled. When it is to be cancelled, select
the step to be cancelled and press the [Cncl Dt] button.
(c) The temporarily entered step data is indicated with a “pale blue” background.
(d) The temporarily entered data is immediately reflected on the Auto Move and Step Move
operations.
(e) While the new placement position is being registered temporarily, it becomes impossible
to edit the current pattern program data.
(f) When all data items are to be cancelled, refer to (6).
Procedure
Note
EUKYX
6-37199-2100
7.2 "Place Pos Teach" Window
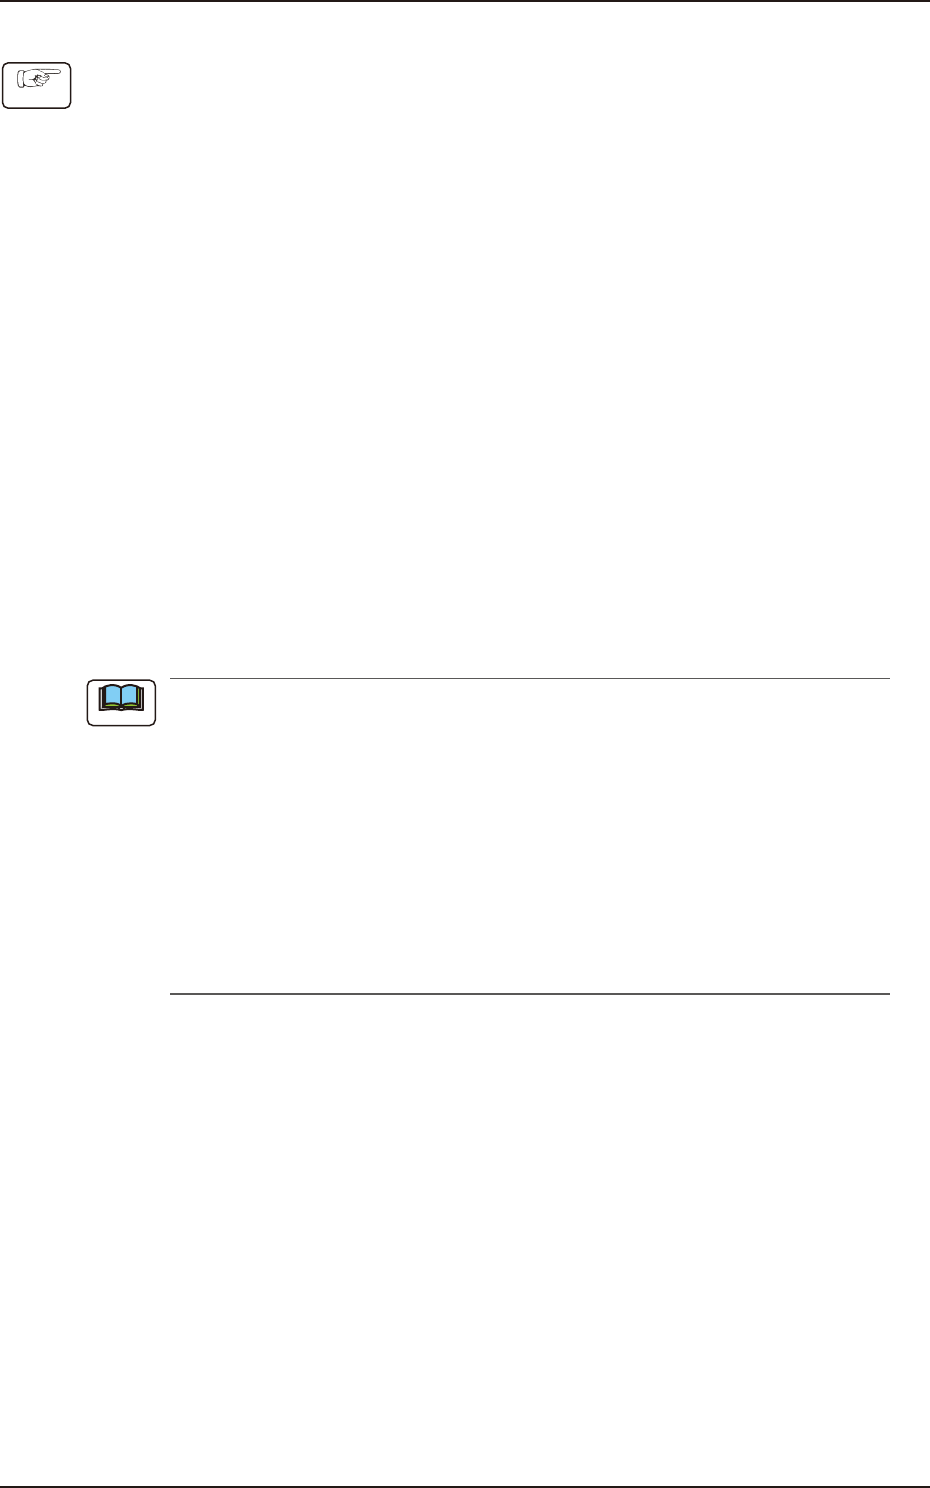
(6) When new placement position is to be registered formally, press the [Save/End] button. (The
"Confirmation to Saving" window will appear ("If a data has no temporal registration, the
teaching result cannot be saved").)
F2F41
To replace the current pattern program data with the new one ("Save" Command)
When the [Yes] button is pressed on the "Confirmation to Saving" window, the "Confirmation
to Saving" message is displayed ("Overwrite data. Is it OK?")
F2F42
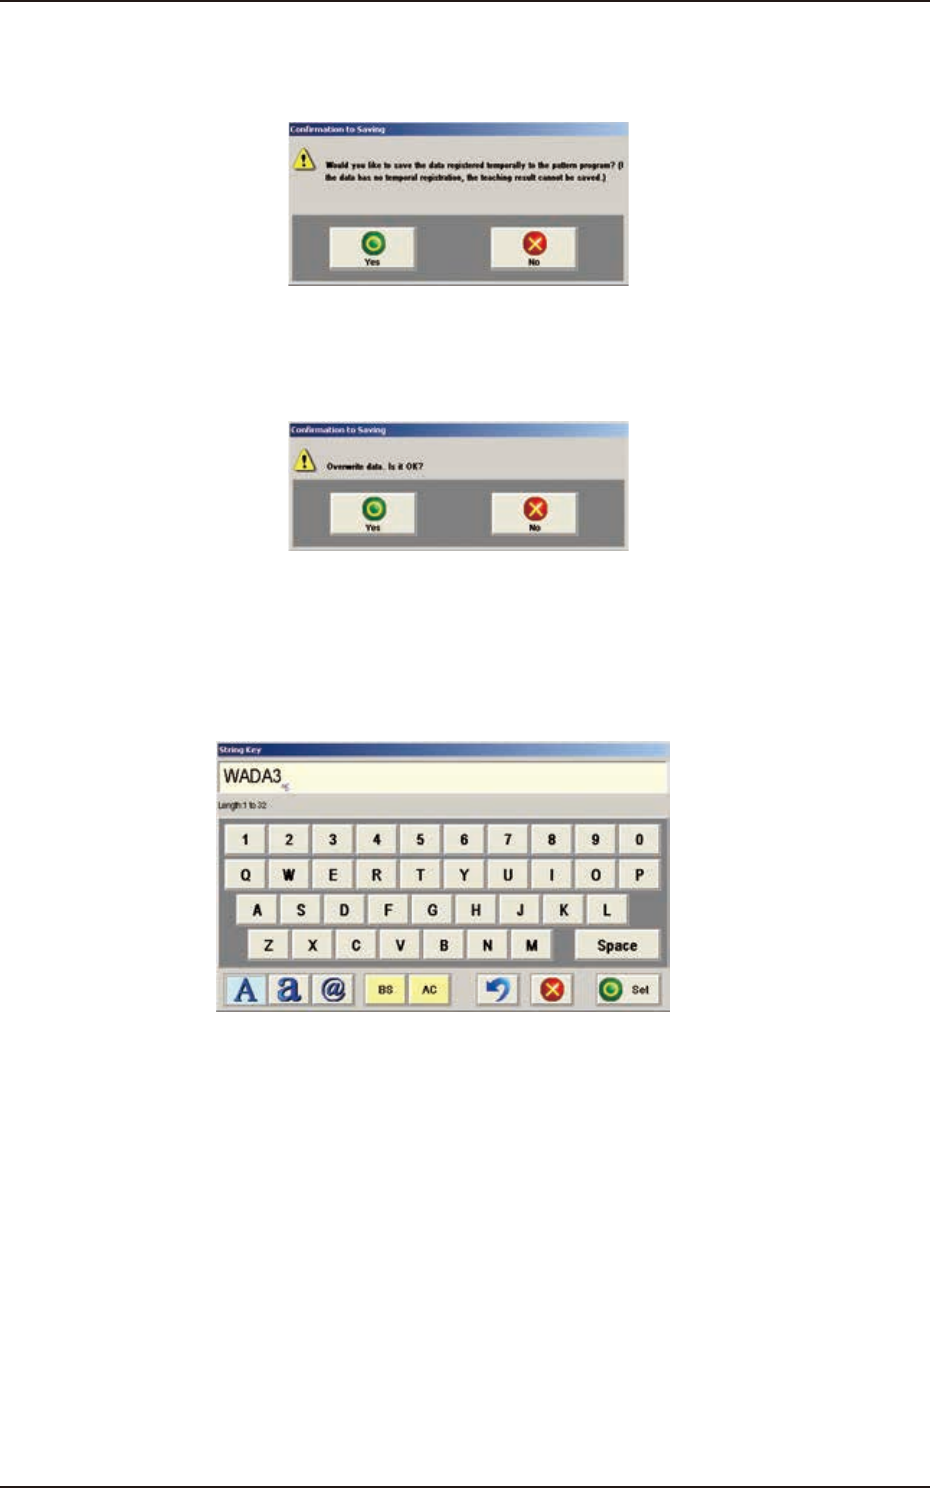
Maintaining the Current Pattern Program Data (Save As)
When the [No] button is pressed on the "Confirmation to Saving" message window ("Overwrite
it. Is it OK?"), the "String key" window appears. Enter new file name and press the [Set]
button. The temporarily entered pattern program will be saved with the newly entered file
name.
F2F43
Deleting the Teach Data (All Teach Data Delete)
Press the [No] button on the "Confirmation to Saving" window ("Would you like to save the
data registered temporarily to the pattern program?
(If the data has not temporal registration, the teaching result cannot be saved)").
EUKYX
6-38199-2100
7.3 "COMP RCG" Test Window
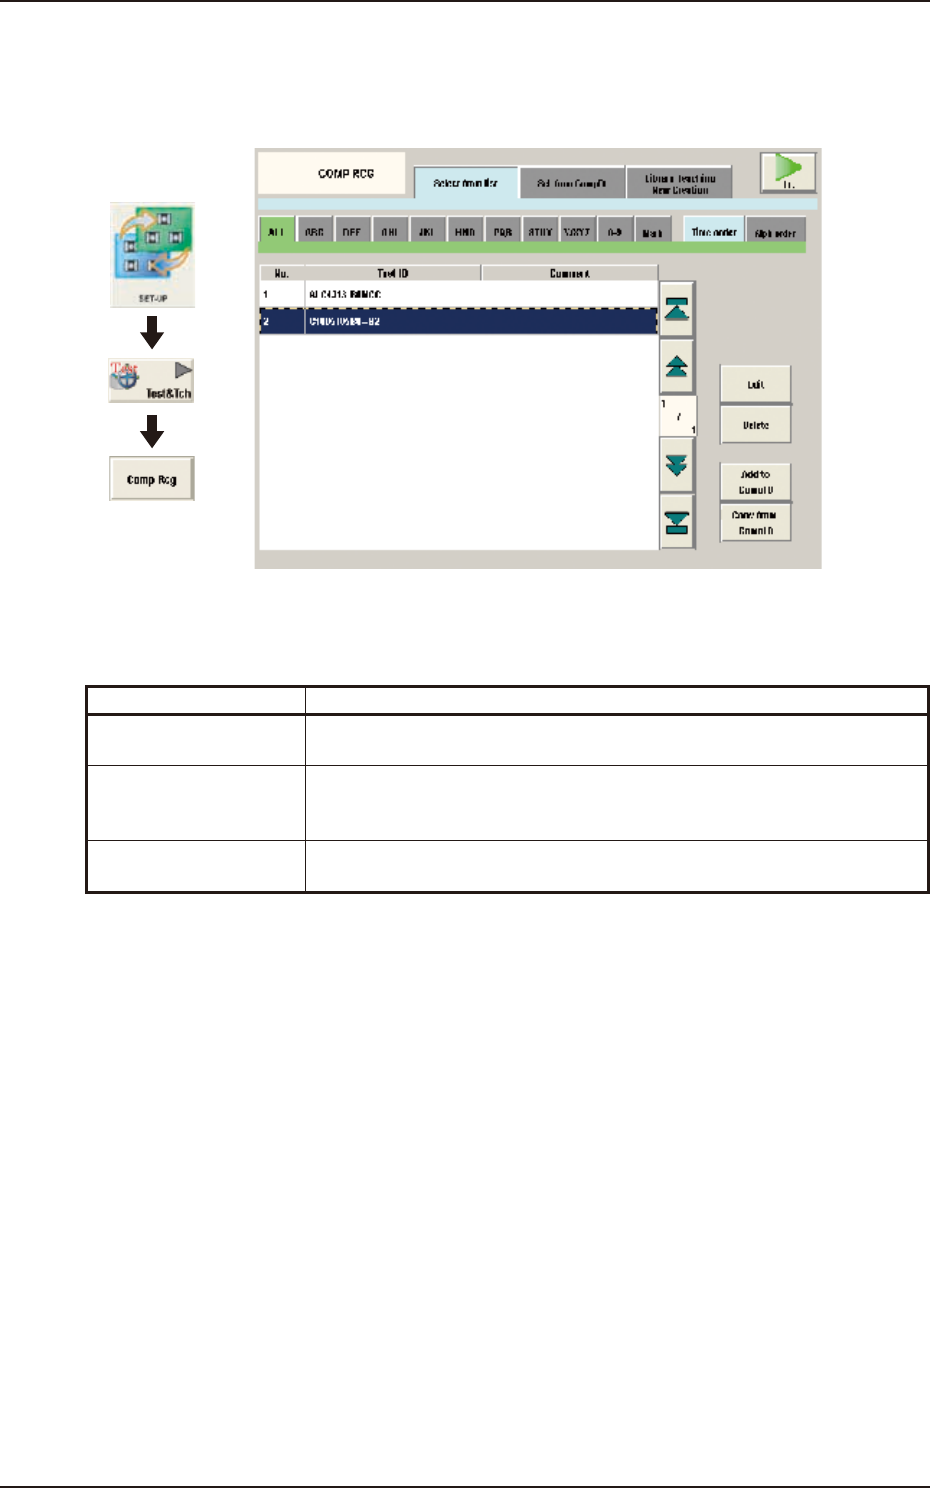
7.3 "COMP RCG" Test Window
The corresponding tab sheet enables the operator to test to check that the component designated in
the Test ID, is recognized normally.
Graphic
Development
F2F44
The "COMP RCG" test window is provided with the following tab sheets.
Tabs Description
Select from list The corresponding tab sheet enables the operator to test to check that the
component designated in the Test ID, is recognized normally.
Sel. from CompDt The corresponding tab sheet enables the operator to test to check that the
component is recognized normally by means of designating the Test ID used
in the block.
Library Teaching
New Creation
The corresponding tab sheet enables the operator to create new component
library teaching data.