EUKYX-199-2100_G5S2_Instruction_Vol2_E.pdf - 第316页
EUKYX 6-79 199-2100 7 .3.8 Exiting from Libra r y Data T eaching Operation Press the [ ] but ton on “Component Li brary T each in g” windo w or press the [ Complete] but ton on the "Create T each" w izard . The…

EUKYX
6-78199-2100
(10) When the conversion to the grid data is completed, check the data and press the [Fixed]
button.
F2F109
(10-1) If there is any unnecessary ball, after pressing the [Deletion of ball] button, specify the
range of the balls to be deleted on the image and delete such balls.
(10-2) If there is any necessary ball to be added, after pressing the [Insertion of ball] button,
specify the range of the balls to be added on the image and add such balls.
(11) When the teaching is completed, press the [Complete] button.
F2F110
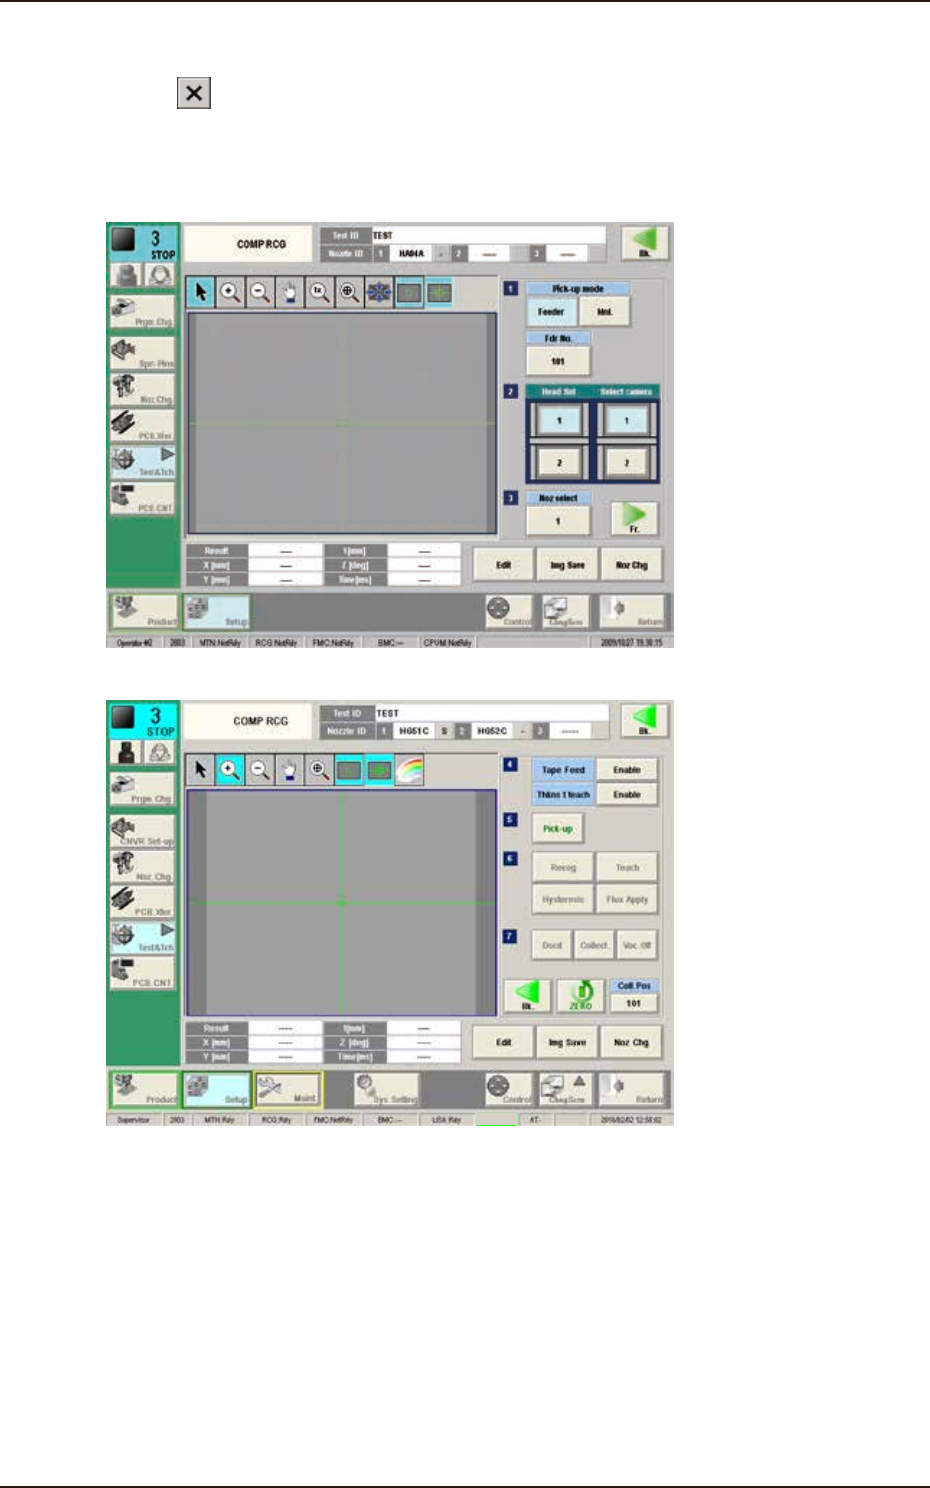
7.3 "COMP RCG" Test Window
EUKYX
6-79199-2100
7.3.8 Exiting from Library Data Teaching Operation
Press the [ ] button on “Component Library Teaching” window or press the [Complete] button
on the "Create Teach" wizard. The "COMPONENT LIBRARY" (teaching operation) window appears
again.
1/2 page
2/2 page
Cover
F2F111
Pressing the [Recog] button can execute the recognition test for the created component library data.
Pressing the [Edit] button can re-edit the created component library data.
When the teaching is to be ended, after pressing the [Dscd] or [Collect.] button to discard or
collect the component, press the [Return] button.
The data saving confirming dialog is displayed.
When the created component library data is to be saved in the test library, press the [Yes] button
and when it is to be discard, press the [No] button.
7.3 "COMP RCG" Test Window
EUKYX
6-80199-2100
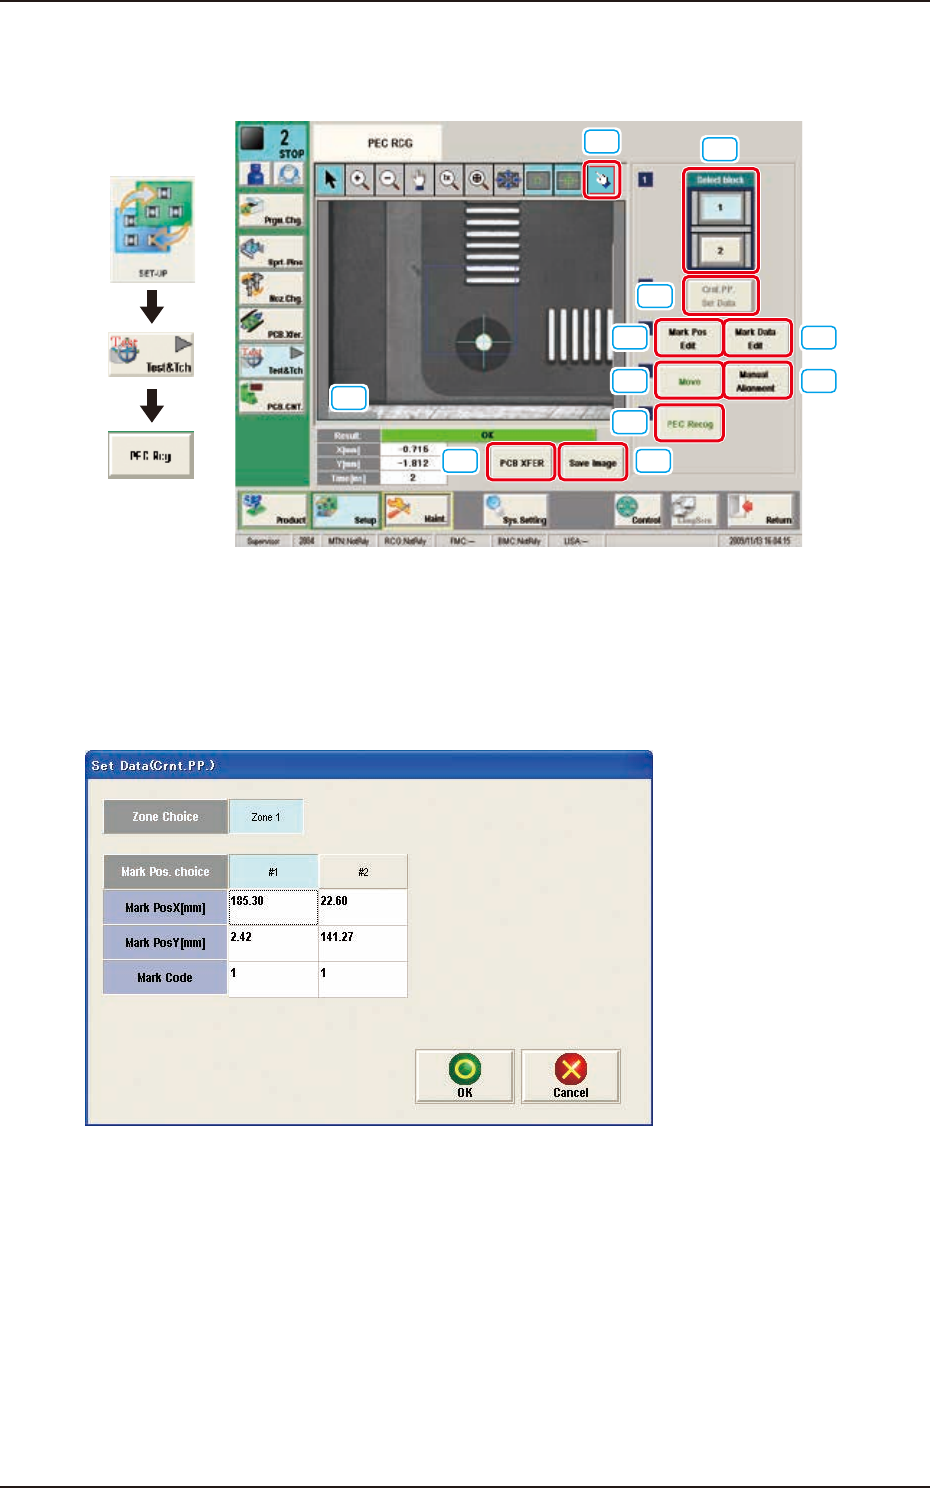
7.4 "PEC RCG" Test Window
7.4 "PEC RCG" Test Window
This window enables the operator to perform the PEC recognition mark recognition test.
[1]
[2]
[3] [4]
[5]
[6]
[7]
[9] [10]
[8]
[11]
Graphic
Development
F2F113
[1] [Select block] Button
The buttons showing each block are displayed using images. Using one of these buttons, the block
used for the PEC recognition test is selected.
[2] [Crnt. PP. Set Data] Button
When this button is pressed, the [Set Data (Crnt. PP.)] window appears.
F2F114
When [Zone n] is selected for the "Zone Choice" for the global recognition position and the [#n]
button is selected and then the [OK] button is pressed, the position data and PEC recognition mark
code are set.
The set data is displayed in the Mark Pos X, Y data boxes on the "[3] Mark Pos. Edit" window and
"[4] Mark Data Edit" window.