EUKYX-199-2100_G5S2_Instruction_Vol2_E.pdf - 第307页
EUKYX 6-70 199-2100 (6 ) Press the [ Teach] butt on to st art t he mol d tea ching ope ration. Make sure that the component image i s withi n the frame with dot li nes. If the component is out of the f rame , adju st it …
EUKYX
6-69199-2100
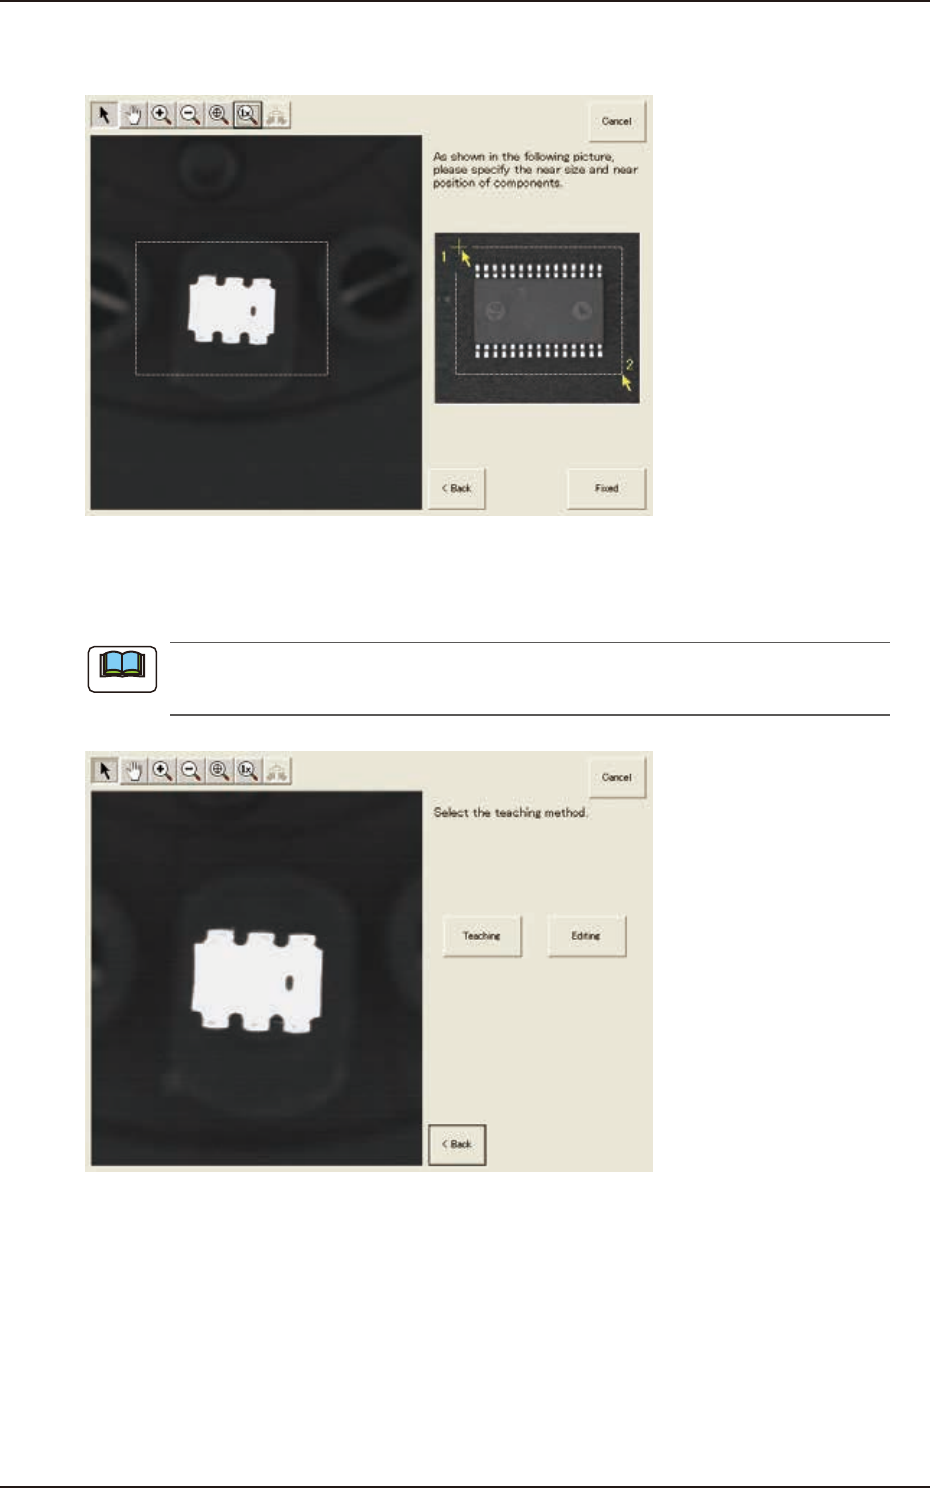
(3) After clicking the upper left of the component image, click the lower right to place the
whole component image within a frame.
F2F89
(4) Make sure that the whole image is within the frame and press the [Fixed] button.
(5) Press the [Teaching] button to select the teaching method.
When the [Editing] button has been selected, the editing operation is performed based on the
sample data. Press the [Complete] button to return to the component library teaching window.
F2F90
Note
7.3 "COMP RCG" Test Window
EUKYX
6-70199-2100
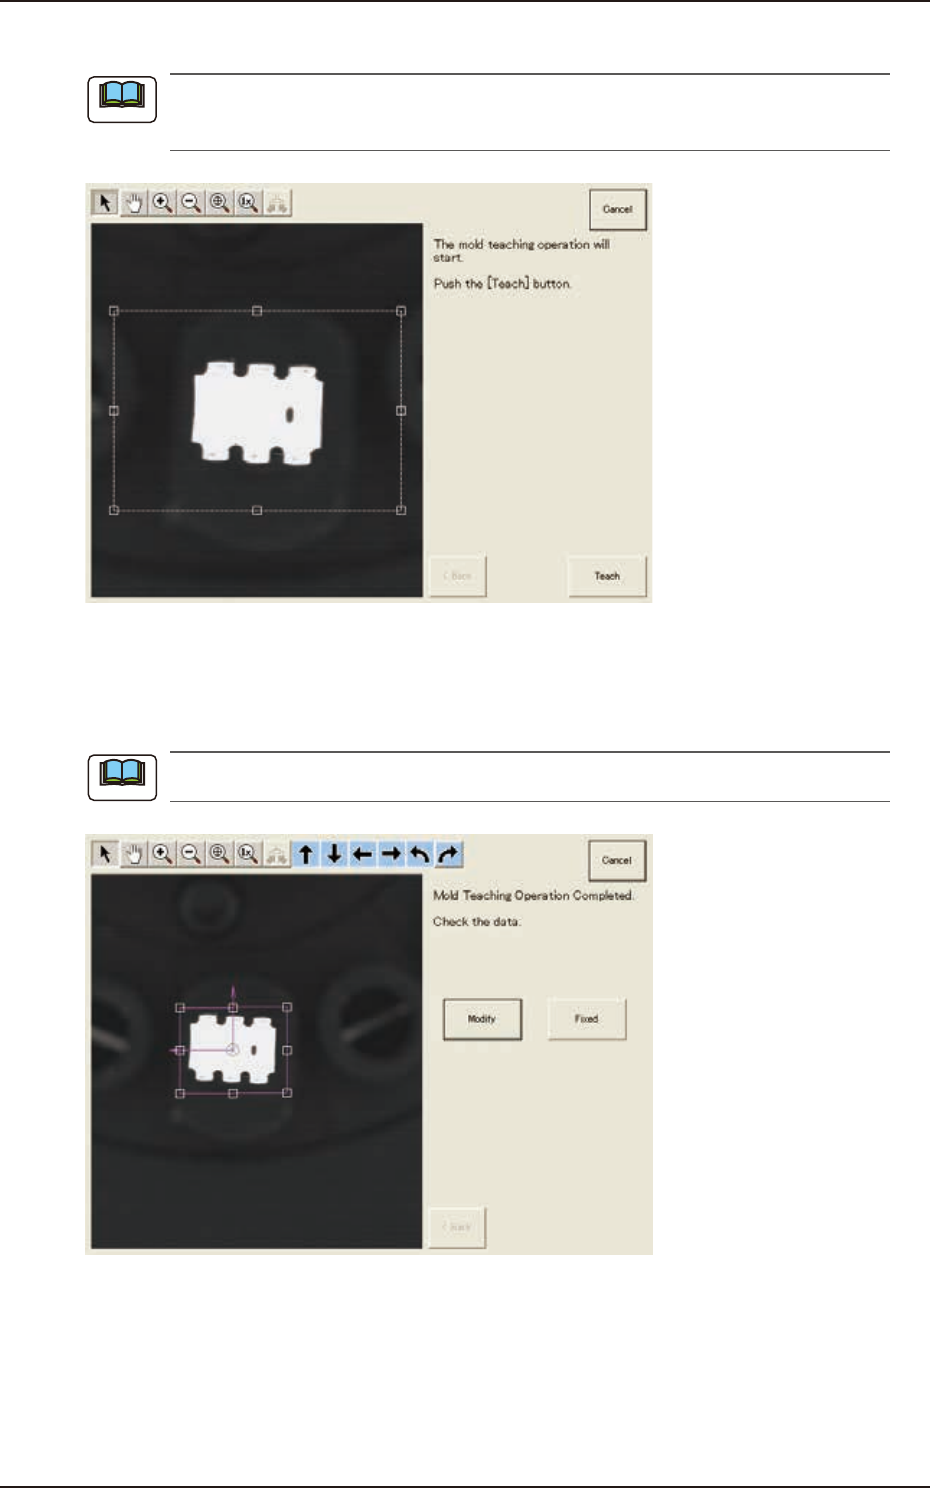
(6) Press the [Teach] button to start the mold teaching operation.
Make sure that the component image is within the frame with dot lines. If the component is out
of the frame, adjust it again.
F2F91
(7) When the mold teaching is completed, check the data and press the [Fixed] button.
(If the component size or angle is not correct, press the [Modify] button to correct the
graphic image.)
To turn the graphic, click the coordinate graphic and drag either one of the arrow ends.
F2F92
Note
Note
7.3 "COMP RCG" Test Window
EUKYX
6-71199-2100
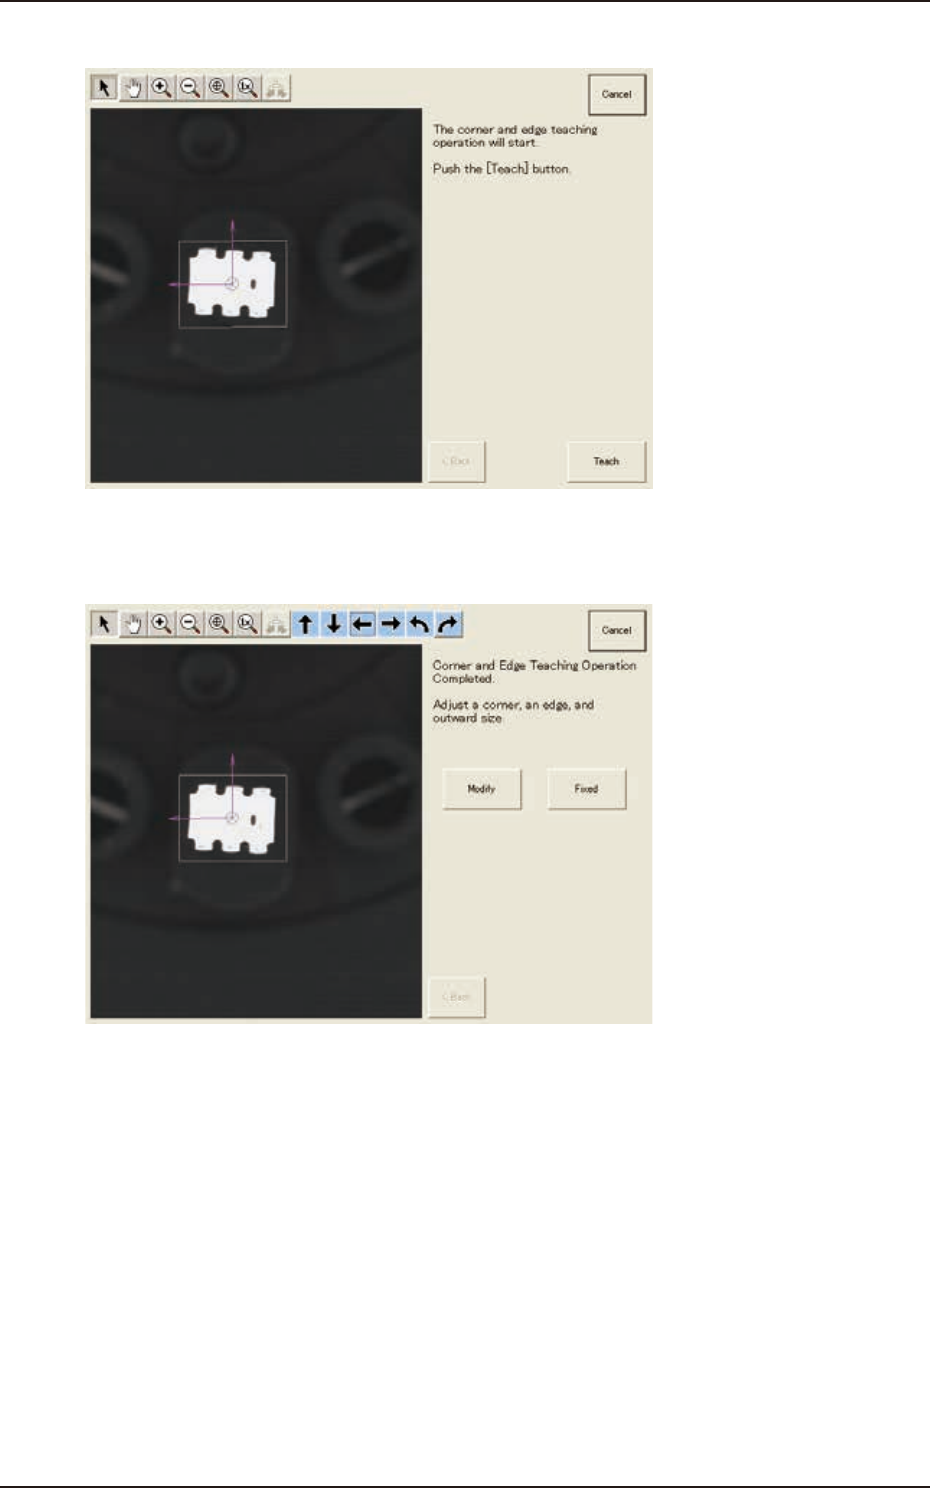
(8) Press the [Teach] button to start the corner and edge teaching operation.
F2F93
(9) When the corner and edge teaching operation is completed, check the data and press the
[Fixed] button. See the next steps from (9-1) to (9-3) if requiring the modification.
F2F94
7.3 "COMP RCG" Test Window