EUKYX-199-2100_G5S2_Instruction_Vol2_E.pdf - 第281页
EUKYX 6-44 199-2100 7.3 "COMP RCG" T est Window 7 .3.4 " Component Recognition T est Execution " Window When the test ID is selected on the " COMP R CG" test wi ndow and the [ Fr .] but ton …
EUKYX
6-43199-2100
7.3 "COMP RCG" Test Window
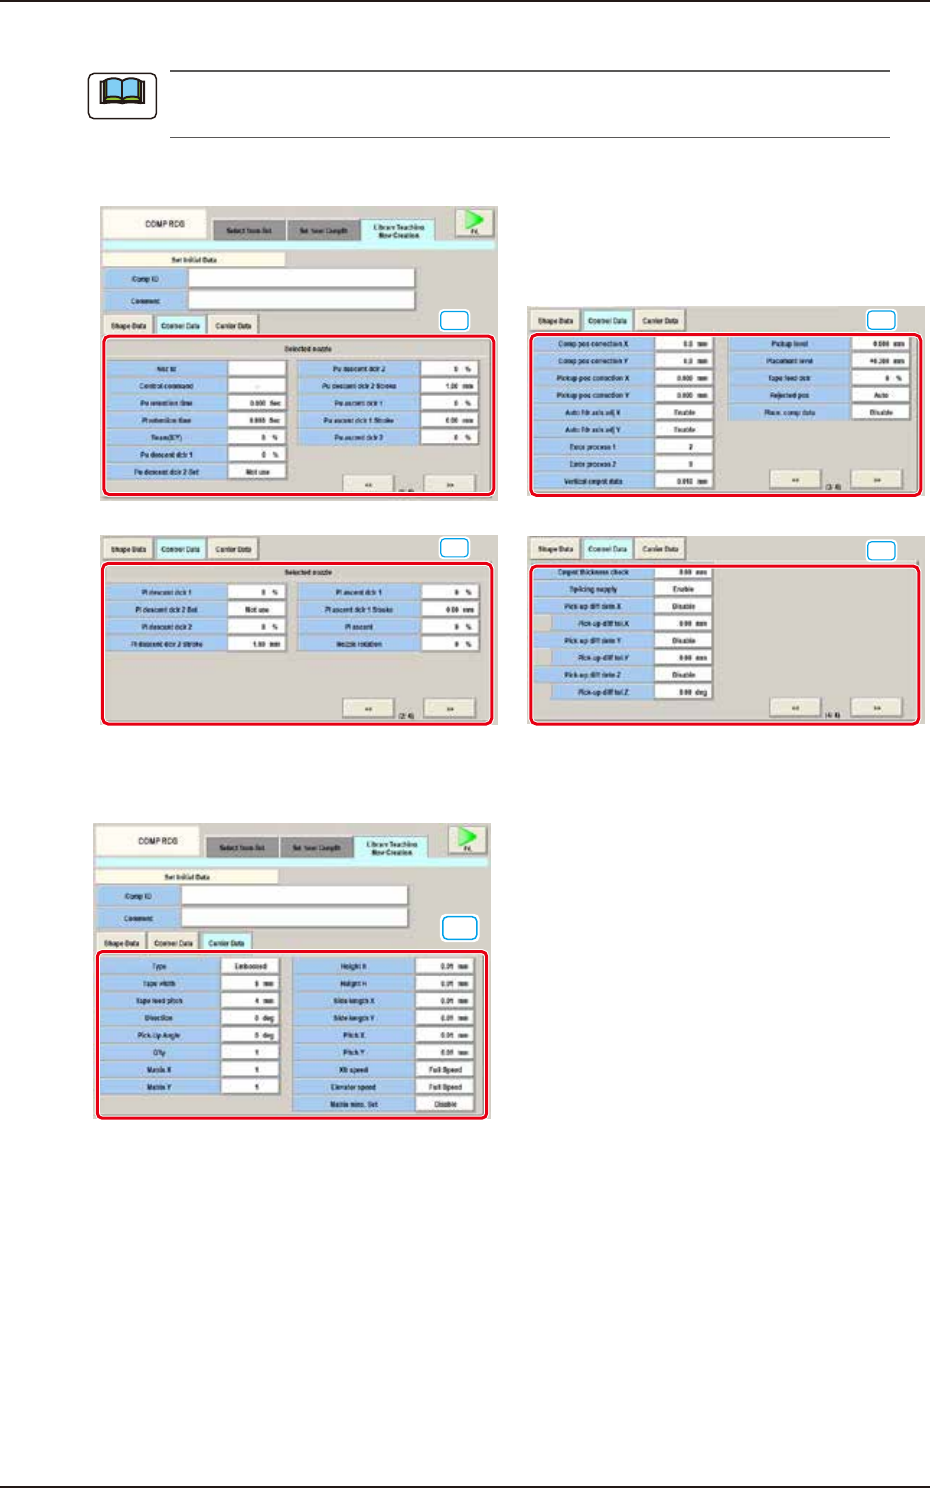
[7] Control Data Entry Window (1/4)
Enter the parameter for the “Nozzle ID”. If this setting is not performed, the procedure does not
go to the next step.
[7]
[7]
[7]
[7]
Control Data (1/4 page)
Control Data (2/4 page)
Control Data (3/4 page)
Control Data (4/4 page)
F2F48
[8] Carrier Data Entry Window:
In this window, the carrier data parameters are set.
[8]
F2F52
Note
EUKYX
6-44199-2100
7.3 "COMP RCG" Test Window
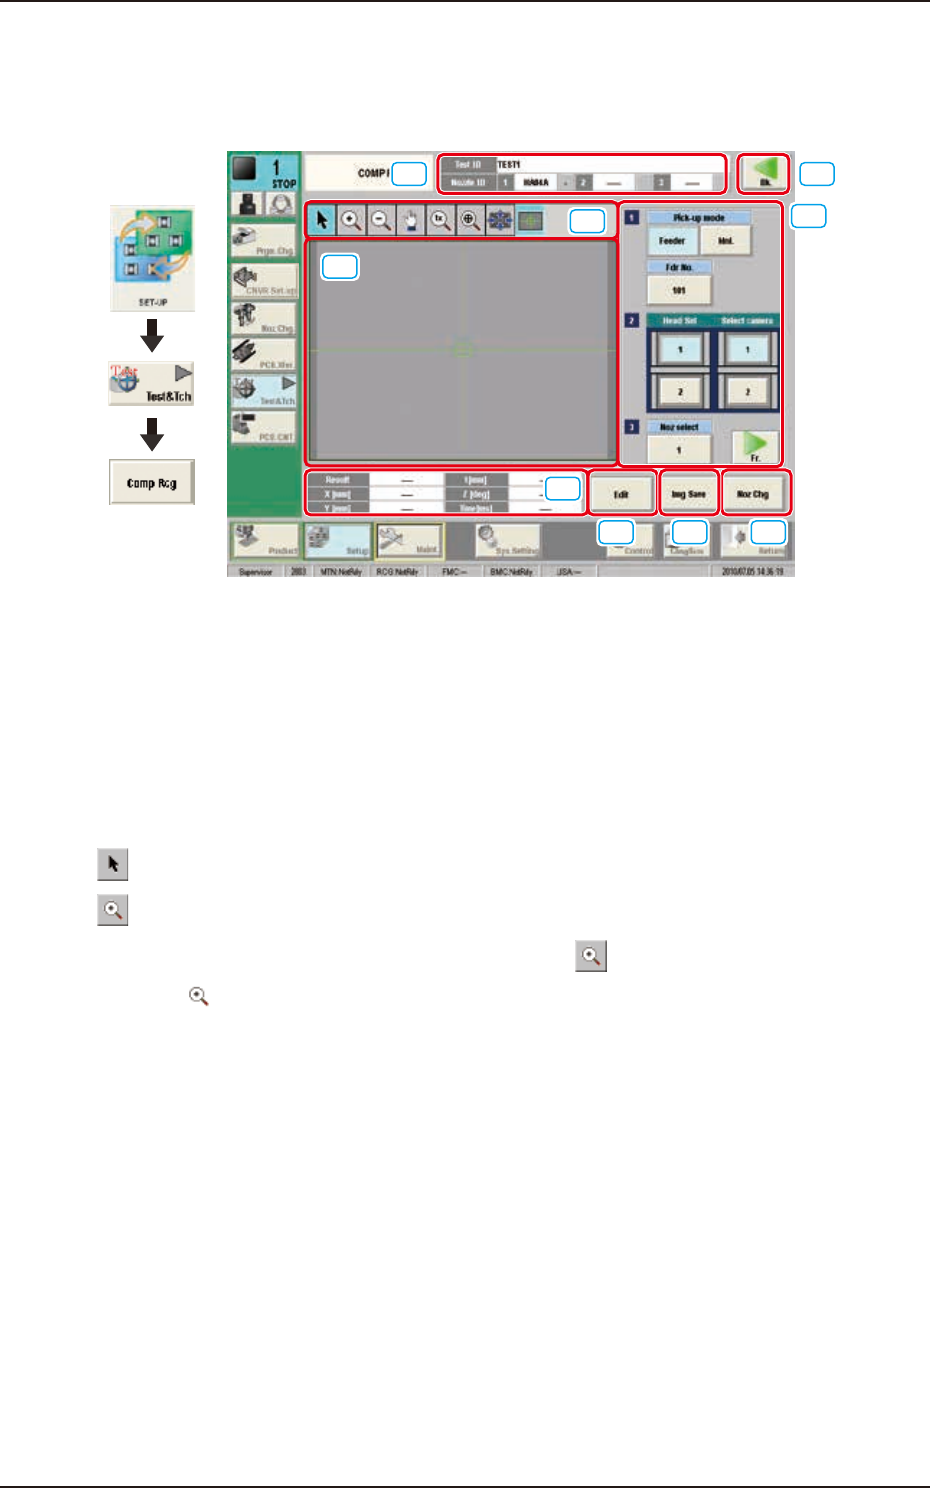
7.3.4 "Component Recognition Test Execution" Window
When the test ID is selected on the "COMP RCG" test window and the [Fr.] button is pressed, the
component recognition test execution window appears.
[1] [9]
[4]
[5]
[6] [7] [8]
[2]
[3]
Graphic
Development
F2F53
[1] Test ID
The text ID selected in the "COMP RCG" test window is displayed in this pane.
Nozzle ID
The nozzle ID (type) specified in the test ID is displayed in this pane.
[2] Displayed Image Operation Buttons
Using the following buttons, the mode is changed to perform the enlargement or movement
operation of the image displayed in the recognized image display pane [3].
[
] Button : Normal Operation Mode
[
] button : Image Enlargement Mode
After changing to the image enlargement mode using the [
] button (the shape of the pointer is
changed to
), when the image to be enlarged is touched, or the left button of the mouse is
clicked on the image, the image is enlarged from the pointer position as the center.
When the image is to be enlarged with its position fixed, place the pointer on the center of the
image before the enlargement operation.
EUKYX
6-45199-2100
7.3 "COMP RCG" Test Window
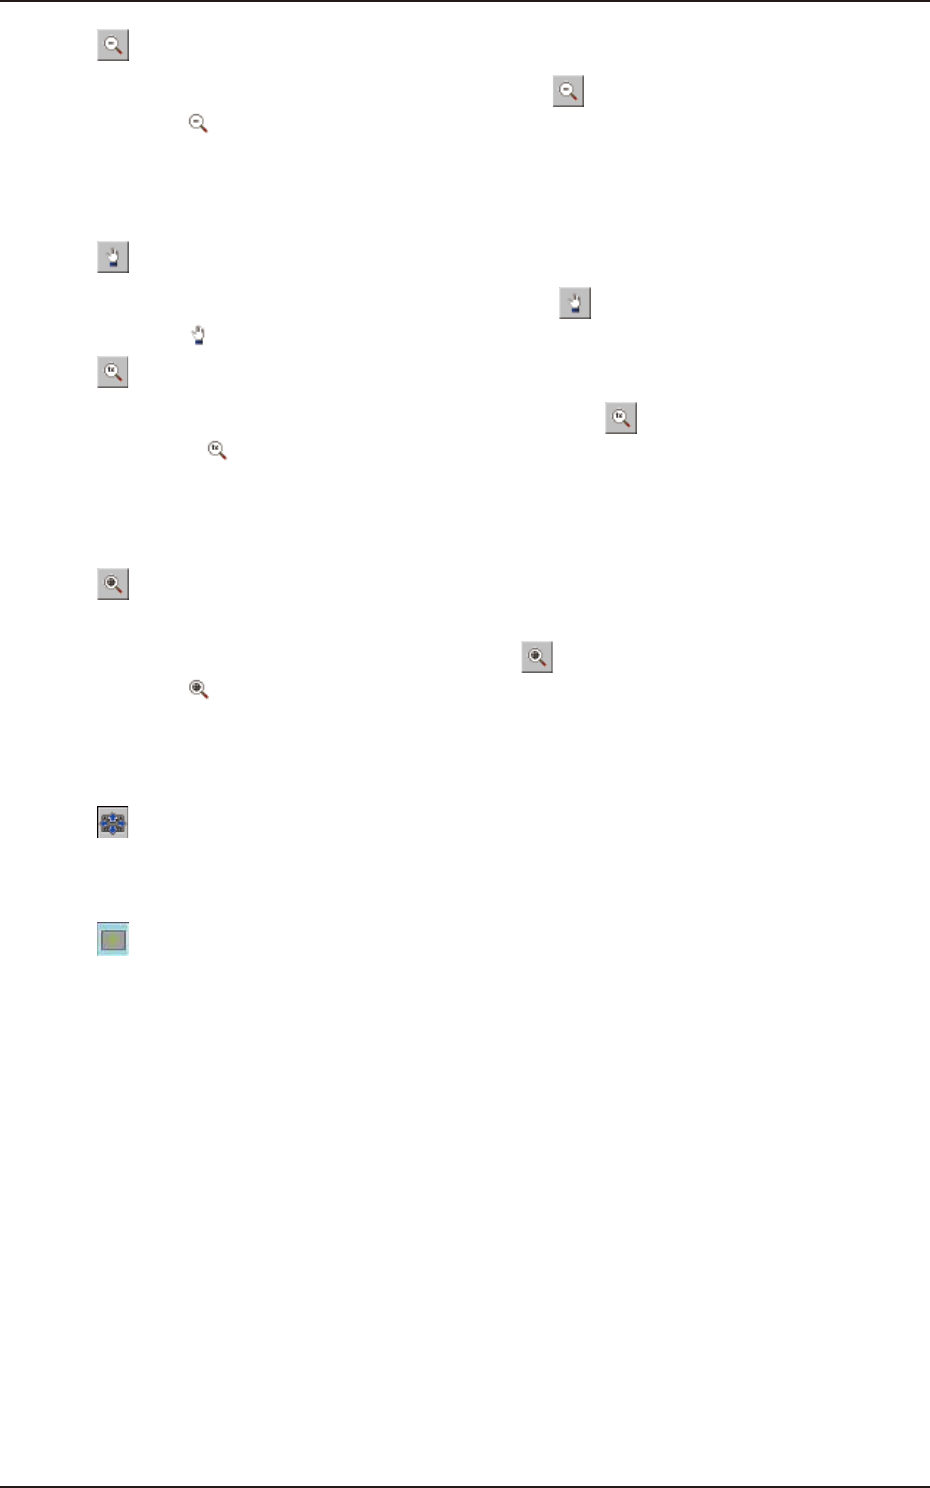
[
] Button : Image Reduction Mode
After changing to the image reduction mode using the [
] button (the shape of the pointer is
changed to
) when the image to be reduced is touched, or the left button of the mouse is clicked
on the image, the image is reduced from the pointer position as the center.
When the image is to be reduced with its position fixed, place the pointer on the center of the
image before the reduction operation.
[
] Button : Image Movement Mode
After changing to the image movement mode using the [
] button (the shape of the pointer is
changed to
mark), drag the image to be moved (with the left button on the mouse pressed).
[
] Button : Image Real-Size Display Mode (Captured image is displayed in real-size.)
After changing to the image real-size display mode using the [
] button (the shape of the pointer
is changed to
), when the image to be displayed in real-size is touched, or the left button of the
mouse is clicked on the image, the image is displayed in real-size from the pointer position as the
center. When the image is to be displayed in real-size with its position fixed, place the pointer on
the center of the image before the image real-size display operation.
[
] Button : Image Fitting Mode (the image is displayed fully using the recognition image
display domain.)
After changing to the image fitting mode using the [
] button (the shape of the pointer is
changed to
), when the image to be fit is touched, or the left button of the mouse is clicked on
the image, the image is displayed fully using the recognition image display domain, from the pointer
position as the center. When the image is to be displayed in the image fitting mode with its position
fixed, place the pointer on the center of the image before the image fitting operation.
[
] button :
Using this button, the image displayed within the display domain on the Recognition Window can
be moved to the position where the image is to be displayed.
[
] button :
When selected, this button displays a crosshair indicates the center of the camera.