1OM-1050-002.pdf - 第114页
1 . 3 Start of Automatic Operation Operation Procedure (1) Confirm that the front safety door is closed. (2) Set the [OPERA TION] switch on the front operation panel to the "RUN" side and be sure to remove the …
Refer to "Attachment and Detachment of Tape Feeders to Feeder
Carriage" in the instruction manual of tape feeders for details.
(3) After the tape feeder has been attached, close the feeder work
area safety doors.
Press the [FEEDER READY] buttons and check that the lamps
of these buttons are ON.
••
••
• Preparation for P.C.B.’s
In the case of normal automatic operation, confirm that P.C.B.’s are
prepared in the input machine.
When this machine is operated singly (actual placement test,
etc.), follow the steps below.
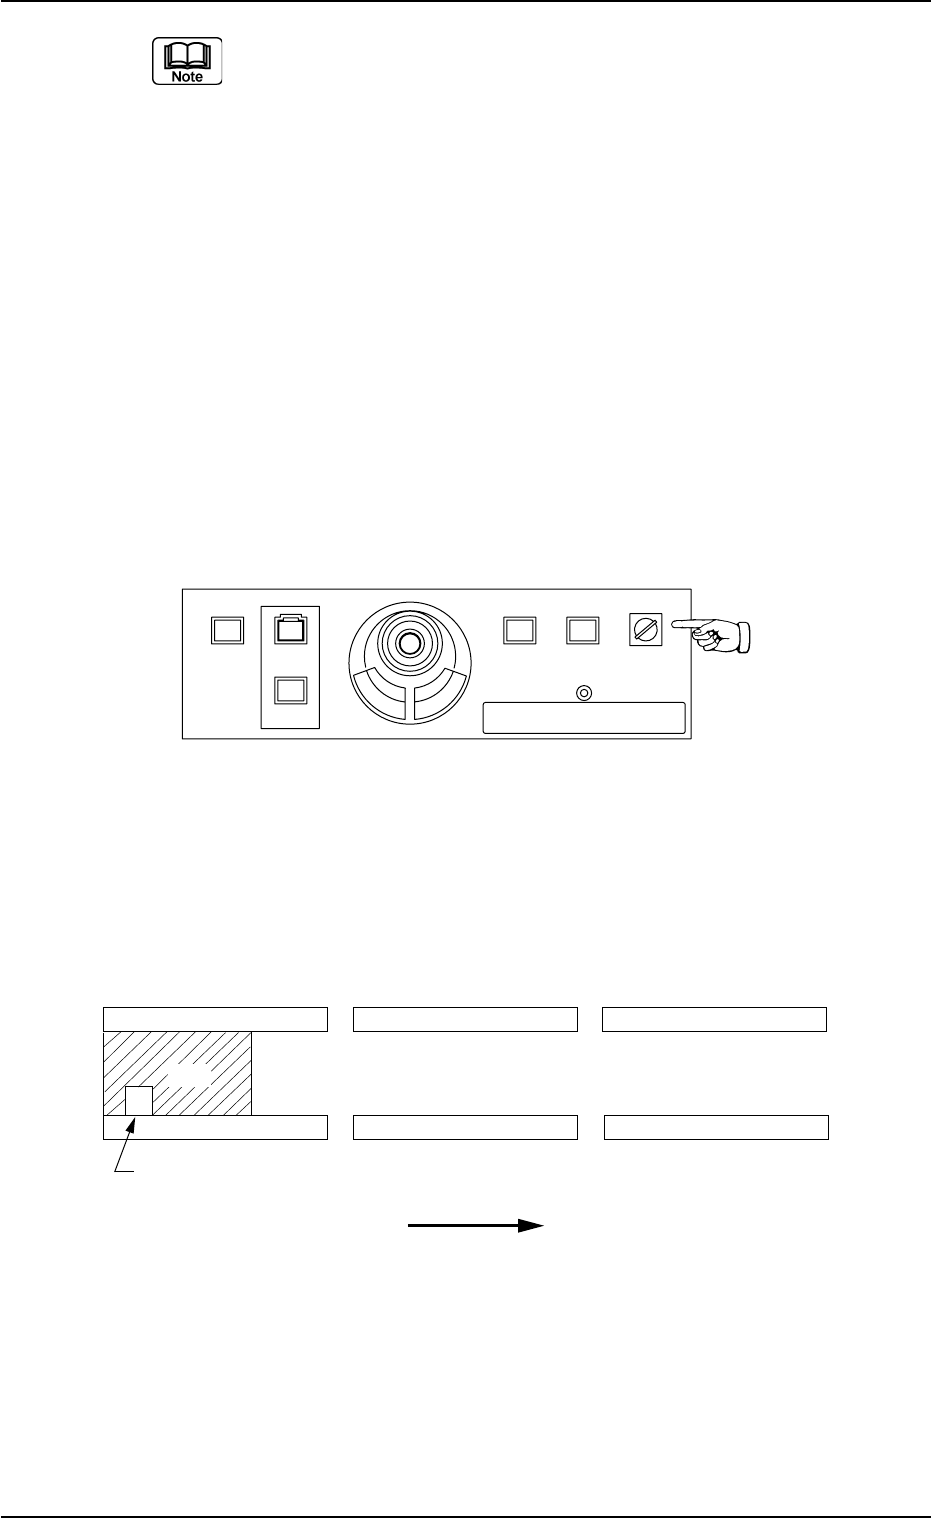
(1) Set the [OPERATION] switch to the "SETUP" side and open the
front safety door.
Fig. 1C16
(2) Set a P.C.B. on the L conveyor (input conveyor) such that the
P.C.B. detection sensor is turned on (the red LED of the sensor
illuminates).
Fig. 1C17 P.C.B. Flow Direction: From Left to Right
1.2 Preparation before Automatic Operation
0307-004 3-10 AFO01EOPP
L Conveyor
(Input Conveyor) (P.C.B. Positioning Section)
R Conveyor
(Output Conveyor)
L Conveyor P.C.B. Detection L Sensor
P.C.B. Flow Direction
2%$
219'410
5612
56#46 '0#$.'
4705'672
12'4#6+10
.1%-
20.%*#0)'
1.3 Start of Automatic Operation
Operation Procedure
(1) Confirm that the front safety door is closed.
(2) Set the [OPERATION] switch on the front operation panel to the
"RUN" side and be sure to remove the selection key from the ma-
chine.
Fig. 1C18
(3) Check the surroundings of the machine and confirm safety before
starting the automatic operation.
CAUTION
Check carefully that there is no person around the
moving mechanisms of the machine. (Especially, the
other side of machine operation).
Make sure that no objects (tools, parts, etc.) remain
within the moving mechanisms of the machine.
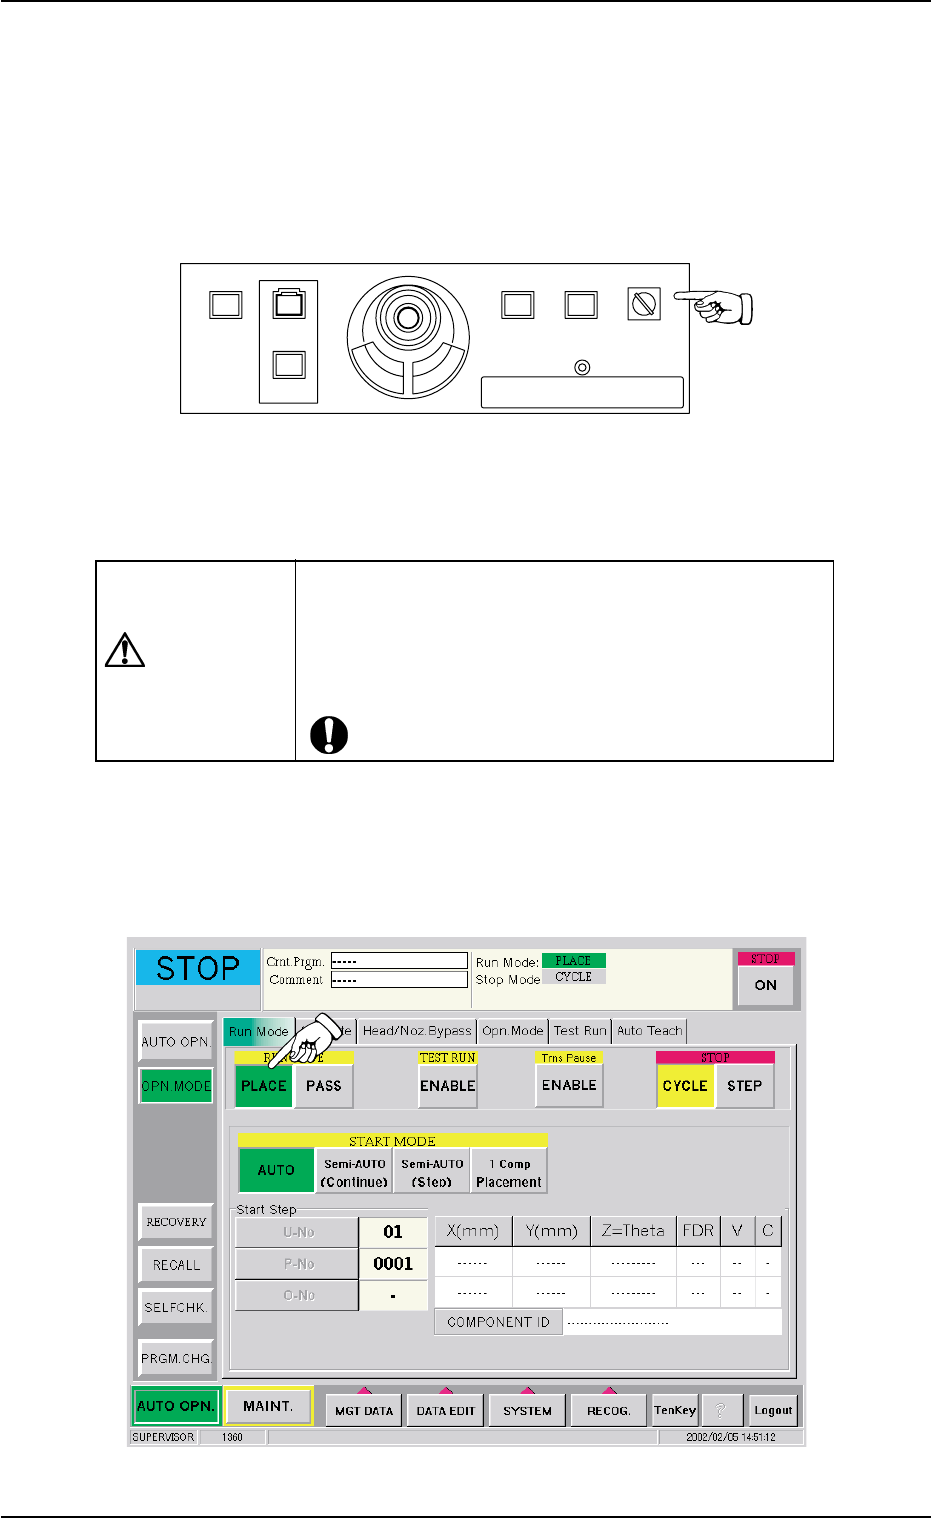
(4) Press the [OPN. MODE] button on the submenu bar on the touch
screen. The "OPN. MODE" window opens. Press the [PLACE] but-
ton (entitled "RUN MODE") in the "Run Mode" tab sheet.
Fig. 1C19
1.3 Start of Automatic Operation
0307-006 3-11 AFO01EOPP
219'410
5612
56#46 '0#$.'
4705'672
12'4#6+10
.1%-
20.%*#0)'
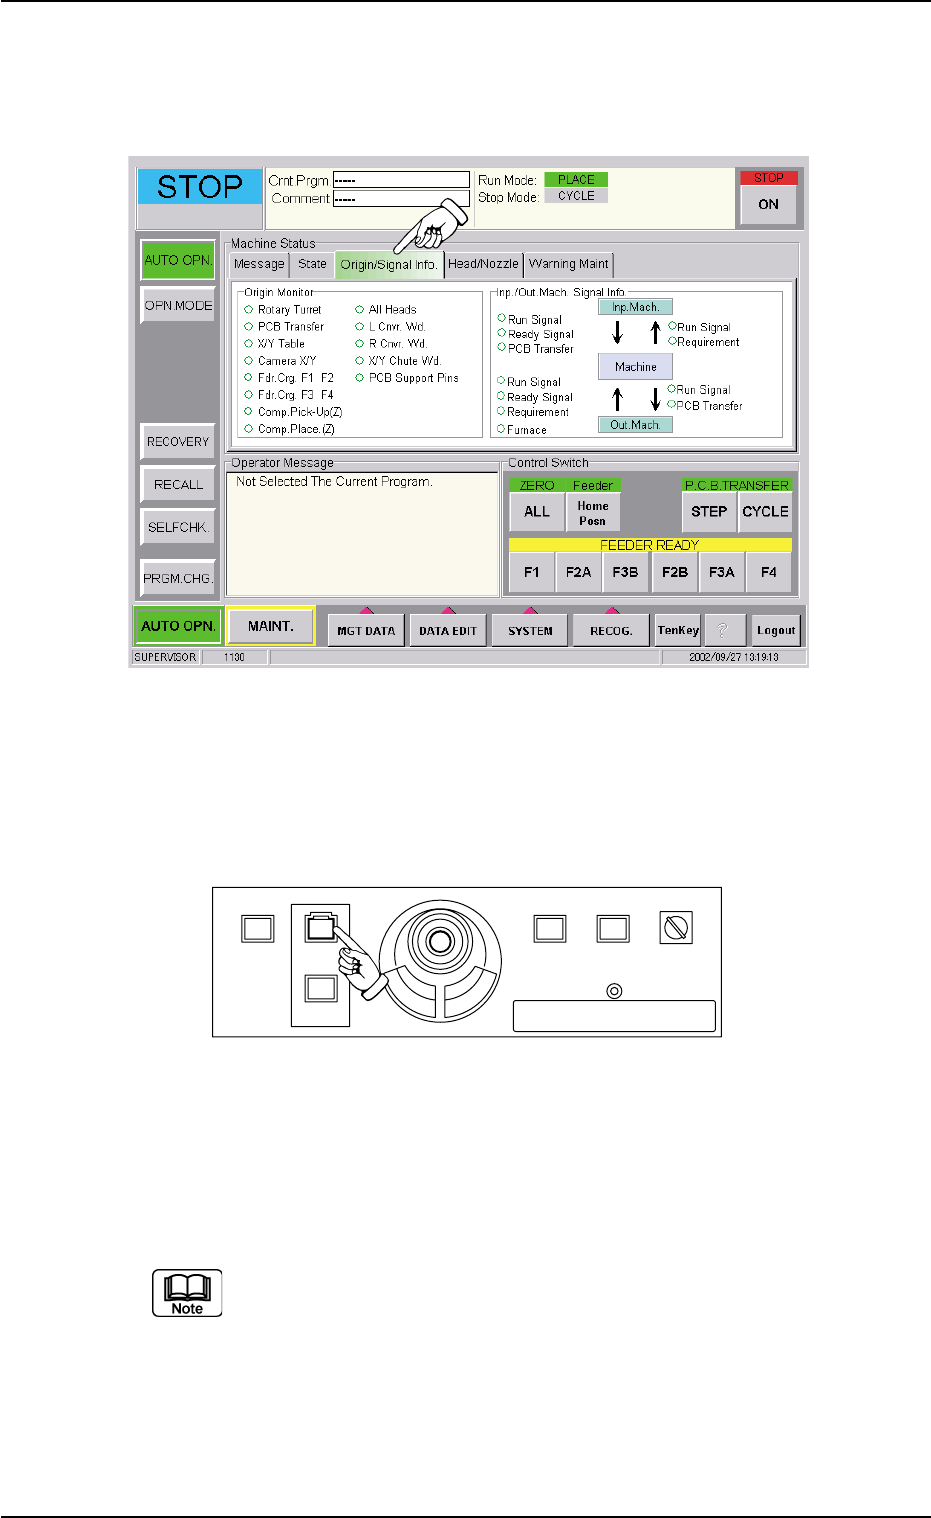
(5) Press the [Origin/Signal Info.] tab in the "AUTO OPN." submenu
window. The "Origin/Signal Info." tab sheet opens. Check the origin
marks.
Fig. 1C20
(6) When the [START] button on the front operation panel is pressed
while the lamp is flickering, the automatic operation (placement)
starts.
Fig. 1C21
When the automatic operation (component placement) starts, all origin
marks disappear and the LED (green) of the [START] button on the front
operation panel and the green lamp of the light tower illuminate.
(a) The automatic operation cannot be started unless the
"AUTO OPN." window is active.
(b) When a P.C.B. already exists in the P.C.B. positioning sec-
tion, the machine discharges the P.C.B. without placing
any component on the P.C.B.
1.3 Start of Automatic Operation
0307-006 3-12 AFO01EOPP
219'410
5612
56#46 '0#$.'
4705'672
12'4#6+10
.1%-
20.%*#0)'