1OM-1050-002.pdf - 第98页
This machine is provided with a password function which pre- vents various types of data groups from being deleted by mis- take and keeps unauthorized user (third party) from operating the machine. The following three ki…
2. Starting or Exiting from the Application
2.1 Getting Started
(1) When the [POWER ON] button on the operation panel is pressed, it
illuminates in yellowish green and the self-diagnostics function starts.
(a) Press and hold the [POWER ON] button for more than 1
second.
(b) It takes 2 to 3 minutes until the self-diagnostics operation
is completed. Please wait for a while.
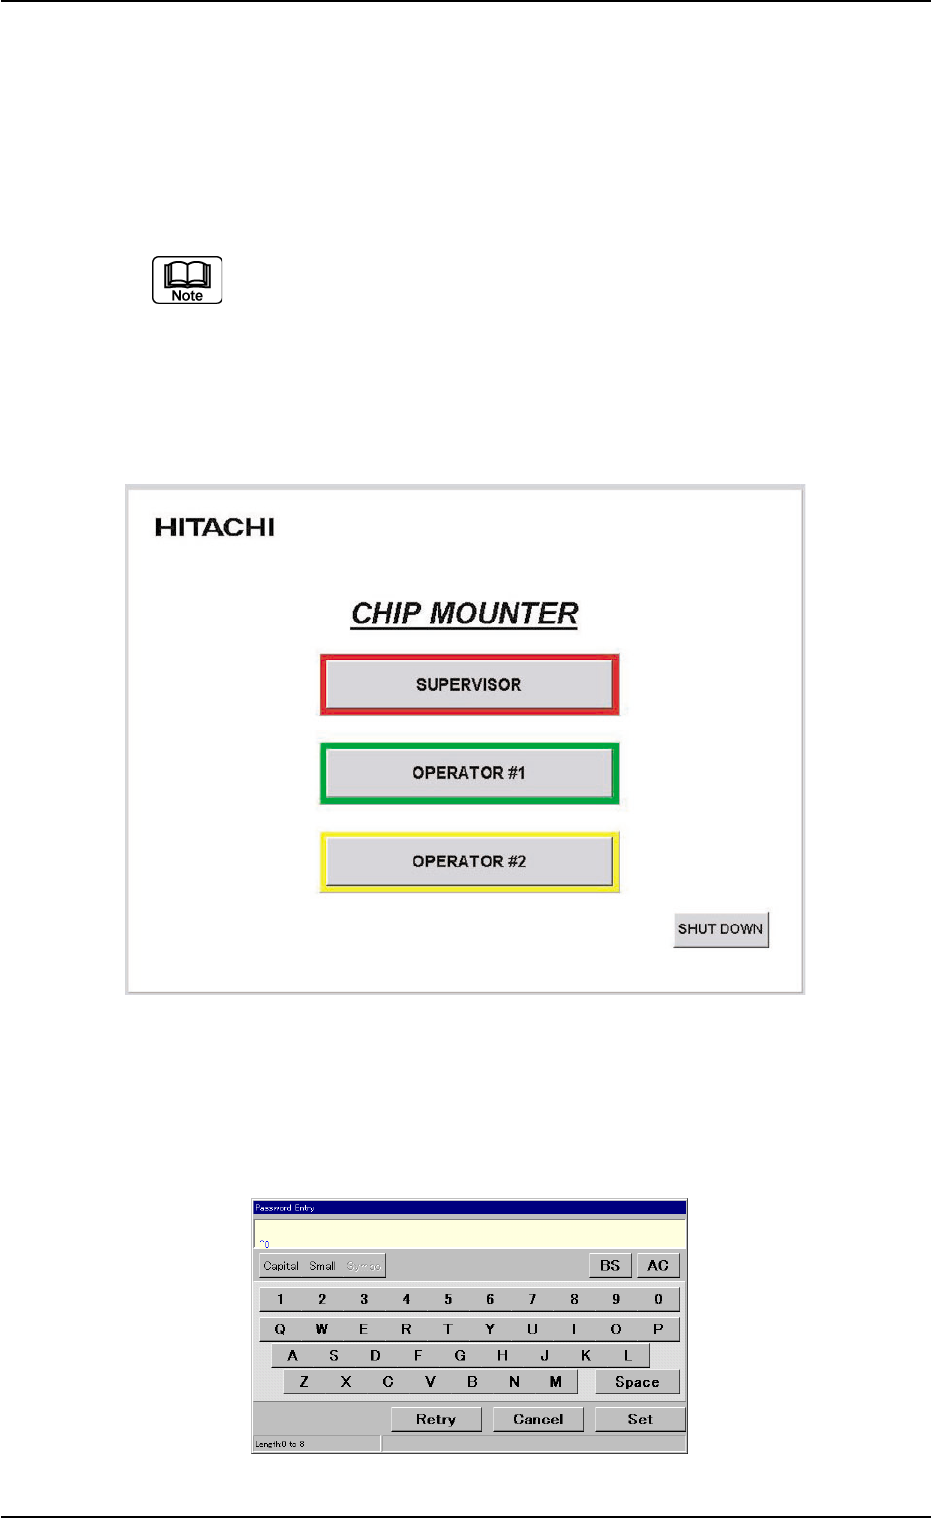
When the self-diagnostics operation is completed, the "Login Type Se-
lection" window appears on the touch screen.
Fig. 1B2 "Login Type Selection" Window
(2) Press the [SUPERVISOR], the [OPERATOR #1], or the [OPERA-
TOR #2] button according to the given authority.
The "Password Entry" dialog box opens.
Fig. 1B3 "Password Entry" Dialog Box
0304-004 2-4 AFO01EOPP
2. Starting or Exiting from the Application

This machine is provided with a password function which pre-
vents various types of data groups from being deleted by mis-
take and keeps unauthorized user (third party) from operating
the machine.
The following three kinds of passwords are available and each
gives individually approved user’s access to the computer sys-
tem of the machine.
Refer to "Section 5 System Setting" in "Volume 3: Program-
ming and Machine Data" for details.
[SUPERVISOR] : Access can be gained by only the person
identified as "Supervisor".
[OPERATOR #1] : Access can be gained by only the person
identified as "Operator #1". For example, the
person identified as "Operator #1" is given
a permission to all machine operations in-
cluding data editing.
[OPERATOR #2] : Access can be gained by only the person
identified as "Operator #2". For example, the
person identified as "Operator #2" is limited
to only the operations related to the auto-
matic operation.
(3) Enter the password.
"*****" appears in the "Password Entry" dialog box.
(4) Press the [Set] button.
The "AUTO OPN." window opens on the touch screen. It is provided
with a main menu bar.
See Fig. 1B4 in "2.2 Structure of Operation Windows" for the dis-
played main menu bar and the "AUTO OPN." window.
When no password is set, press the [SUPERVISOR], the [OP-
ERATOR #1], or the [OPERATOR #2] button according to the
given authority. The "AUTO OPN." window opens.
0102-002 2 - 5
AFO01EOPP
2.1 Getting Started
2.2 Structure of Operation Windows
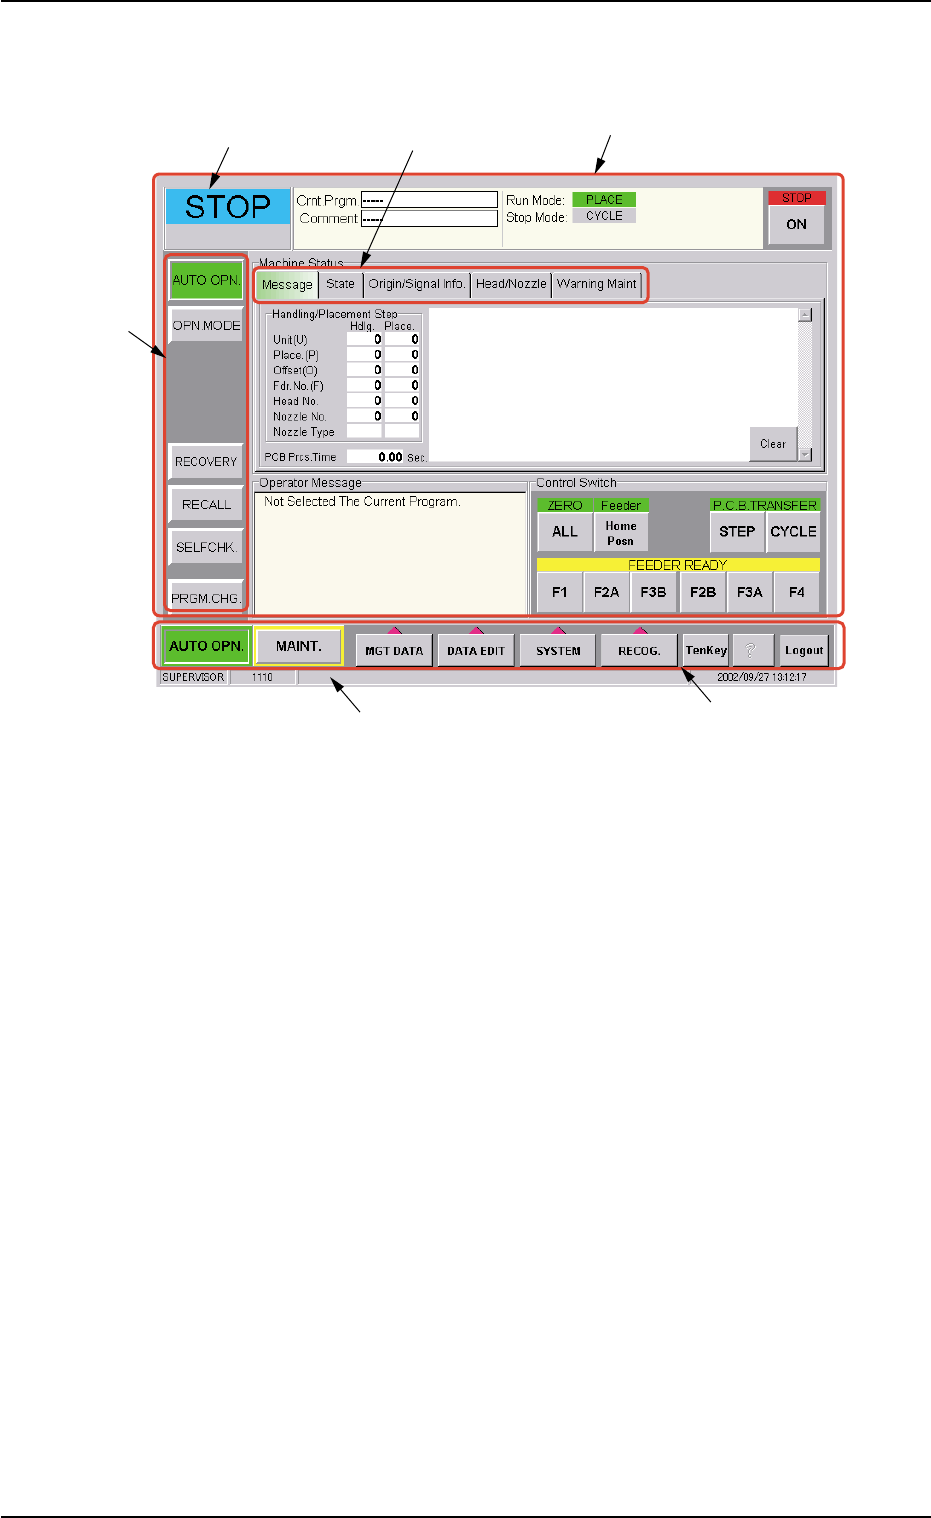
Fig. 1B4 Main Menu Bar and "AUTO OPN." Window
••
••
• Window Composition
*1 Main Menu Bar
The main menu bar has five buttons ([AUTO OPN.], [MAINT.], [MGT
DATA], [DATA EDIT], and [SYSTEM] buttons) as main menus, one
button ([RECOG.] button) for selection of a recognized image pat-
tern to be displayed, and three operation buttons ([TenKey], [?], and
[Logout] buttons).
Refer to "Section 4" in "Volume 2: Operation (Supervisor)" for the
main menu bar.
*2 Submenu Bar
The submenu bar has the buttons to select the submenus. When
each button on the submenu bar is selected, the corresponding
operation window opens.
When a button on the main menu bar is pressed, the corresponding
submenu bar appears.
Refer to "Section 4" in "Volume 2: Operation (Supervisor)" for the
submenu bar.
2.2 Structure of Operation Windows
*5 Current Mode
*4 Operation Window
(Menus for Automatic Operation)
*6 Supplementary Explanation
*1 Main Menu Bar
*3 Tab
*2 Sub Menu Bar
0210-004 2 - 6 AFO01EOPP