YesAX V3.1.2 - Software User Manual.pdf - 第235页
Optional A ccessories 19 -5 19.3 Bottom Barcode Read ers Both the bottom camera and the bottom barcode reader options can read barcodes placed on the bottom side of the PCB. The bottom camera has the advantage to also pe…
19-4 Optional Accessories
1. With the YesAX software not running, make sure both the normal report printer and the
label printer are connected and functional.
2. From Windows XP control panel, Printers and Faxes icon, select the normal report
printer as the default printer.
3. Start the YesAX software. (During start up the software records the default printer at the
time as the printer for normal report.)
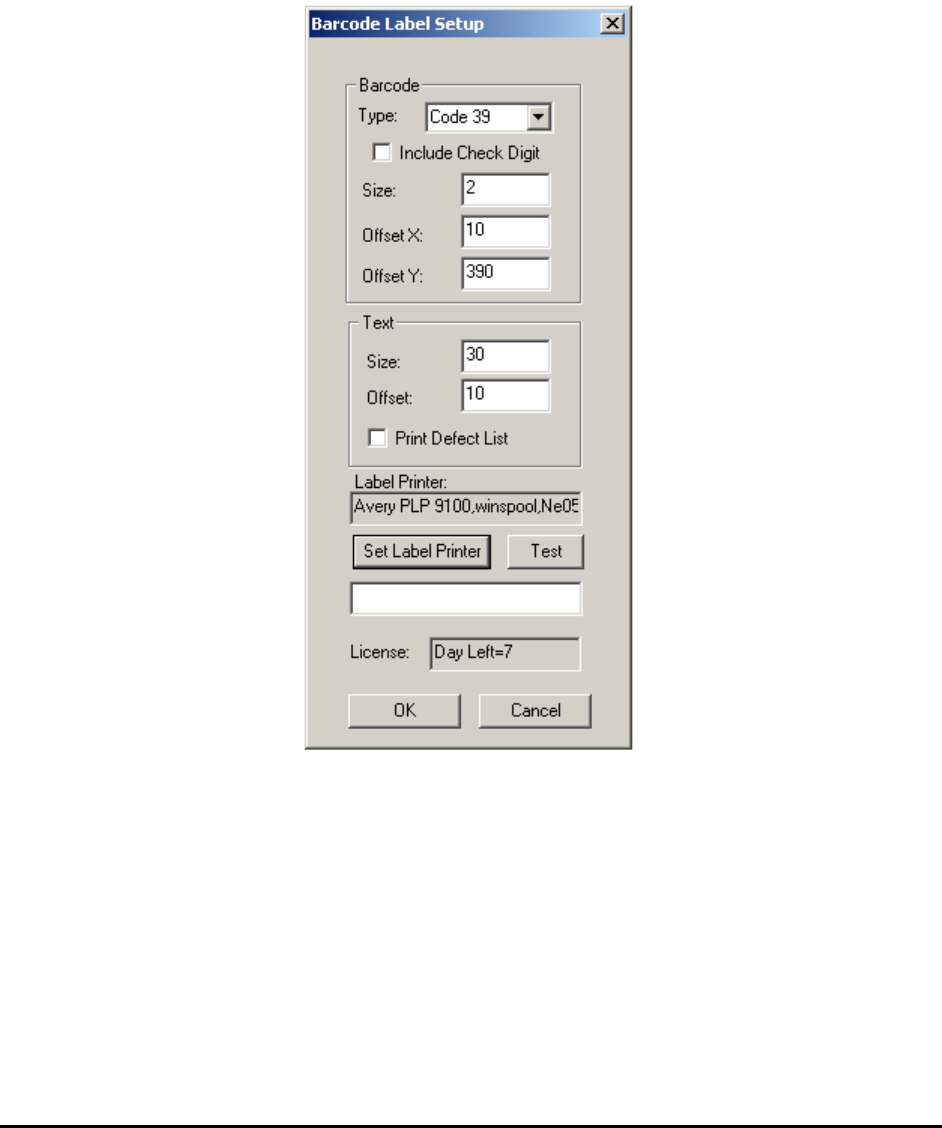
4. From System Options, press the Setup button on the right of the Print Barcode Label
option to display the Barcode Label Setup dialog.
5. From Windows XP control panel, Printers and Faxes icon, select the barcode label
printer as the default printer.
6. Press the Set Label Printer button on the Barcode Label Setup dialog. (Pressing the Set
Label Printer button causes the software to record the default printer at the time as the
barcode label printer.) Press the Test button to verify barcode printing.
7. Press OK to close the dialog.
This option requires a license code to activate. The very first time you enable this option a dialog
displays showing a system code and prompt for a license code. Call Nordson YESTECH’s
technical support to obtain a license code.
Optional Accessories 19-5
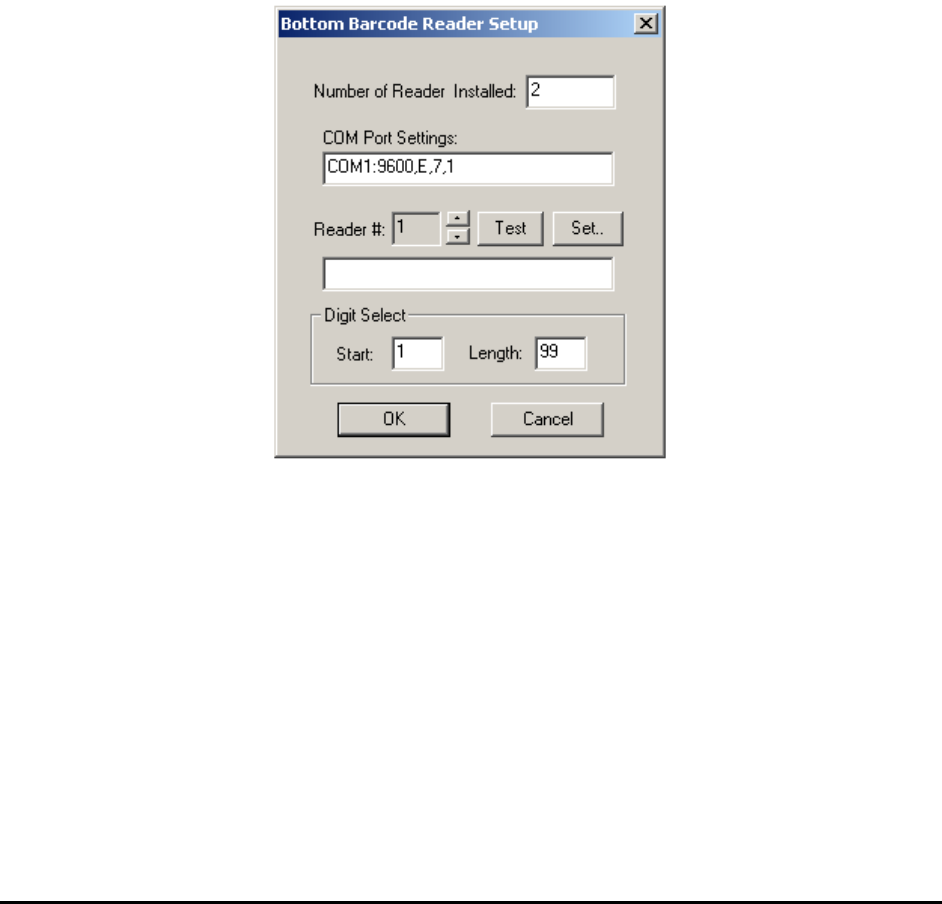
19.3 Bottom Barcode Readers
Both the bottom camera and the bottom barcode reader options can read barcodes placed on the
bottom side of the PCB. The bottom camera has the advantage to also perform OCR. It is also
generally easier to setup the bottom camera for barcode reading because it has the same barcode
reading capability as the top camera.
The Bottom Barcode Reader option has the advantage of using multiple read heads to read
multiple barcodes from a panelized board. The multiple read heads are daisy chained together
and interfaced with the PC via the RS232 (Serial) Port.
It is generally more difficult to setup the bottom barcode reader because it is hard to see where
the head is reading. The Bottom Barcode Reader is recommended for high volume applications
where the barcodes are machine placed. In addition it is also for applications where non
sequential barcodes are used on panelized boards.
Pressing the Setup button on the System Options dialog displays the Bottom Barcode Reader
Setup dialog.

19-6 Optional Accessories
19.4 Audible Alarm
It is possible to connect an audible alarm to the AXI system to alert the operators when the
machine requires human intervention in order to continue with the inspection process. Users can
purchase an optional audible alarm from Nordson YESTECH or, much more economically,
connect their own alarm hardware onto the AXI system. Compatible alarms must operate from
24V DC power supplies and have a continuous tone.
To connect the alarm, locate the IOB (Assy#10072) from the back of the machine. IOB is a
square PCB about 5” by 6” in size with screw terminal connectors on the top. Connect the
negative terminal of the alarm to pin 11 or 12 (Ground) on the ST2 screw terminal connector,
and connect the positive terminal to pin 6 of ST2 (OUT2-). Then use a jumper cable to connect
pin 5 (OUT2+) to pin 1 or 2 (+24V). You may find wires that are already connected on pin
1,2,11 or 12 (Signal Ground or +24V). The alarm wire can share terminal with existing wires.
There are entries in the YesAX.ini file that you can use to customize alarm settings:
[AudiAlarm]
DelayTime=10000
OnTime=300
OffTime=300
The DelayTime is the time in milliseconds that the alarm will sound after user intervention is
requested by the software. If the operator responds within the delay time limit, then no alarm will
sound. Once the alarm begins to sound it oscillates on and off. The OnTime and OffTime set the
duration of it’s on and off time.