YesAX V3.1.2 - Software User Manual.pdf - 第89页
SMEMA Conveyor Setup 9-1 9 - SMEMA Conveyor Setup The X2/X3 Series AXI sy stem is equipped with si ngle section bi-directional conveyors with motorized width adjust. The width of the conveyor will adjust accordingly when…
8-6 Train Part without CAD data
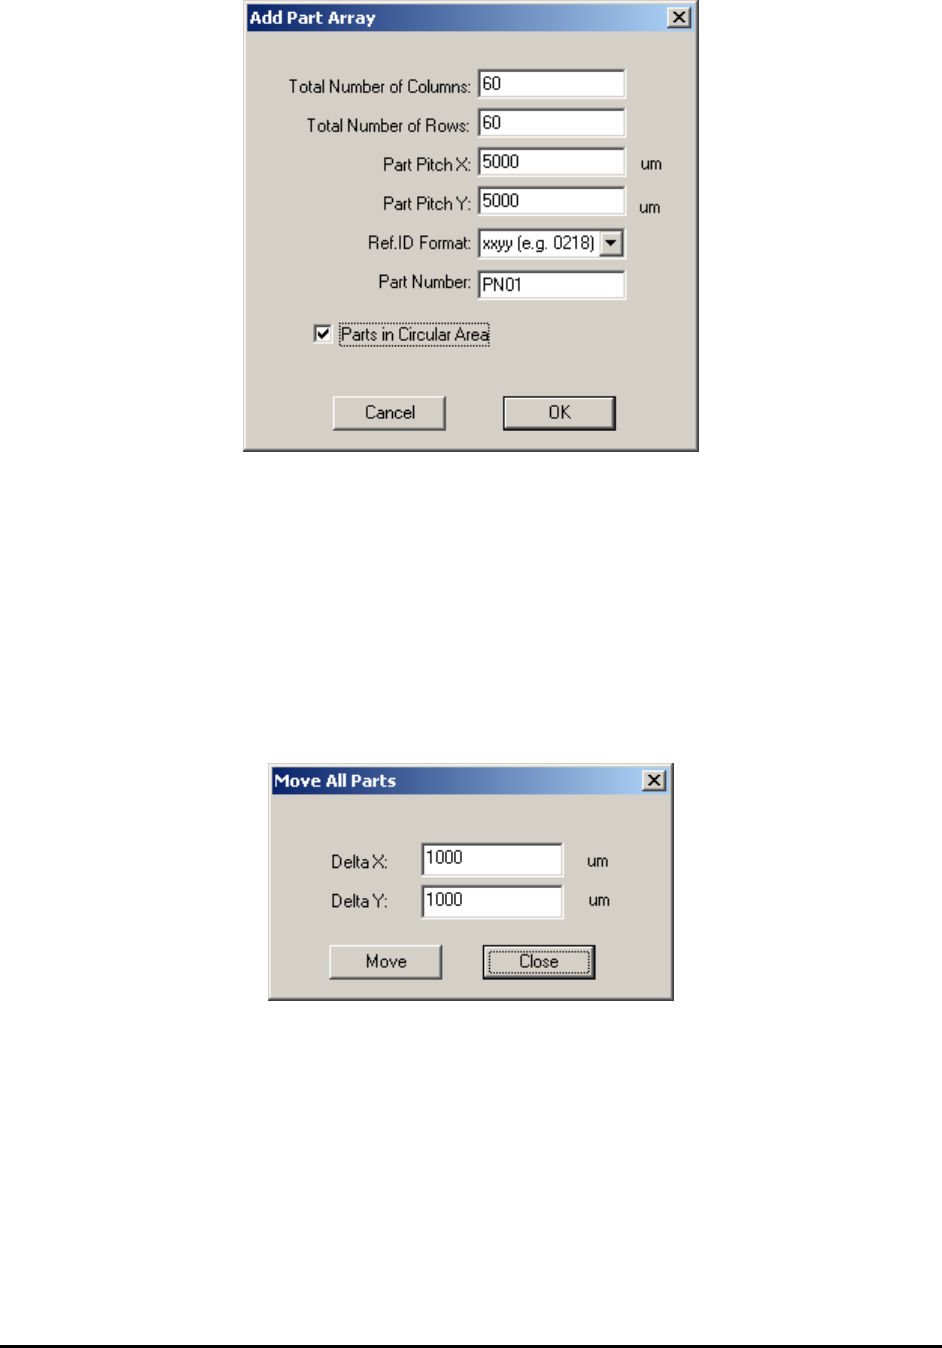
The number of columns, number of rows, pitch in X and Y direction, Ref ID format and part
number need to be specified in this dialog. The format of Ref ID is in the form of xxyy, which xx
represents column number and yy represents row number. The orders are from left to right and
from top to bottom. If all parts occupy a rectangle area, the total number of parts added will be
total number of columns multiple by total number of rows. It is ok to specify a circular area for
these parts. In this case the total number of parts added will be less than the previous case.
After creating the part array, the user may need to delete certain extra parts around the perimeter
of the area. To adjust position of part array, select File>CAD Data>Self Re-sync from the main
menu. The user can also select Edit>Move All Parts from the main menu. The Move All Parts
dialog displays.
SMEMA Conveyor Setup 9-1
9 - SMEMA Conveyor Setup
The X2/X3 Series AXI system is equipped with single section bi-directional conveyors with
motorized width adjust. The width of the conveyor will adjust accordingly when a new recipe is
loaded.
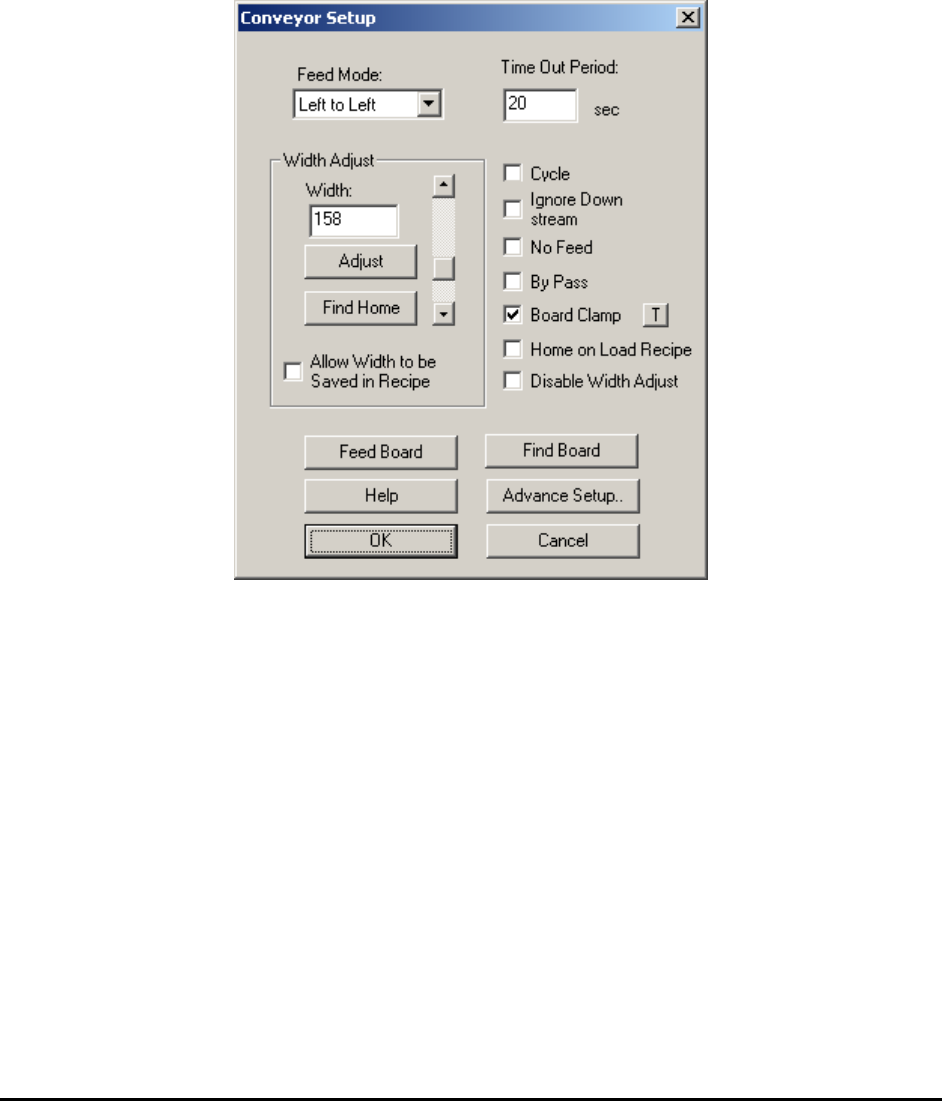
To setup the conveyor for the recipe, select System>Conveyor Setup from the Main Menu. The
Conveyor Setup dialog displays.
The Feed Mode selects the feed direction for the board in and out.
The Time Out Period sets the time that the conveyor feed motor will run without seeing a board
at the entry.
The Width Adjust group deals with the width control of the conveyor. The Find Home button
moves the conveyor width to its minimum width (approx. 50 mm). If the conveyor width is not
50mm after finding home, actual conveyor home width can be updated in the Advance Setup
dialog. The Allow Width to be Saved in Recipe checkbox if checked will save the current
conveyor width to the recipe. the conveyor will open to this width the next time the recipe is
loaded. However, the software cannot adjust the width if there is a board on the conveyor during
recipe loading. In this case, the software will defer the width adjustment until the board is
removed from the conveyor.
The Cycle checkbox is used only in trade show demonstrations. It allows the board to reverse its
feed direction once it reaches the exit so that the board can be fed in and out repeatedly.

9-2 SMEMA Conveyor Setup
The Ignore Down Stream checkbox will ignore the downstream conveyor’s SMEMA busy
single when selected.
The No Feed checkbox will prevent the board from feeding after inspection. It is needed when
you want to inspect the same board repeatedly.
The By Pass checkbox selects the bypass mode of operation. The machine will pass any board
down once it enters the system without performing any inspection.
Board Support and Board Clamp are two options that can be purchased for the AXI machine.
They are pneumatically operated. These options require a high pressure air supply at 80 PSI or
more.
The Board Support option consists of a pair of pins which come up to support the back side of a
board. Board support corrects board sag on thin and large board. The board support pins have
magnetic bases which can be positioned anywhere under the board.
The Board Clamp option consists of a pair of clamps which clamp down on the top and the
bottom edge of the board along the conveyor belt. Used with the board support, the board clamp
helps de-warp the board for a more accurate inspection.
The two small “T” buttons to the right of the Board Support and Board Clamp checkboxes are
for the user to exercise the two mechanisms.
The Home on Load Recipe checkbox will home the conveyor before adjusting to the recipe
width every time a new recipe is loaded.
The Disable Width Adjust checkbox will not allow any adjustment of conveyor width. If the
customer only has one kind of test board or all the boards have the same width, there is no need
to adjust conveyor width during normal operations.
9.1 Advance Setup
The SMEMA connectors of the machine are located on the right side of EBOX 1 which can be
seen when the back panel is open. The SMEMA connector on top is for the upstream conveyor
(previous) and the SMEMA connector below is for the downstream conveyor (next). Despite
some of the claims, not all conveyor equipment is truly SMEMA compliant. SMEMA specifies
an edge triggered signaling scheme and lots of conveyor equipment with level trigger schemes
still claim to be SMEMA compatible. The YesAX software makes its SMEMA signal
configurable to accommodate for those conveyors.