YesAX V3.1.2 - Software User Manual.pdf - 第52页
5-6 Inspect ion and Defe ct Revie w Step by Step The Update ODBC Defect Code Table button w hen pressed will update the DefectCode table in the ODBC database using on the information from the defect.ini file. The Update …

Inspection and Defect Review Step by Step 5-5
With this option selected the system will not save any images.
Save Only Images with Failed Parts
With this option selected the system will only save images of failed parts.
Create IS Board for Passing Boards
If enabled, this feature will create an IS
Save All Images
With this option selected the system will save all images. For offline defect review, save at
least the defect images.
For offline defect review, save at least the defect images.
In the Reporting group there are six checkboxes and one button.
Print Board Report
With this option selected the system will print a board report without previewing.
Preview Board Report
With this option selected the system will preview a board report onscreen before printing.
Restart
This option is only available when the Preview Board Report option is selected. If enabled,
this option allows the user to optionally restart the inspection process while previewing
defects on screen.
Electronic Board Report
With this option selected the system will create defect reports in JPEG format in the recipe’s
report folder.
Create Individual Defect Images
With this option selected the system will create images for each individual defects in the
recipe’s report folder.
SPC Data Log
With this option selected the system will create a summary report.
Enter WO and Others Button
Use to update the SPC data record with a work order number and two user definable fields.
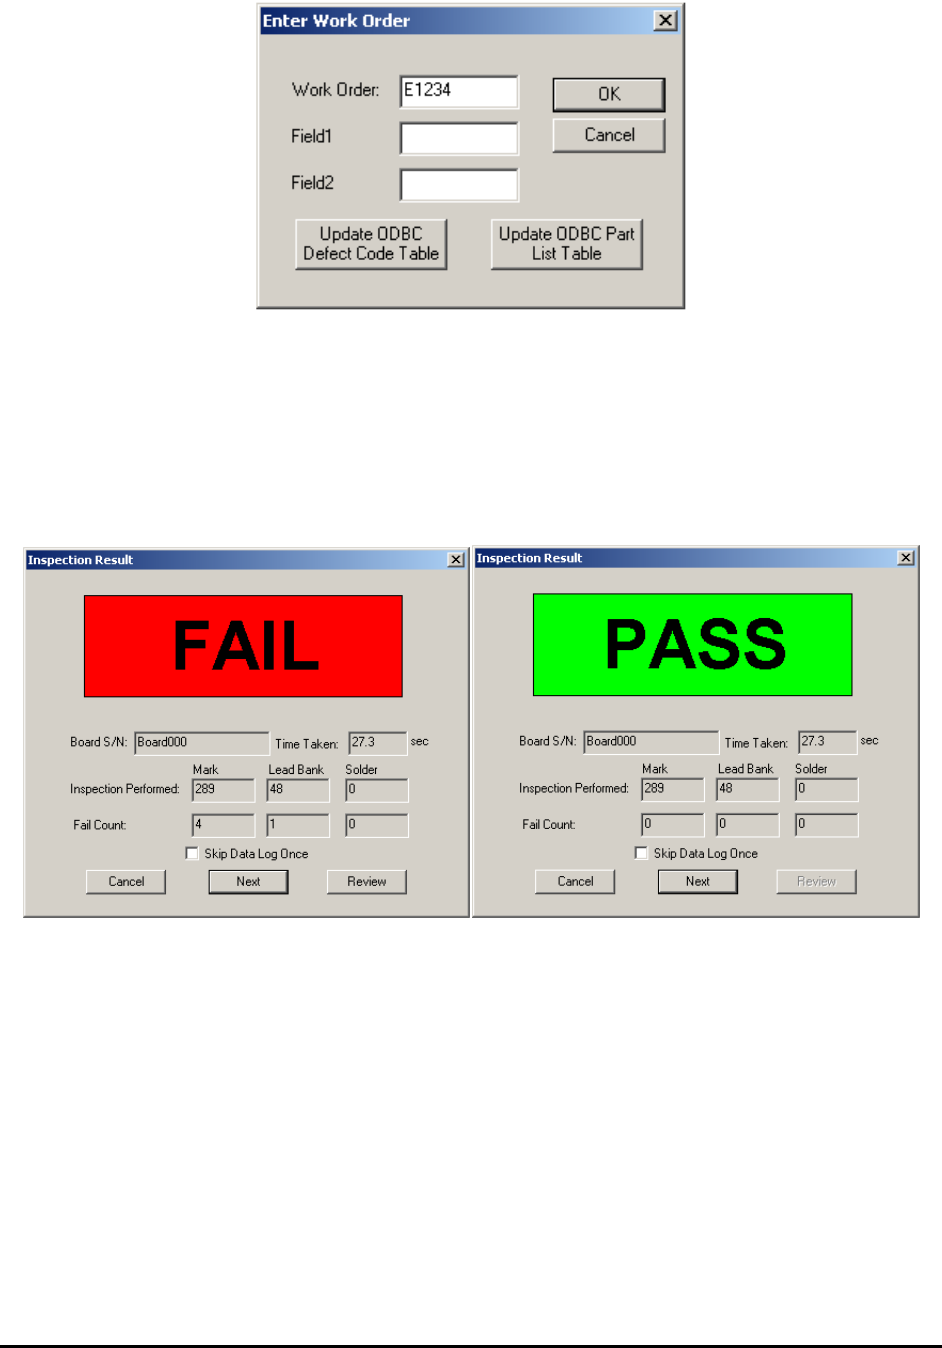
Press the Enter WO and Others button to open the Enter Work Order dialog box.
5-6 Inspection and Defect Review Step by Step
The Update ODBC Defect Code Table button when pressed will update the DefectCode table
in the ODBC database using on the information from the defect.ini file. The Update ODBC
Part List Table button creates a PartList table for the current recipe in the database.
Pressing the Ok button on the Run Inspection dialog will start the inspection process. The
process involves locating the fiducials and inspecting all the parts based on the recipe. At the end
of the inspection the Inspection Result dialog appears. Based on the inspection results the dialog
will show “Fail” or “Pass”
5.3 Step3: Review the Defect
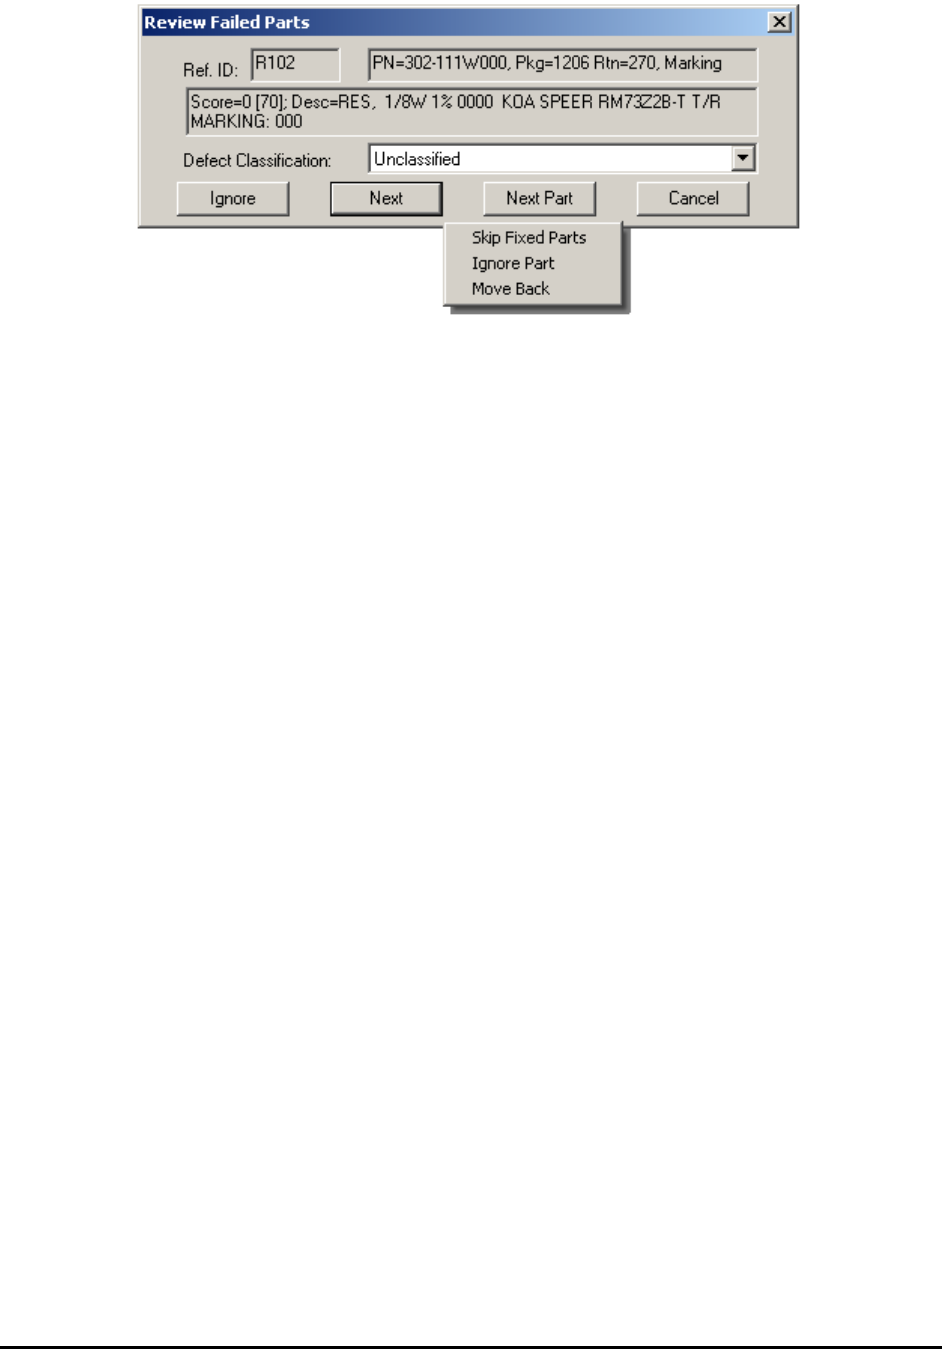
Defect review can be done online or offline. The online review process starts with pressing the
Review button in the Inspection Result dialog. The machine steps through each defect and
displays the Review Failed Parts dialog as shown below.
Inspection and Defect Review Step by Step 5-7
During defect review, verify the defect visually. If there is a true defect, classify it accordingly
using the Defect Classification drop-down list. The data in the list comes from the Defect.ini
file in the INI folder of the software. If there is NOT a true defect, in other words, a false call is
made by the machine; press the Ignore button to have it removed from the defect list.
There is a pop-up menu for less frequently used functions. To display the menu, point the mouse
inside the dialog and press the right mouse button. The pop-up has nine items. The Skip Fixed
Parts item removes parts in the review list that have been modified. The Ignore Part item
ignores parts with multiple defects with one click. The Move Back item “undoes” the Ignore or
Next button. The Ignore item ignores a defect. Have the Auto Retest Fixed item selected will
automatically re-test parts that are modified during the review process. The Ignore Block item
ignores all defects on a selected block. The Next Slice item is for 3D inspection only. It ignores
parts within the same slice and moves on to parts in next slice. The Next 3D Site item is also for
3D inspection only. It ignores parts within the same 3D site and moves on to parts in next 3D site.
The Pause Review item pause the current review process. If the same image set was selected and
being reviewed again, the user can select to review the defect from where it was paused during
last review, instead of review from the beginning of the defect list.
You can also log the false calls. Select Vision>Recipe Option from the Main Menu. Select the
Log False Call checkbox in the Recipe Options dialog. When Log False Call is selected, the
Ignore Part button will change to a False Call button. Pressing the False Call button classifies
the defects as false calls and leaves them in the defect list. The Index specifies the classification
linked to the False Call button. For example, if the false call classification is in line 12 in the
defect.ini then the Index should be set to 12. The total number of false calls on the board is
reported in the defect report.