YesAX V3.1.2 - Software User Manual.pdf - 第240页
21 -2 Image Set and Image A rchive On this tab the name of the Image Set is listed on the left, followe d by IS Flag. IS Flag may be one or more of the following letters : I Inspection Path I mage Set G Grid Image Set A …
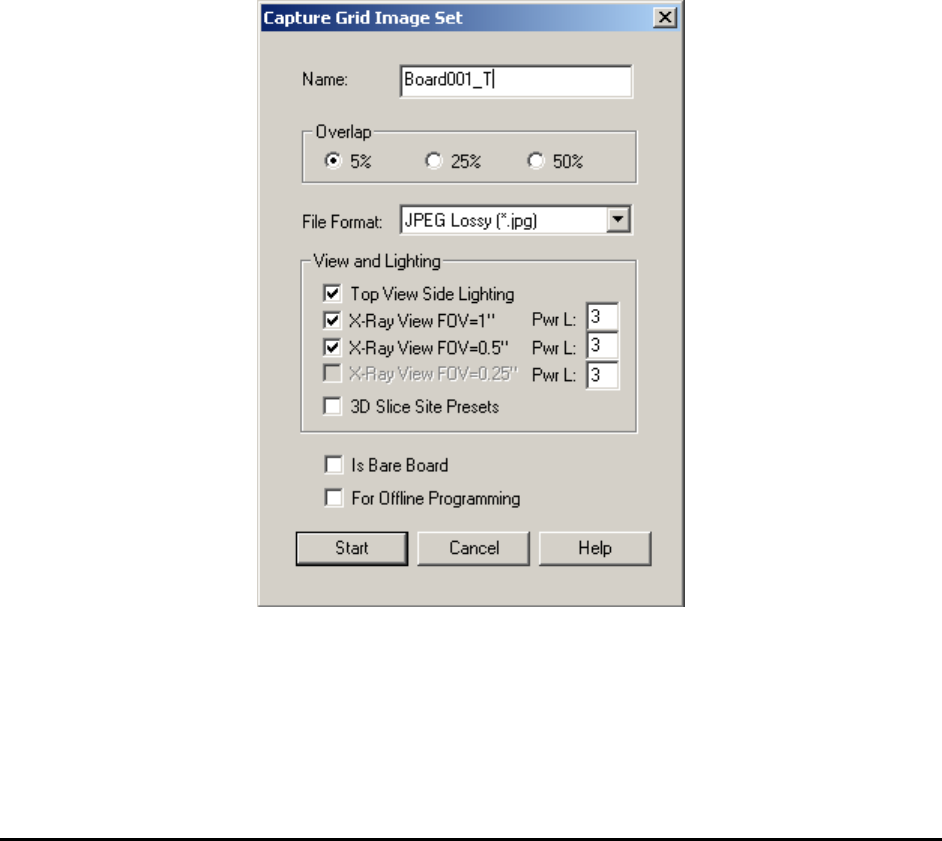
Image Set and Image Archive 21-1
21 - Image Set and Image Archive
The Image Set is a collection of images captured from one particular board. It is like an
electronic copy of the board. The software can run an inspection on the Image Set of the board
as if it were running a live mode inspection. The Image Archive is a collection of Image Sets
organized according to the inspection recipe. Offline programming and offline defect review
features are made possible by using Image Sets.
YesAX supports five image formats for an Image Set: TIFF, bitmap, JPEG, JPEG 2000 and Raw
Bayer. An Image Set can be captured in 2 ways; grid or inspection paths. The Grid Image Set is
captured by moving the camera in a grid pattern over the board. Inspection path Image Set is
captured during board inspection by selecting one of the Image Archive options in the Run
Inspection dialog. Comparatively, the Grid Image set captures more information of the board and
it can be captured before the creation of the inspection recipe. The disadvantage of the Grid
Image Set is that it is larger and takes more time to capture.
To capture the Grid Image Set, select Image Set>Capture Image Set from the File menu. The
Capture Grid Image Set dialog displays.
Select an overlap value, image file format, camera view and lighting for the Image Set to be
captured. For X3 AXI systems, if there are 3D sites defined for the current recipe, you can also
enable the 3D Slice Site Presets option and capture a full image set for all 3D sites.
When an inspection recipe is loaded, its associated Image Set is listed in the Image Archive
window of the List View.

21-2 Image Set and Image Archive
On this tab the name of the Image Set is listed on the left, followed by IS Flag. IS Flag may be
one or more of the following letters:
I
Inspection Path Image Set
G
Grid Image Set
A
Full Image Set
D
Defect Only Image Set
RV
The Image Set had been reviewed.
RW
The Image Set had been reworked.
RD
The Image Set had been reviewed and a real defect is found on it.
Double clicking on the selected Image Set will load it into program memory.
This page also has a pop-up menu which will display when the user clicks the right mouse button
inside the Image Archive window (see 21.6 Pop-up Menu for Image Archive).
21.1 Offline Programming
The offline software (PN: AXI-OLS) is a software option that AXI users can purchase separately
at an additional cost. The software can perform three main functions: offline programming (i.e.
offline inspection recipe creation), offline defect review, and defective board rework. AXI-OLS
can be installed on any computer running Windows 2000 or XP. This section describes the
offline programming feature. Offline review and rework is documented in the next section.
You can create inspection recipes offline from an Image set captured on an X2/X3 AXI system.
Programming offline allows the AXI machine to continue with inspection work, which
eliminates delays in the manufacturing process. It also allows the user to create inspection
recipes in the comfort of his or her office.

Image Set and Image Archive 21-3
Installing the offline software:
1. Install the Rainbow key driver.
The setup program can be found in the Rainbow folder on the YesAX delivery CD. The
name of the setup program is SSD5411-32bits.exe
2. Install Matrox Imaging library.
The setup program (install.bat) can be found in the Matrox folder on the YesAX
delivery CD.
3. Install the YesAX software.
The setup program can be found in the YesAX Vx.x Setup folder on the YesAX delivery
CD.
4. Plug the software protection key into a free USB port.
5. Rename the Offline.ini file to YesAX.ini, found in the folder C:\Program Files\Aoi\ini.
(There may be a YesAX.ini already in the folder. Please overwrite it.)
Setup the network environment:
Offline software must be connected to the host AXI machine via a fast Ethernet connection (100
base T is the minimal requirement). The AOI_Data folder on the AXI machine and the offline
computer should be shared as AOI_Data and allow full access between them. All AXI machines
and offline computers on the network should share a single LTMaxNum.txt file. This file
regulates the template number for all stations which prevents cross contamination of templates.
Offline programming process:
The process of creating inspection recipes offline starts on the AXI machine just like normal
(online) recipe creation. Select File>New Recipe from the main menu to launch the Create New
Inspection Recipe dialog. Carry out the steps for defining board size. When it comes to capturing
the image set, click the For Offline Programming checkbox on the dialog.
The second part of the offline programming process involves the offline software. On the offline
computer’s YesAX software, select File>Load Recipe, then browse the network and open the
empty recipe created on the AXI machine. The Image Set should load automatically. If not,
double click and load it from the Image Archive. Define alignment marks, unless the fiducials
are included in the CAD data, by selecting Vision>Define Alignment Marks from the main
menu. Press the Align button once to make sure the image set can align properly. Then select
File>Import CAD from the main menu to create the recipe.
21.2 Offline Review
Defect review and classification can be time consuming. Reviewing online consumes valuable
machine time that can be used for uninterrupted automated inspection. Offline software allows
defect review to be carried out on another computer either downstream of the AXI machine or
completely offline (provided the board is serialized). Before using the offline review and rework
feature, make sure the defect classification code is the same on all machines and offline stations.
This means the Defect.ini file must be the same on all the stations. The Defect.ini file can be
found in the folder C:\Program Files\AOI\ini.