YesAX V3.1.2 - Software User Manual.pdf - 第99页
General Inspecti on Methodolo gy 10 -5 If Manu al Verify is checked the part is reviewed regardless of the test result. That means the mark will always appear in the review list. Review Zoom selects the preferred zoom le…
10-4 General Inspection Methodology
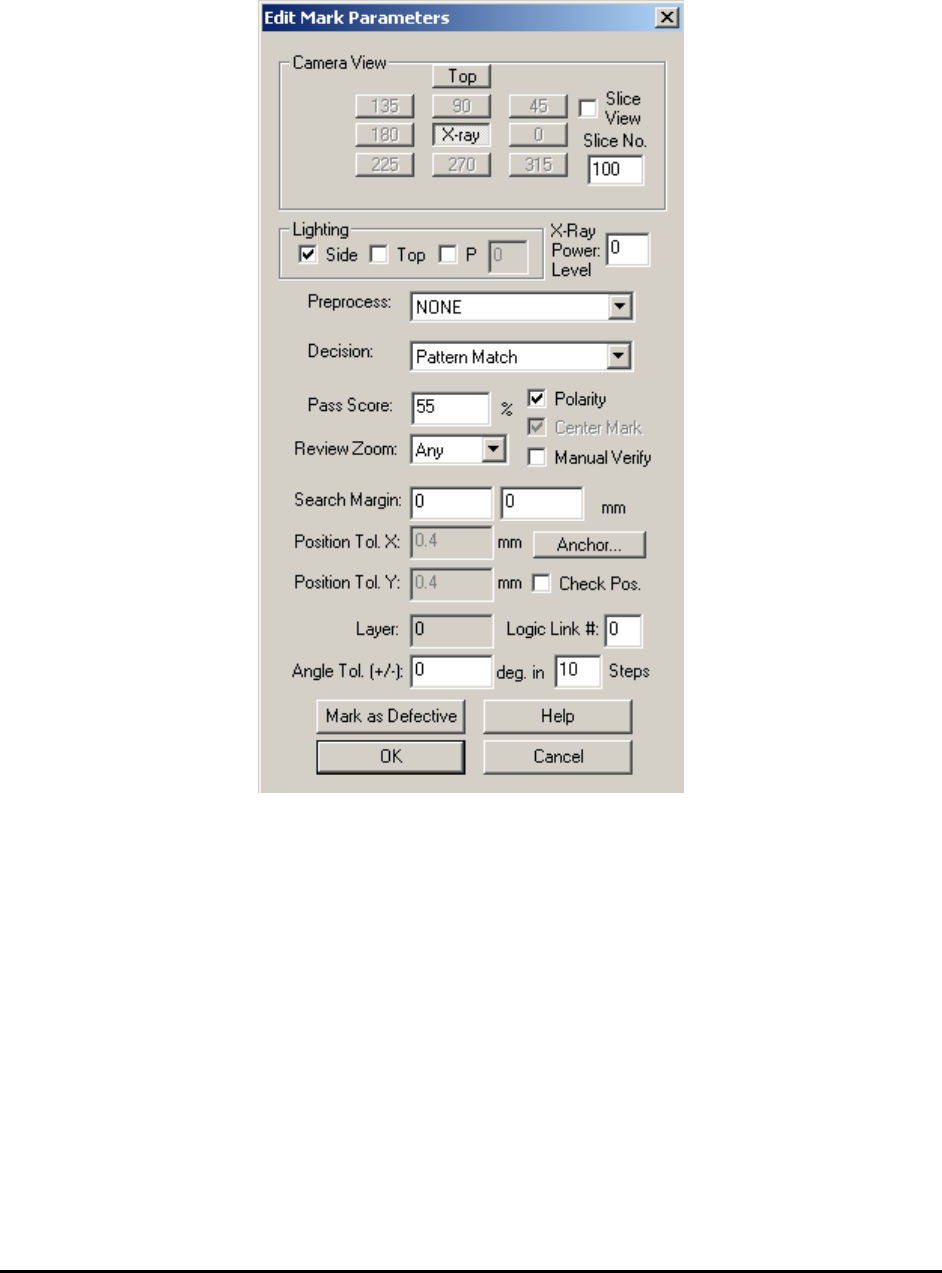
10.2.1 Edit Mark Parameters
Select Edit Mark Params from the Mark pop-up menu to open the Edit Mark Parameters dialog.
The Camera View group selects the view of the inspection. For 2D X-ray inspection, the Slice
View box must be unchecked and the Slice No. field doesn’t matter. For 3D inspection, the Slice
View box must be checked for slice view images and Slice No. must be specified.
The Lighting group selects the lighting. For X-ray views please select Side Light only.
The X-Ray Power Level field specifies the power level used for current inspection.
The PreProcess pull-down lists the available preprocessing algorithms and the Decision pull-
down lists the decision algorithms.
The Pass Score field, Polarity and Center Mark checkboxes and Search Margin field
parameters apply only to the Pattern Match algorithm. The Pass Score sets the sensitivity of the
acceptance. 100% means a perfect match. Acceptable pass scores for part inspection are between
40 to 80%. If Polarity is unchecked the software will accept images that are rotated 180 degrees
from the original image template. If Center Mark is checked the mark inspection box is always
at the center of the part.
General Inspection Methodology 10-5
If Manual Verify is checked the part is reviewed regardless of the test result. That means the
mark will always appear in the review list.
Review Zoom selects the preferred zoom level for reviewing.
The Search Margin indicates a margin around the template’s original position that the software
will search for a match. If Check Pos. is checked, the software will also verify the position of the
mark after it has been found. Position Tol. X and Position Tol. Y set the position tolerance of
the mark inspection. The Anchor button launches the Anchor Setup dialog. Any marking can be
used to anchor other inspection boxes. Refer to section 14.4 for details on using anchors. The
Mark as Defective button manually forces the inspection state to be set to Fail.
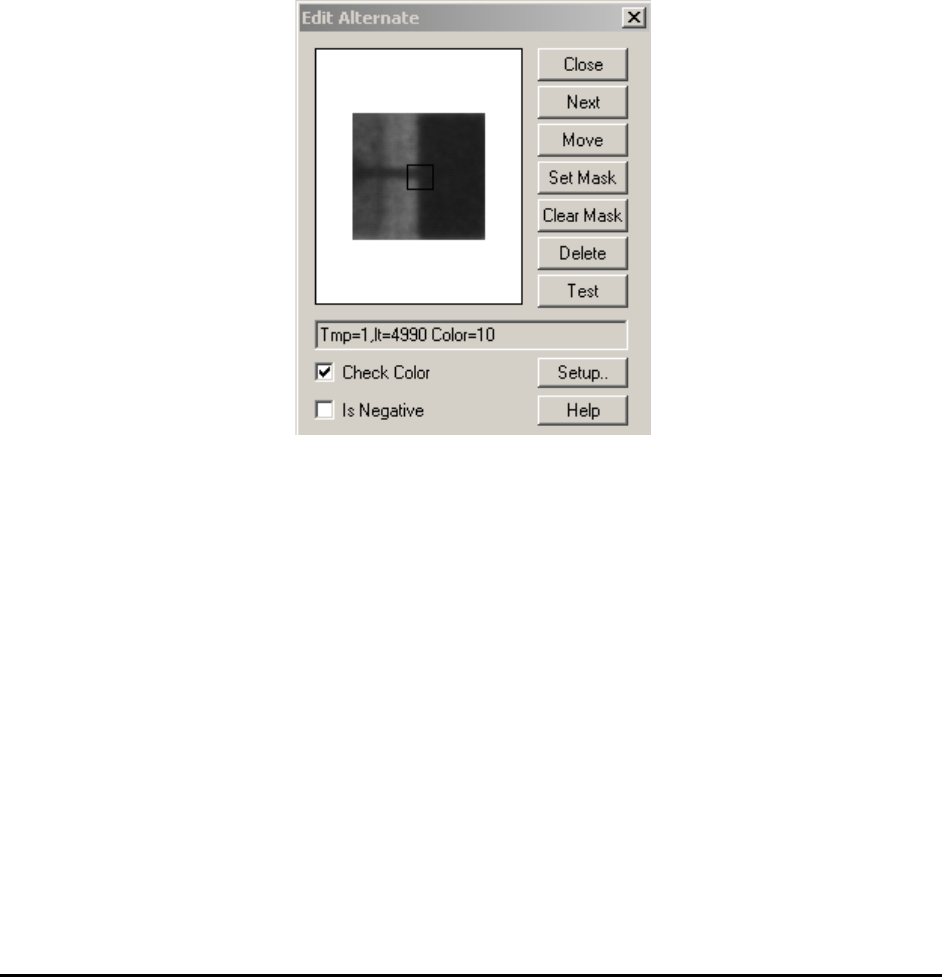
10.2.2 Edit Alternate
Select Edit Alternate from the Mark pop-up menu to open the Edit Alternate dialog.
The Next button displays the next template in the list.
The Set Mask button starts the process that allows the user to create a “Don’t Care” mask on the
template.
The Clear Mask button clears the “Don’t Care” mask off the template.
The Delete button deletes the current template from the list.
The Test button conducts a pattern matching test using the current template on the current image.
The template matching function is performed in gray scale. The Check Color checkbox enables
or disables the color check function for the center of the template.
The Is Negative checkbox is for making the template a negative template. A negative template is
a template of a defect. During inspection it must score lower than any positive templates for the
inspection to pass, regardless of what the Pass Score is set to. It is used to detect defective parts
which look very close to the good parts.
10-6 General Inspection Methodology
The Setup button launches the Template Color Check Parameters dialog.
The Sync Chk Color button updates the state of the Check Color checkbox to all the alternate
templates. The Sync Tolerance button updates the tolerances (center color and tolerance, percent,
and gray level and tolerance) of all the alternate templates to that of the current template.
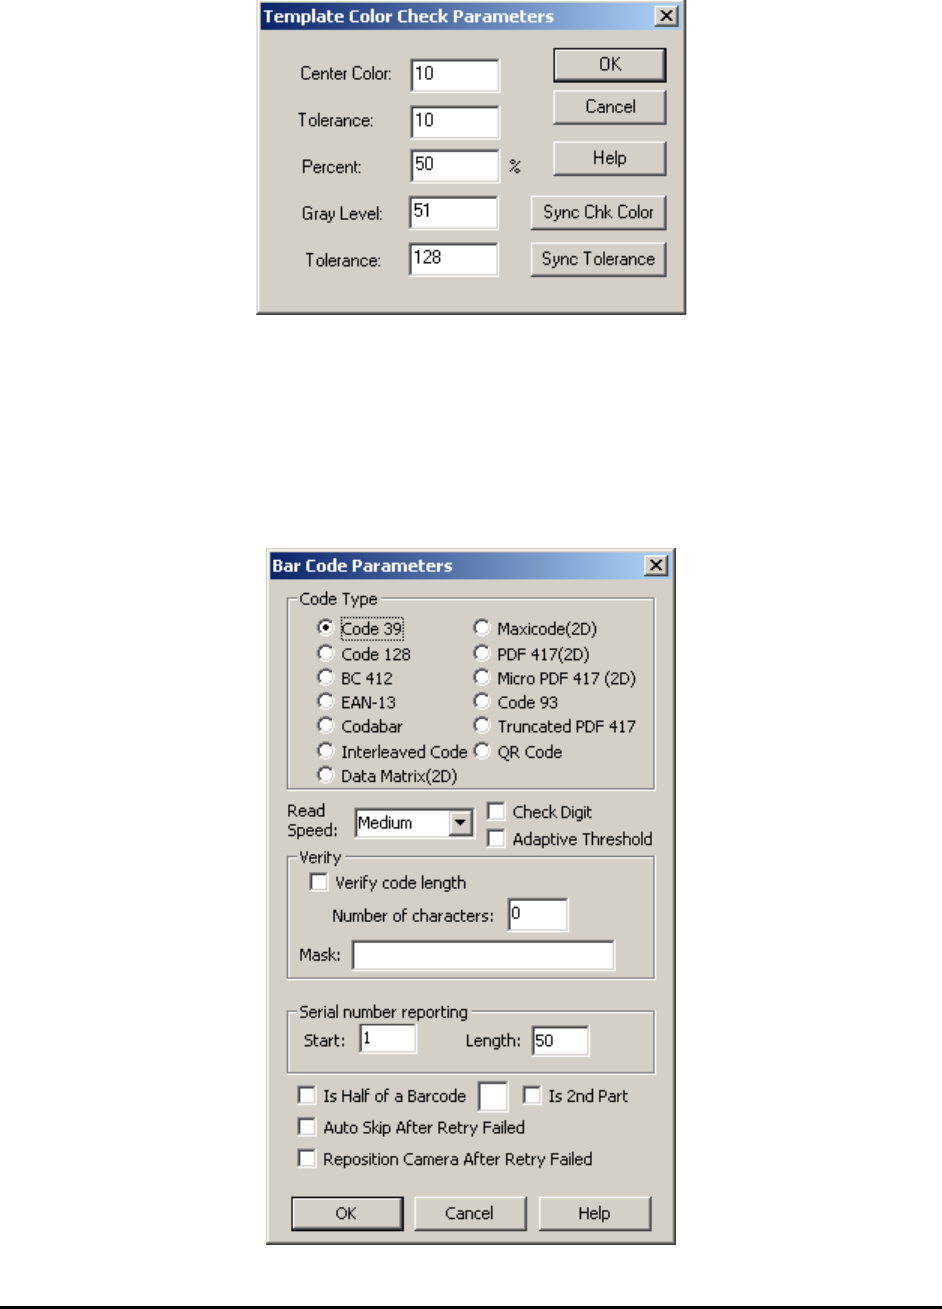
10.2.3 Bar Code Parameters
Available only when Bar Code is selected as the decision algorithm menu item.
Select Bar Code Params.. from the Mark pop-up menu to open the Bar Code Parameters dialog.