YesAX V3.1.2 - Software User Manual.pdf - 第88页
8-6 Tra in Part without CA D data The number of columns, number of rows, pitch in X and Y direction, Ref ID format a nd part number need to be specified in this dialog. The format of Ref ID is in the form of xxyy , which…
Train Part without CAD data 8-5
The Quick Marking Check function is similar to the Auto repeat function in operation. It allows
you to quickly add template matching inspections without worrying about the part numbers or
reference IDs of the inspection. It also allows an inspection region to be set simply by drawing a
box on the screen.
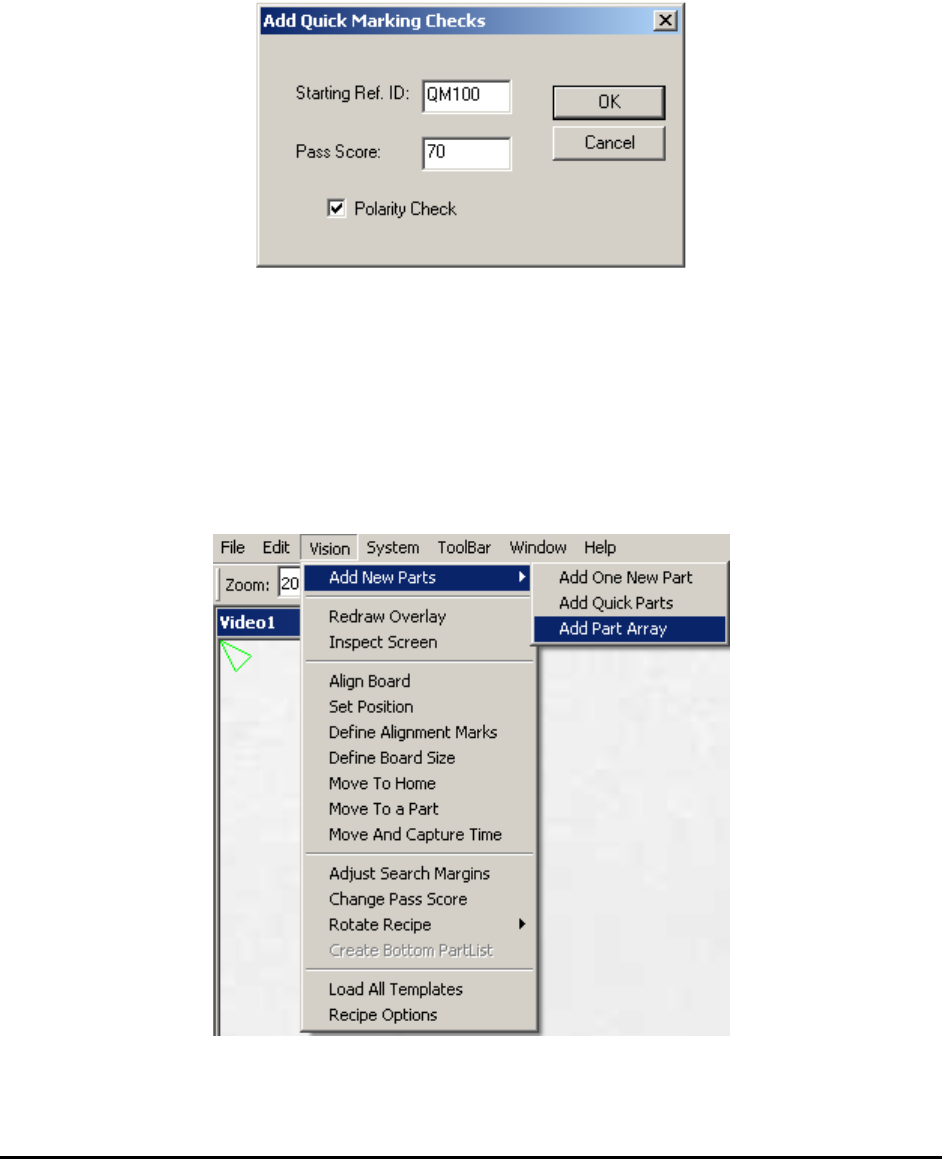
To start the Quick Marking Check function, select Vision>Add New Parts>Add Quick Parts
from the toolbar. The Add Quick Marking Checks dialog displays.
Enter the starting Reference ID, Pass Score and Polarity attribute.
Just like the auto repeat function, the Quick Mark Check function is repeated by pressing the
right mouse button.
8.4 Add Part Array
If parts of same kind are evenly located in an array, either in rectangle or circular area, it is
possible to add these parts all together by using the Add Part Array function. To start, select
Vision>Add New Parts>Add Part Array from the main menu.
The Add Part Array dialog displays.
8-6 Train Part without CAD data
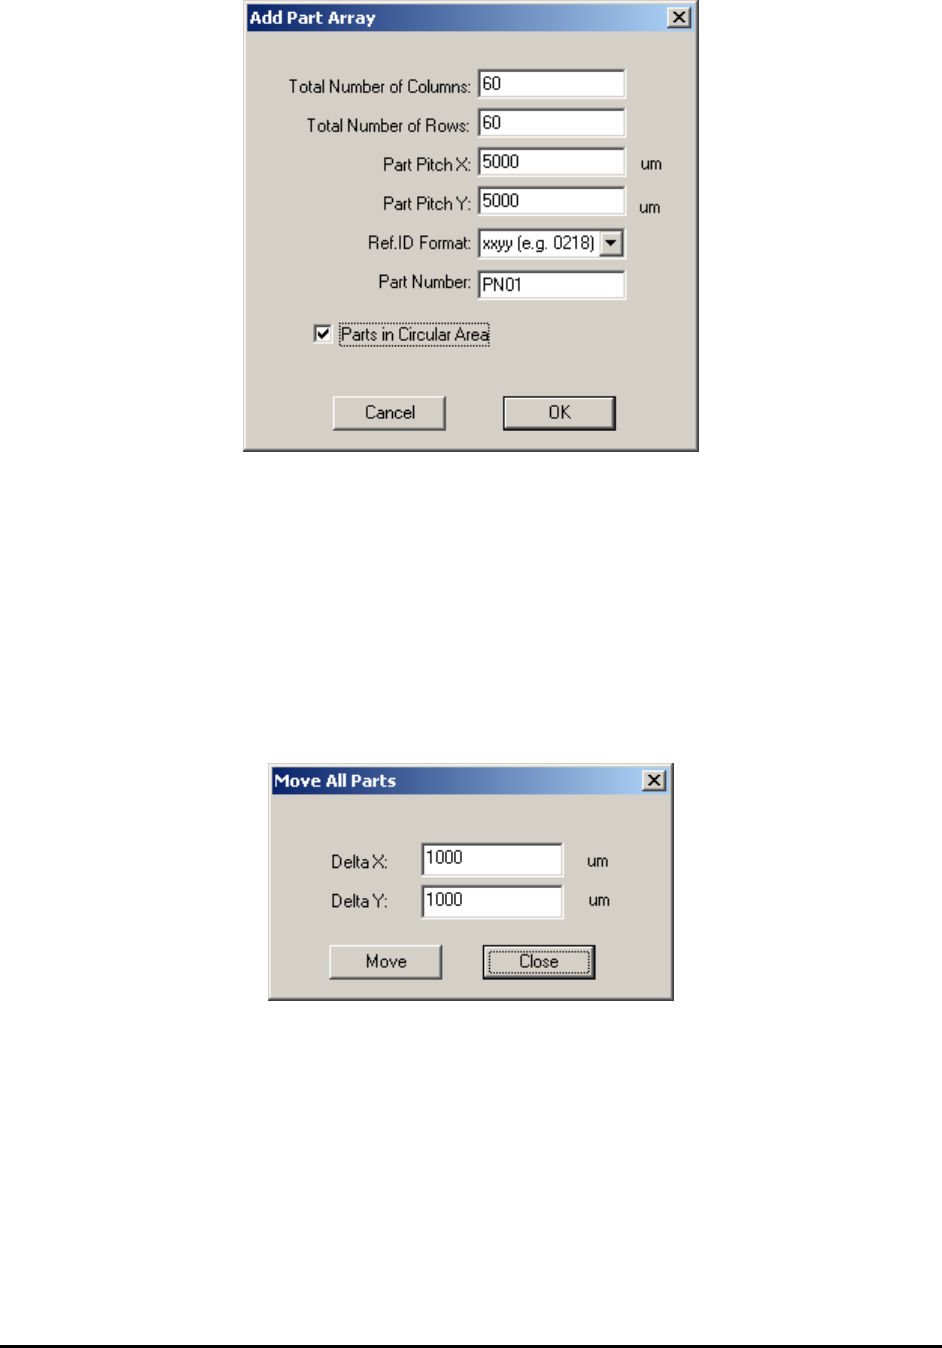
The number of columns, number of rows, pitch in X and Y direction, Ref ID format and part
number need to be specified in this dialog. The format of Ref ID is in the form of xxyy, which xx
represents column number and yy represents row number. The orders are from left to right and
from top to bottom. If all parts occupy a rectangle area, the total number of parts added will be
total number of columns multiple by total number of rows. It is ok to specify a circular area for
these parts. In this case the total number of parts added will be less than the previous case.
After creating the part array, the user may need to delete certain extra parts around the perimeter
of the area. To adjust position of part array, select File>CAD Data>Self Re-sync from the main
menu. The user can also select Edit>Move All Parts from the main menu. The Move All Parts
dialog displays.
SMEMA Conveyor Setup 9-1
9 - SMEMA Conveyor Setup
The X2/X3 Series AXI system is equipped with single section bi-directional conveyors with
motorized width adjust. The width of the conveyor will adjust accordingly when a new recipe is
loaded.
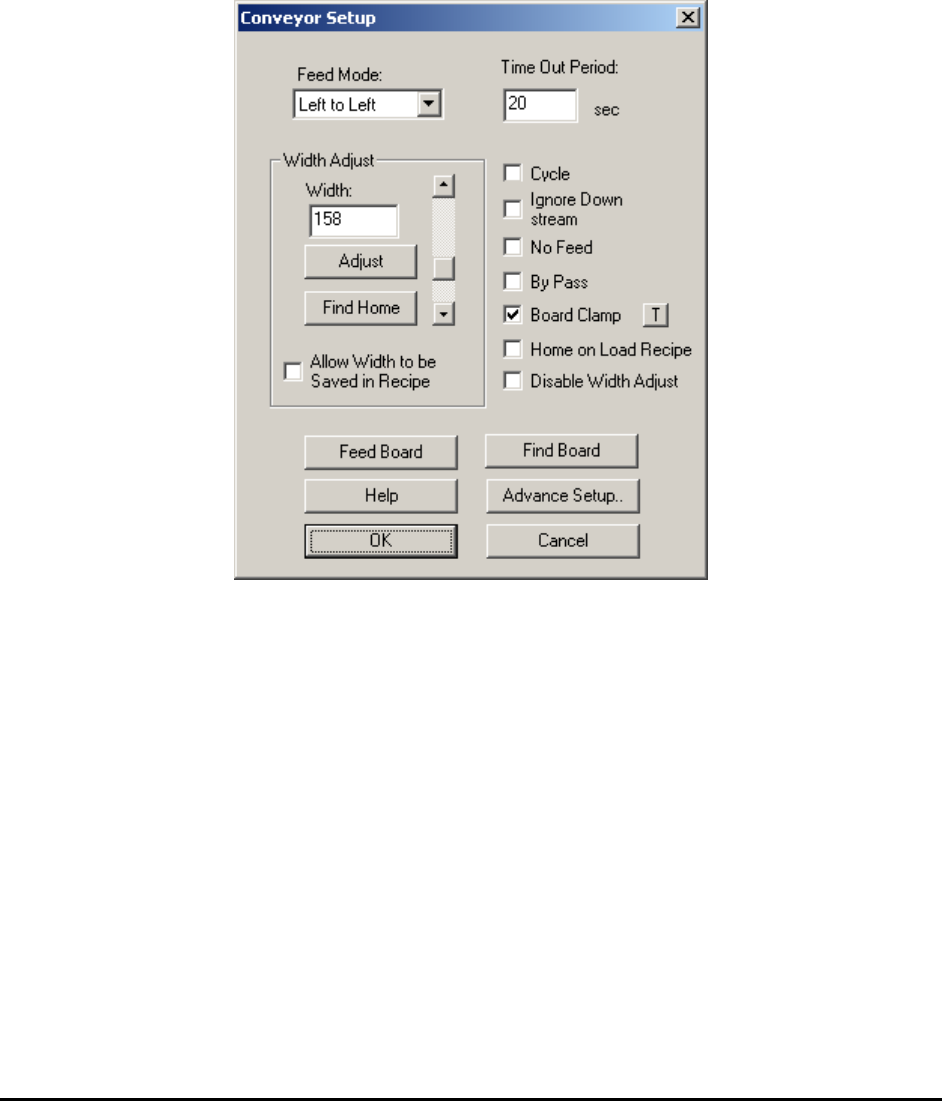
To setup the conveyor for the recipe, select System>Conveyor Setup from the Main Menu. The
Conveyor Setup dialog displays.
The Feed Mode selects the feed direction for the board in and out.
The Time Out Period sets the time that the conveyor feed motor will run without seeing a board
at the entry.
The Width Adjust group deals with the width control of the conveyor. The Find Home button
moves the conveyor width to its minimum width (approx. 50 mm). If the conveyor width is not
50mm after finding home, actual conveyor home width can be updated in the Advance Setup
dialog. The Allow Width to be Saved in Recipe checkbox if checked will save the current
conveyor width to the recipe. the conveyor will open to this width the next time the recipe is
loaded. However, the software cannot adjust the width if there is a board on the conveyor during
recipe loading. In this case, the software will defer the width adjustment until the board is
removed from the conveyor.
The Cycle checkbox is used only in trade show demonstrations. It allows the board to reverse its
feed direction once it reaches the exit so that the board can be fed in and out repeatedly.