CP-6-series Mechanical Reference.pdf - 第254页
2.1 Adjustment of the Carrier Confirmation Sensors W arning Turn off the 200 V servo power before carrying out this work. 1. First, release the air in the pneumatic cylinder. 2. Raise the slider, and hold it in place at …
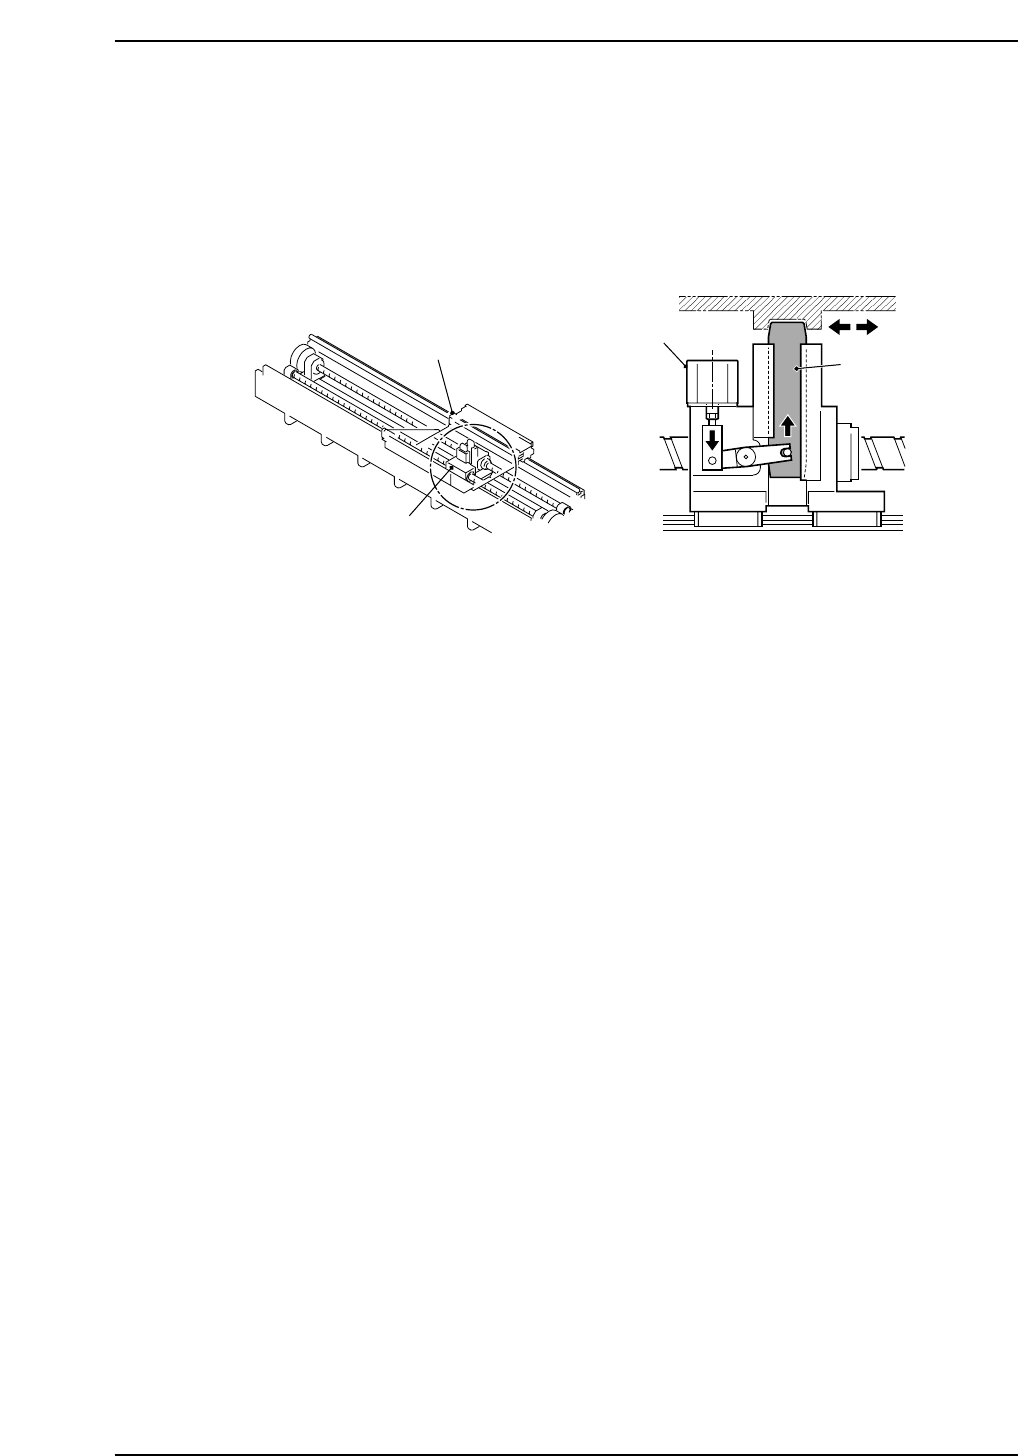
2. D-Axis Carrier
As shown in the figure below, a slider on the carrier moves up and down, driven by a
pneumatic cylinder. This slider clamps a tapered groove on the bottom of the pallet, and
so the pallet is transported as the carrier moves.
Pallet
Slider
Carrier
Pneumatic cylinder
Pallet bottom
CP6M9002
Part 8 Chapter 2 D-Axis Carrier
Edition 1.0 8-2-1 CP-6-series Mechanical Reference
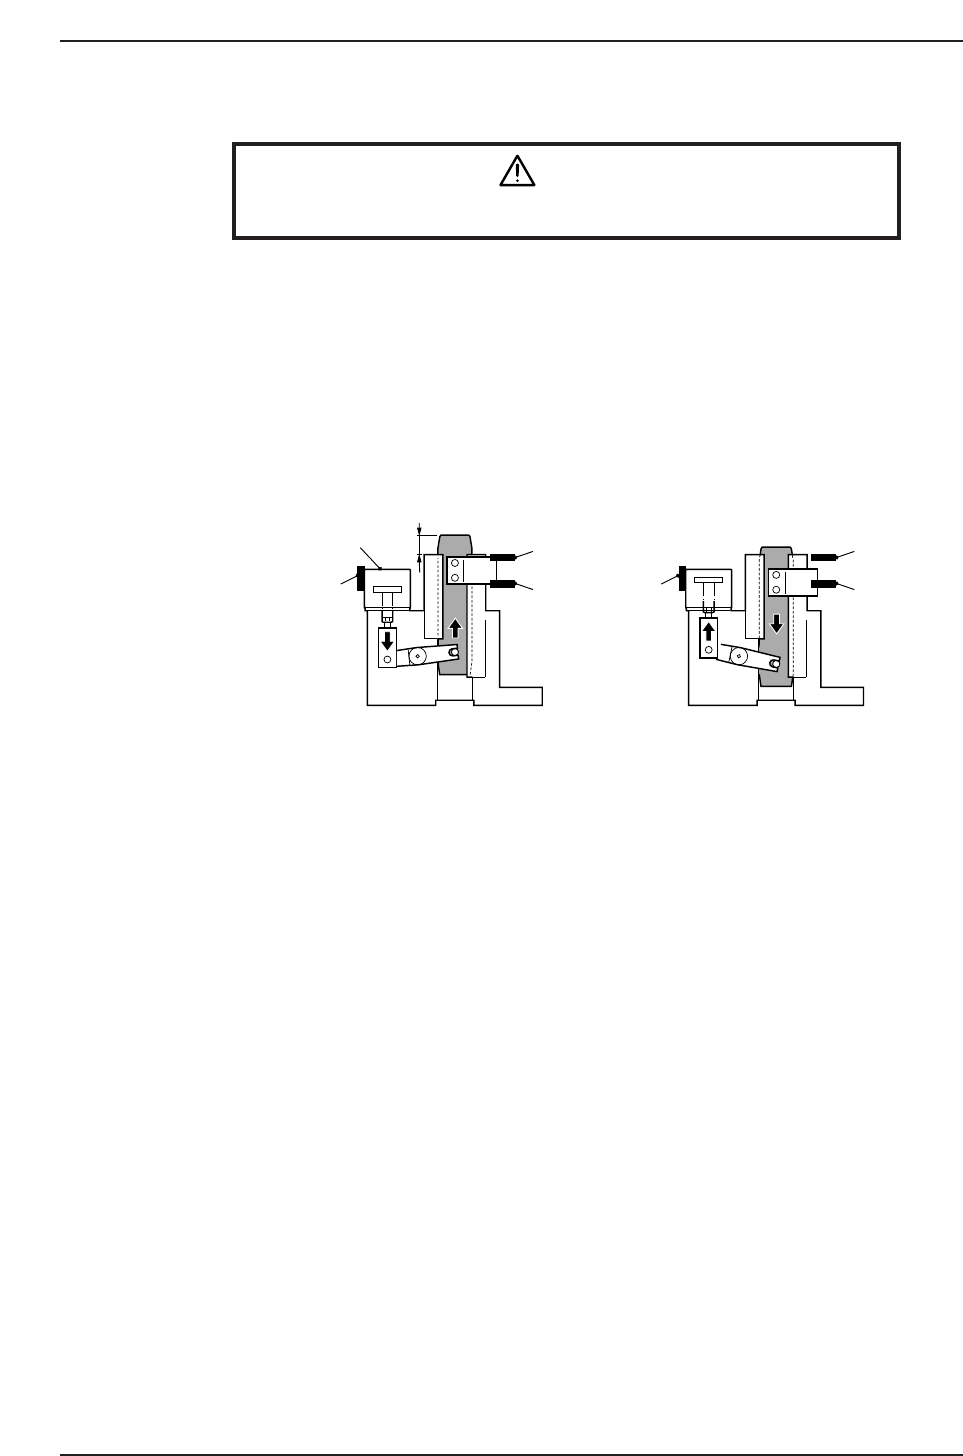
2.1 Adjustment of the Carrier Confirmation Sensors
Warning
Turn off the 200 V servo power before carrying out this work.
1. First, release the air in the pneumatic cylinder.
2. Raise the slider, and hold it in place at a position 21.0 mm ±1.0 mm from the
upper surface of the bracket for the carrier.
3. Adjust the position of the carrier "ON" sensor and the carrier confirmation sensor,
and secure them in place at respective locations where each is actuated.
4. Next, check the position of the sensor at the lowest position of the slider. Make
sure the carrier "OFF" sensor is switched on and the carrier "ON" sensor is
switched "OFF".
1 (ON)
2 (ON)
3
(OFF)
1 (OFF)
2 (ON)
3
(ON)
21.0 mm ±1.0
1. Carrier "ON" sensor (X058)
2. Carrier confirmation sensor (X05A)
3. Carrier "OFF" sensor (X058)
Pneumatic cylinder
Lowest position of the slider
CP6M9003
Part 8 Chapter 2 D-Axis Carrier
Edition 1.0 8-2-2 CP-6-series Mechanical Reference
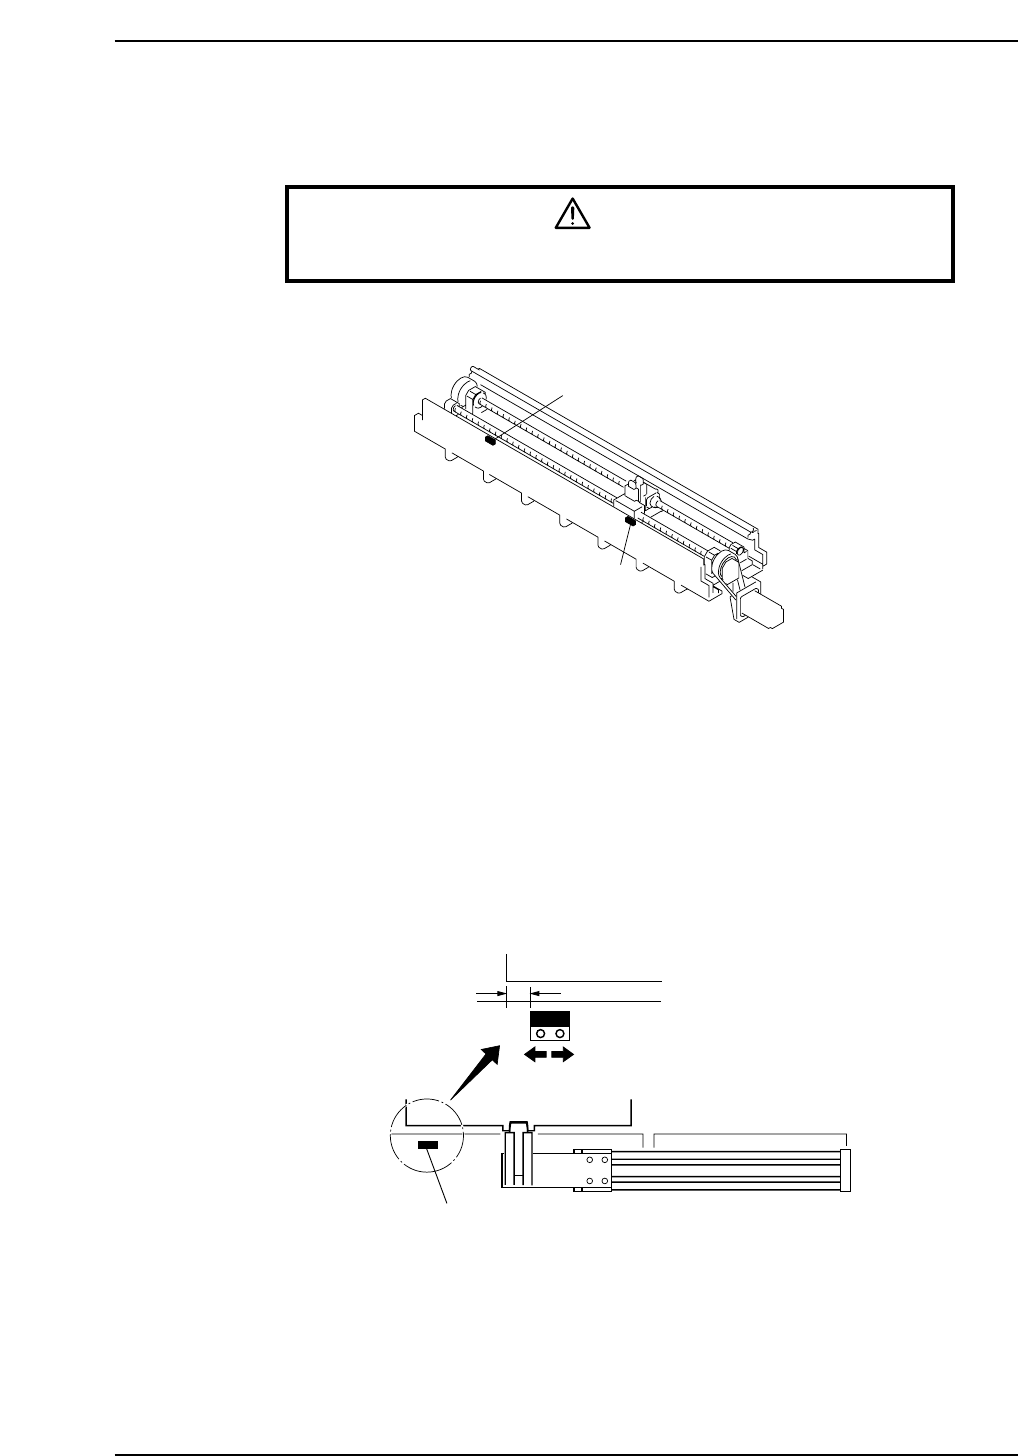
2.2 Adjustment of the Pallet-position Confirmation
Sensors
Warning
Turn off the 200 V servo power before carrying out this work.
Pallet-position confirmation sensors are located on the in-side and the out-side.
In Pallet-position Confirmation Sensor
1. Move a pallet to the pallet IN-position.
The pallet IN-position is the fully advanced end of the pallet feed cylinder in setup
station in-side.
2. As shown in the figure below, align the sensor at a position 10 mm inward from
the edge of the pallet and secure it in place.
3. Adjust the sensor amp dial to "MIN."
Out Pallet-position Confirmation Sensor
Adjust in the same way as for the in pallet-position confirmation sensor.
10 mm
In pallet-position confirmation sensor
Pallet
CP6M9005
In pallet-position confirmation sensor
Out pallet-position confirmation sensor
CP6M9004
Part 8 Chapter 2 D-Axis Carrier
Edition 1.0 8-2-3 CP-6-series Mechanical Reference