X7056_Operating manual_en.pdf - 第107页
Installation First use 107 Inspection system X7056 | Operating manual | Version 3.1 Rev.006| 2016-01-06 | 30.009.1930a 3. Click D RIVE S: > D ATA > W ORK . The VPC files of the verifi cation station are in the W …
Installation
First use
106
Inspection system X7056 | Operating manual |
Version 3.1 Rev.006| 2016-01-06 | 30.009.1930a
Perform the following work steps:
1. Open the Windows Explorer on the inspection system.
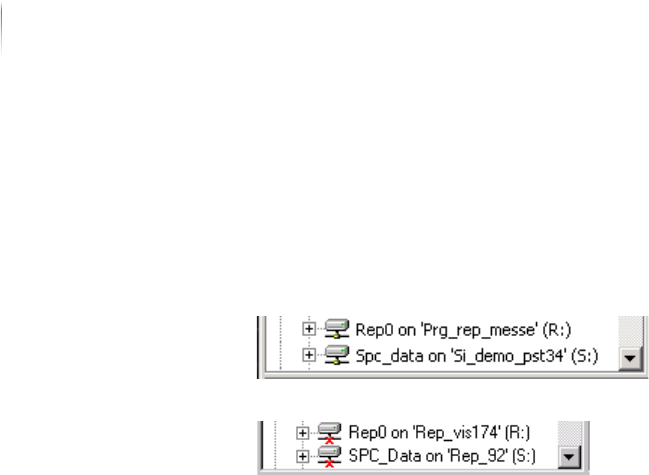
2. Check if the drives R: (verification station)/ S: (SPC server) are
connected.
The drives are connected.
The drives are not connected.
? The verification station/SPC server are connected and switched
on.
Switch on verification station/SPC-server.
Doubleclick drive R:/S: in Windows Explorer.
The network connections are checked.
Checking the data transfer to the verification station
Perform the following work steps:
1. Start the Viscom software, see „Starting the Viscom software“
(Page 155).
2. Select an inspection plan, see „Choosing an inspection
program“ (Page 156).
3. Start automatic operation, see „Starting PCB inspection“ (Page
156).
The PCB is automatically infed, inspected, and outfed.
4. Open the Windows Explorer on the inspection system.
5. Click D
RIVE R: > DATA > WORK.
The inspection system .res files are in the WORK directory.
The data transfer to the verification station is checked.
Checking the data transfer to the SPC server
Perform the following work steps:
1. Repeat steps 1 to 3.
2. Classify the found defects at the verification station.

Installation
First use
107
Inspection system X7056 | Operating manual |
Version 3.1 Rev.006| 2016-01-06 | 30.009.1930a
3. Click DRIVE S: > DATA > WORK.
The VPC files of the verification station are in the WORK direc-
tory.
The data transfer to the SPC server is checked.

Installation
First use
108
Inspection system X7056 | Operating manual |
Version 3.1 Rev.006| 2016-01-06 | 30.009.1930a