1OM-1075-002.pdf - 第105页
AHB01EOPP (5) Press the [SUPERVISER], the [OPERA T OR #1], or the [OPERA- TOR #2] button according to the given authority . The "Password Entry" window opens. When a password is already set, the "Password …
AHB01EOPP
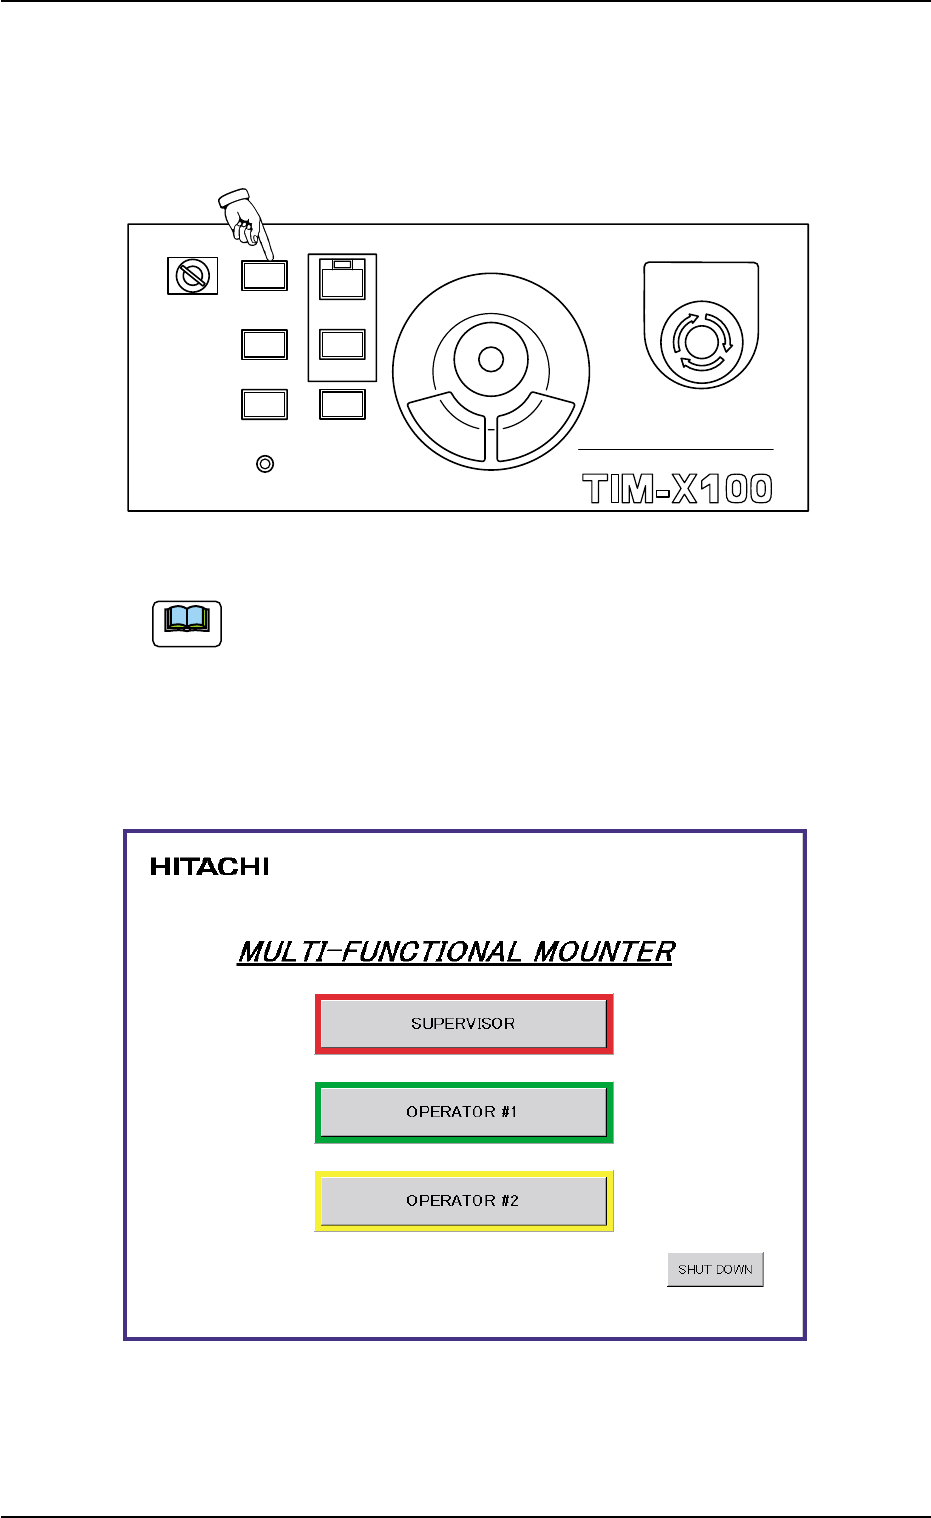
(4) Hold down the [POWER ON] button on the operation panel for more
than 1 second.
The lamp of the [POWER ON] button illuminates in red and the self-
diagnostics function starts.
Fig. 1C7
It takes 2 to 3 minutes until the self-diagnostics operation is
completed. Please wait for a while.
When the self-diagnostics operation is completed, the lamp of the
[POWER ON] button changes in yellow and "Login Type Selection" win-
dow appears on the touch screen.
Fig. 1C8
1.2 Preparation before Operation
Note
0308-003 3-6
MULTI FUNCTIONAL MOUNTER
STOP
LOCK
OPERATION
RUN SETUP
START
ENABLE
PNL CHANGE
READY
POWER ON
EMERGENCY

AHB01EOPP
(5) Press the [SUPERVISER], the [OPERATOR #1], or the [OPERA-
TOR #2] button according to the given authority.
The "Password Entry" window opens.
When a password is already set, the "Password Entry" window
opens.
Fig. 1C9
This machine is provided with a password function which pre-
vents various types of data groups from being deleted by mis-
take and keeps unauthorized user (third party) from operating
the machine.
The following three kinds of passwords are available and each
gives individually approved user’s access to the computer sys-
tem of the machine.
Refer to "4.2 "Password" Tab" in "Section 5" of "Vol. 3: Pro-
gramming and Machine Data" for details.
[SUPERVISOR] : Access can be gained by only the person
identified as "Supervisor".
[OPERATOR #1] : Access can be gained by only the person
identified as "Operator #1". For example, the
person identified as "Operator #1" is given
a permission to all machine operations in-
cluding data editing.
[OPERATOR #2] : Access can be gained by only the person
identified as "Operator #2".
For example, the person identified as "Op-
erator #2" is limited to only the operations
related to the automatic operation.
1.2 Preparation before Operation
Note
0206-003 3 - 7
AHB01EOPP0308-003 3-8
1.2.2 "AUTO OPN." Windows and Zeroing of Each Device
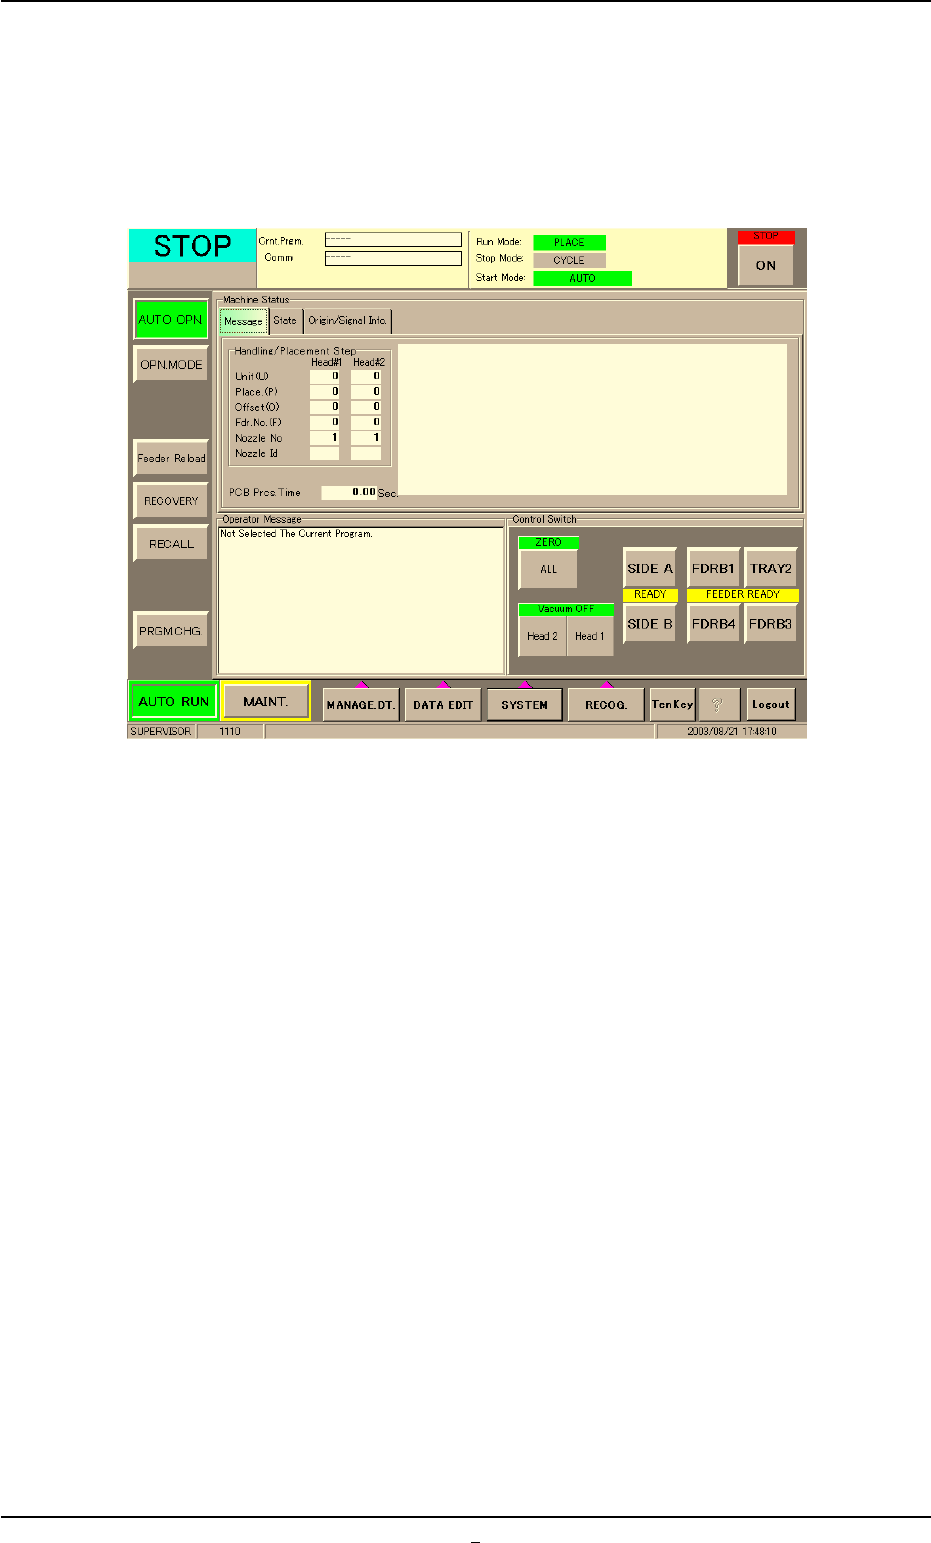
(1) Enter the password and press the [OK] button.
Main menu bar and "AUTO OPN." window are displayed in the touch
screen.
Fig. 1C10
(2) Wait for a few seconds until the lamp of the [READY] button illumi-
nates in green.
1.2 Preparation before Operation