1OM-1075-002.pdf - 第65页
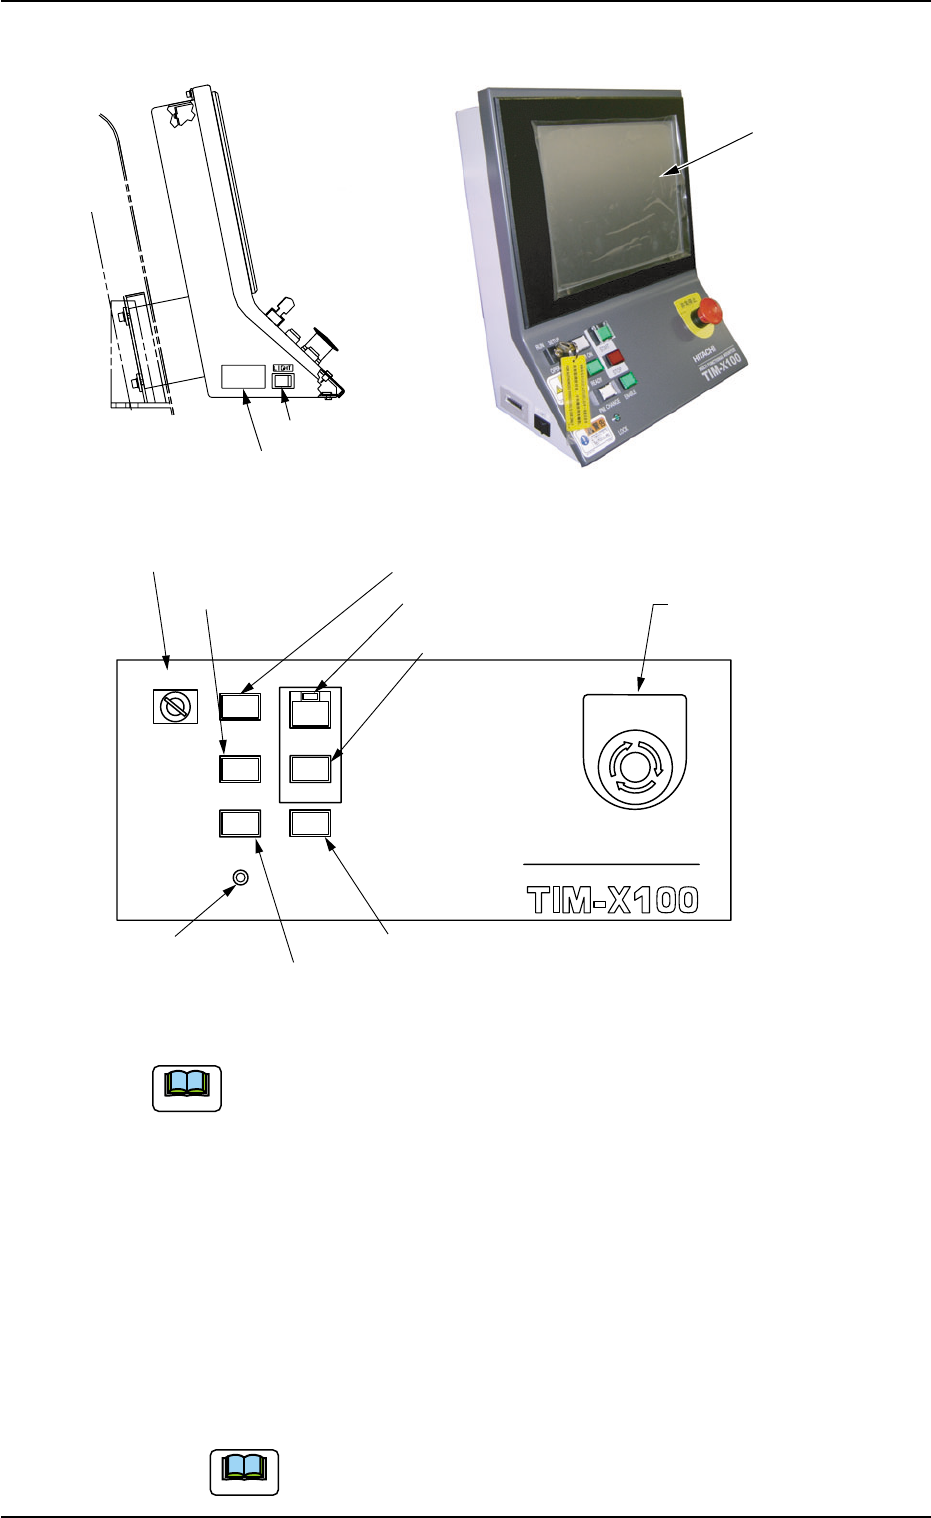
2.3.7 Rear Operation Panel Fig. 1A16 Fig. 1A17 The rear operation panel is not provided with any keyboard. A key board is available as an option. *1 [POWER ON] Button • This button is used to turn on the power for operat…

When temperature is low at power-up, the brightness of the back light
drops. The deterioration is not abnormal.
The brightness resumes normal after a few minutes.
When the back light is turned on or off repeatedly at low temperature,
the life will be shortened.
Refer to "1.2.2 Notes on Handling Touch Screens" in "Section
2" for the detailed information on how to clean the touch screens.
*13 Working Lamp Switch
This switch is used to turn on or off the working lamp on the front
side.
0206-002 1-19
AHB01EOPP
2.3 Equipment for Operations
Note
2.3.7 Rear Operation Panel
Fig. 1A16
Fig. 1A17
The rear operation panel is not provided with any keyboard. A
key board is available as an option.
*1 [POWER ON] Button
• This button is used to turn on the power for operations.
*2 [START] Button
• This button is used to start the automatic operation.
The automatic operation can be started only when the lamp is
flickering.
• While the lamp of this button is ON, it indicates that the machine
is running automatically.
When the [STOP] button is pressed during automatic operation,
the lamp of this button extinguishes.
The lamp is kept ON while each device is being zeroed.
0308-004 1-20
AHB01EOPP
MULTI FUNCTIONAL MOUNTER
OPERATION
RUN SETUP
READY
POWER ON
STOP
LOCK
START
ENABLE
PNL CHANGE
EMERGENCY
*8 [OPERATION] Switch
*7 [READY] Button
*1 [POWER ON] Button
*4 [ENABLE] Button
*2 [START] Button
*9 [EMERGENCY
STOP] Switch
*6 [LOCK] Lamp
*5 [PNL CHANGE] Button
*3 [STOP] Button
2.3 Equipment for Operations
Note
Note
*10 Rear Touch Screen
*11 Working Lamp Switch
*12 Cycle Counter

*3 [STOP] Button
• This button is used to stop the automatic operation.
• When this button is pressed during zeroing operation, the zeroing
operation of each device is interrupted, excluding the P.C.B. trans-
fer.
*4 [ENABLE] Button
• When the [ON] button (entitled "MOVE") is pressed in the active
operation sheet, the LED of the [ENABLE] button illuminates for
two seconds.
When the [ENABLE] button is pressed with its LED "ON", the ma-
chine performs various operations selected in the operation sheets.
*5 [PNL CHANGE] Button
• This button is used to select either the front or the rear operation
panel.
(a) The other operation panel can be selected by press-
ing the [PNL CHANGE] button on the unavailable (in-
valid) side only when the currently selected panel is
not set in the "Operation Locked" mode.
(b) While the LED of this button is ON, the followings
become available.
Rear Touch Screen
[START] Button
[STOP] Button
[ENABLE] Button
[READY] Button
[OPERATION] Switch
[EMERGENCY STOP] Switch
(c) The [STOP] button and [EMERGENCY STOP] switch
are always available regardless of the [PNL CHANGE]
button.
(d) When the panel operation is not locked and the
[STOP] button on the unselected operation panel is
pressed, the operation panel on the pressed button
side becomes activated automatically.
• When this button is pressed with the LED "ON", the "LOCK" lamp
illuminates, indicating that only the rear panel is available (Opera-
tion Locked).
To cancel the "LOCK" mode, press this button again.
0308-003 1-21
AHB01EOPP
2.3 Equipment for Operations
Note