1OM-1075-002.pdf - 第22页
• Connect the primary power supply to T erminals "L1", "L2", and "L3" and the ground- ing wire to the bolt at the grounding mark located on the right side of the power breaker . V oltage : 2…
0308-004 2 0 AHB01EOPP
2.5 Pre-Installation Checks
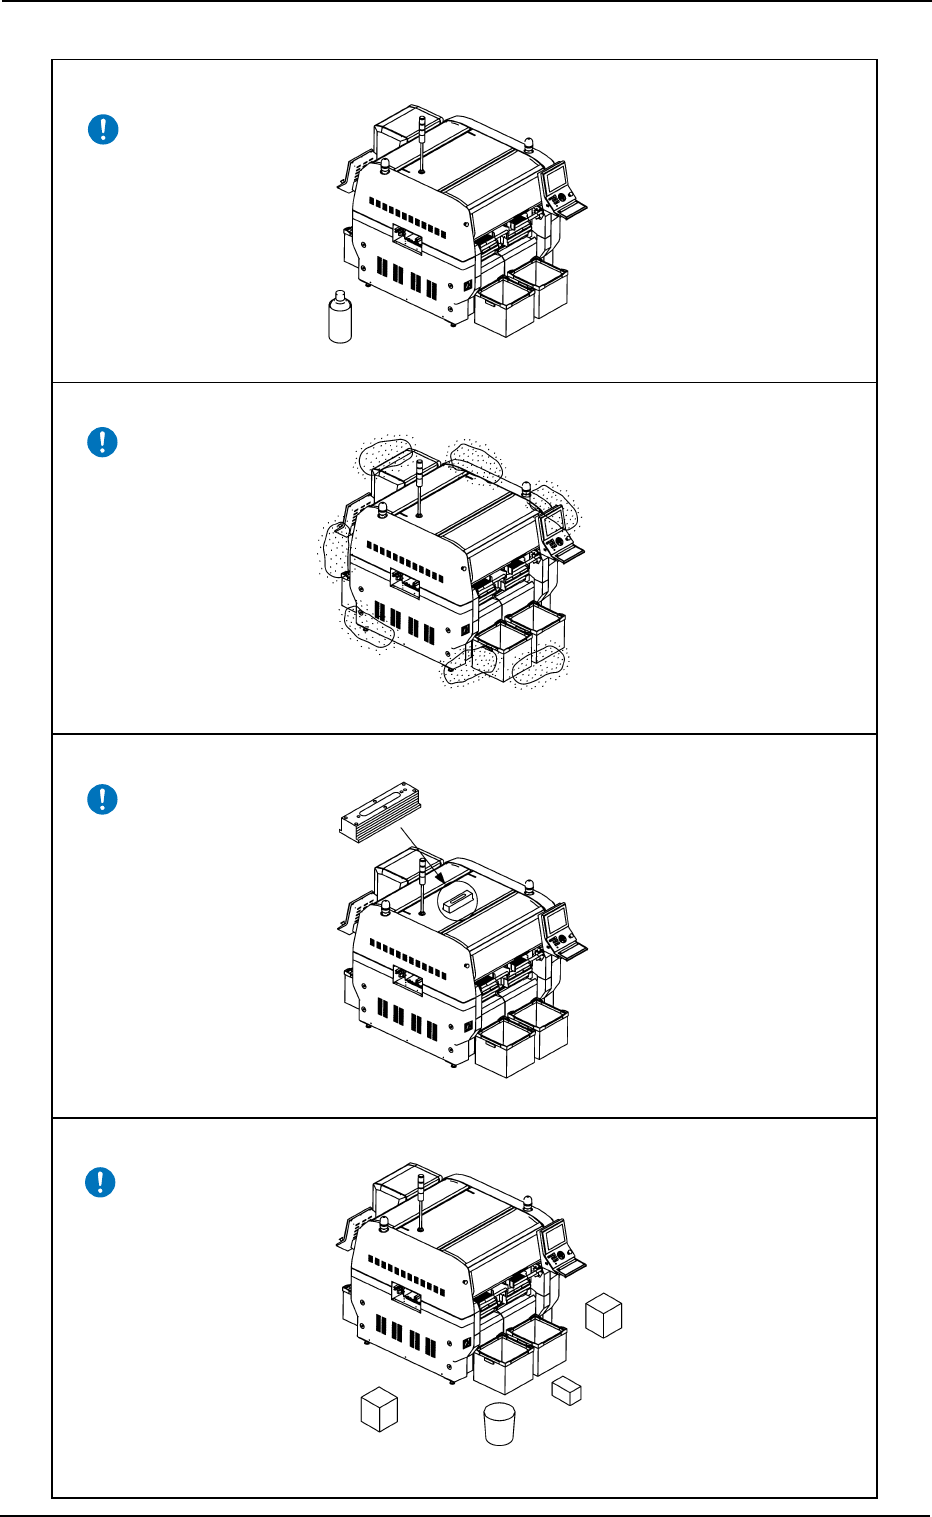
• Do not expose the machine to combustible or corrosive gas.
• Select a place free of lamp soot and dust.
Fig. 1X21
• Level the machine at the correct height, using a level vial.
Fig. 1X22
• The machine should be free of obstacles around it for easy maintenance.
Fig. 1X23
Fig. 1X24
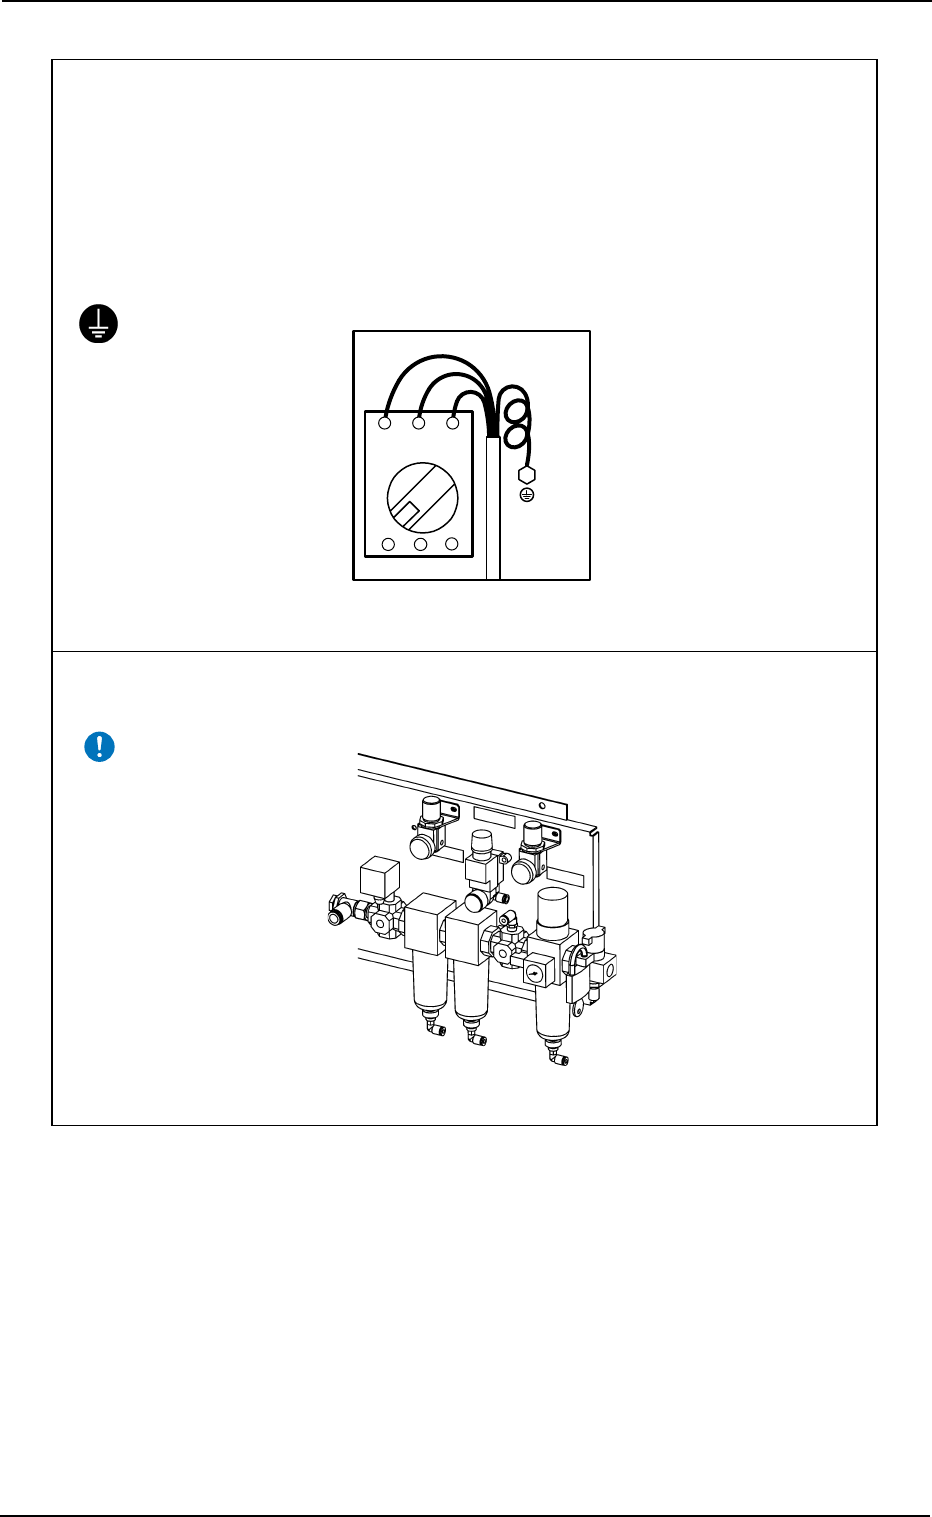
• Connect the primary power supply to Terminals "L1", "L2", and "L3" and the ground-
ing wire to the bolt at the grounding mark located on the right side of the power
breaker.
Voltage : 200±20 V AC, 3-Phase
Apparent Power : Approx. 5 kVA for TIM-X100
Note: Make the PE wire longer than the others (L1, L2, and L3), giving some
leeway.
Grounding
L1
(R)
L2
(S)
L3
(T)
Fig. 1X25
Fig. 1X26
• Clean, dry, and non-lubricated air (air containing no moisture, oil, and dust) must
be supplied at an air pressure of 0.49 to 0.69 MPa (5 to 7 kgf/cm
2
).
0308-005 2 1 AHB01EOPP
2.5 Pre-Installation Checks
3. About Warning Labels
Please read "3.1 Warning Label Positions" and "3.2 Warning Labels and
Description" carefully to fully understand the meaning of each precau-
tionary point for safety precautions.
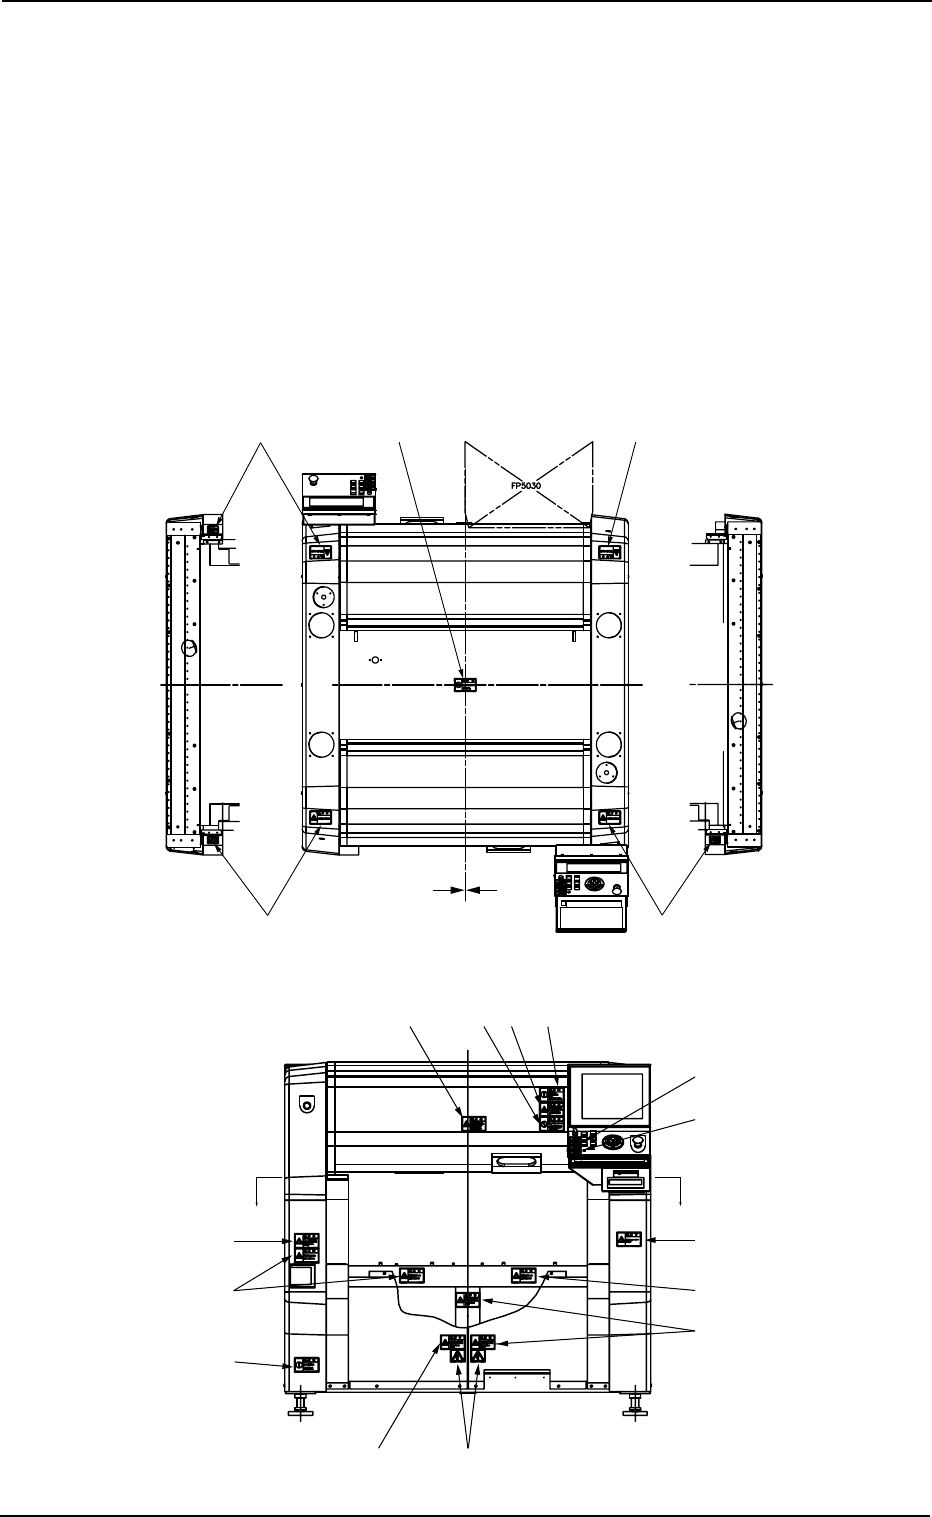
3.1 Warning Label Positions
The warning labels are affixed to hazardous and special attention-re-
quired areas.
Refer to "3.2 Warning Labels and Description" for details.
Fig. 1X27 Top View
Fig. 1X28 Front View
3. About Warning Labels
0308-004 2 2 AHB01EOPP
Sectional View F Sectional View F
*2
*9
*7
*14
*6
*6
*13
*6
*1-1
*1-2
*1-1
*3*5*10
F
F
*8
*8
*8
D
C
*4
*8