1OM-1075-002.pdf - 第61页
*10 Keyboard Fig. 1A13 This keyboard can be used to enter alphanumeric characters in data edit windows for pattern programs and component data. T o enter numerals in one of the windows that belong to "AUTO OPN."…
*8 [OPERATION] Switch
• The selection key must be inserted to change over the [OPERA-
TION] switch to "RUN" or "SETUP"
The [OPERATION] switch must be set to the "RUN" side for auto-
matic operation.
The switch can be changed over to "RUN" or "SETUP"
only when the machine is in the "STOP" mode.
• When the switch is changed to the "SETUP" side, the machine is
set as follows.
(a) The red, yellow, and green lamps of the light tower will illumi-
nate (initial setting of the machine upon shipment).
(b) The following operations are prohibited regardless of the front
safety door condition (opened/closed).
Automatic Operation, Zeroing Operation, Device Test, Unit
Adjustment, and Teaching Operation
(c) Operations automatically become available on the front op-
eration panel (operations locked).
No operations are accepted on the rear operation panel.
• When the [OPERATION] switch is set to the
"SETUP" side, the interlock system of the front
safety door is deactivated.
• Do not operate the machine with the [OPERATION]
switch in the "SETUP" mode except for the setup
operations.
• Do not keep the selection key inserted unless nec-
essary. The key shall be stored by the person in
charge.
• When the selection key is turned forcibly, the switch
may be damaged.
*9 [EMERGENCY STOP] Switch
• This switch is used to stop the machine immediately in an emer-
gency.
• When this switch is pressed, the power is turned off and the ma-
chine stops immediately.
When the power is turned off, the LED of the [POWER ON] but-
ton on the operation panel illuminates in red.
0308-004 1-15
AHB01EOPP
2.3 Equipment for Operations
CAUTION
Note
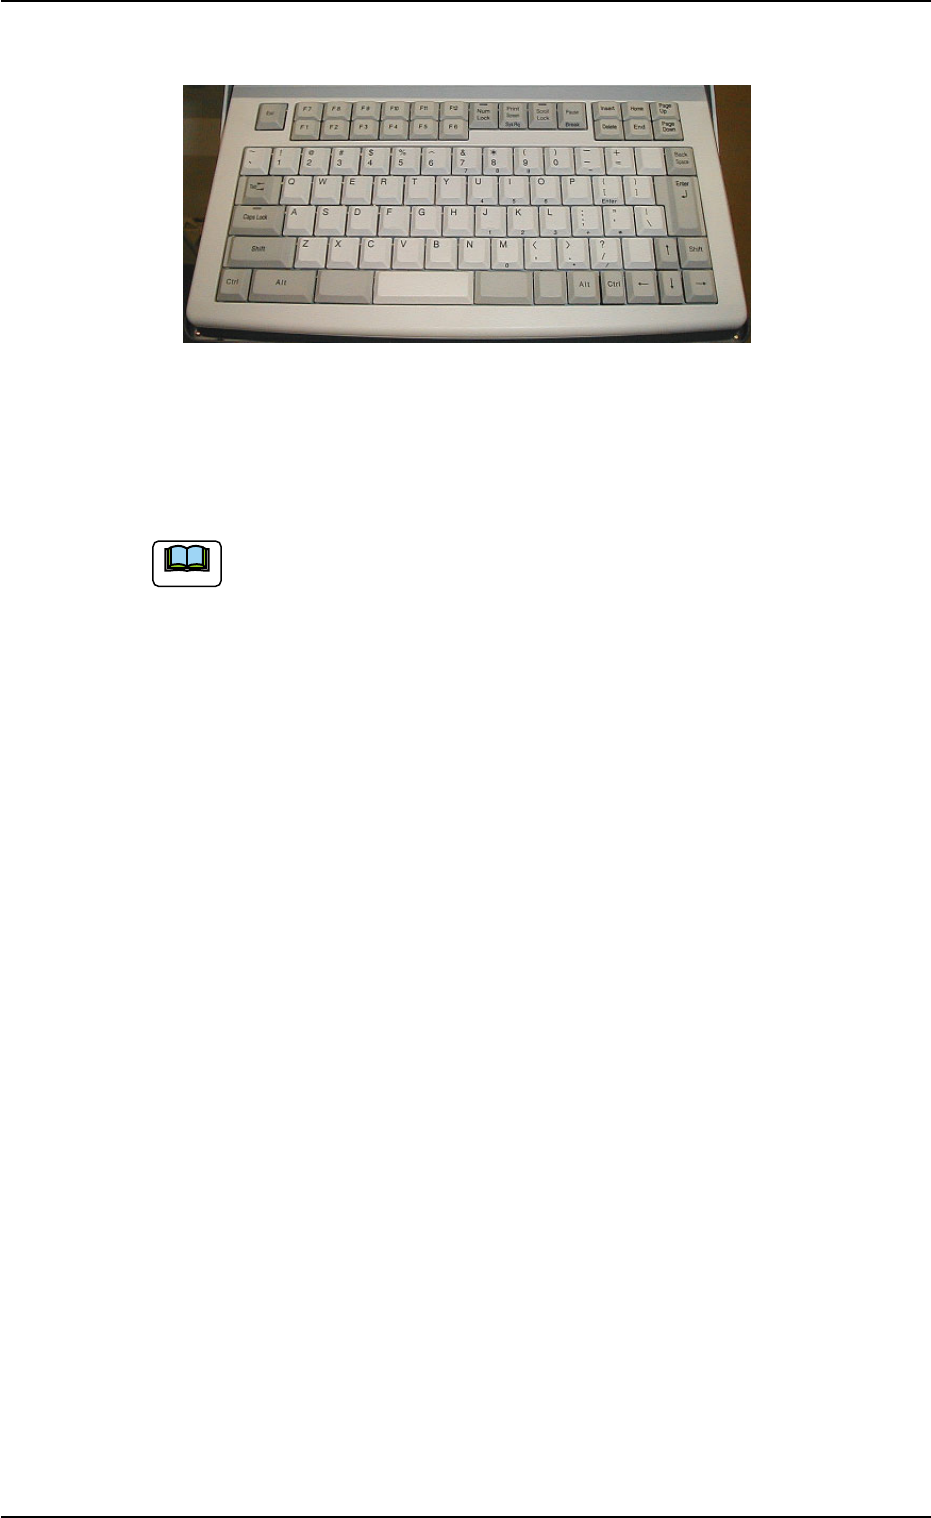
*10 Keyboard
Fig. 1A13
This keyboard can be used to enter alphanumeric characters in data
edit windows for pattern programs and component data.
To enter numerals in one of the windows that belong to "AUTO
OPN." or "MAINT.", the edit sheets on the screen can be used.
01 12-002 1-16 AHB01EOPP
2.3 Equipment for Operations
Note
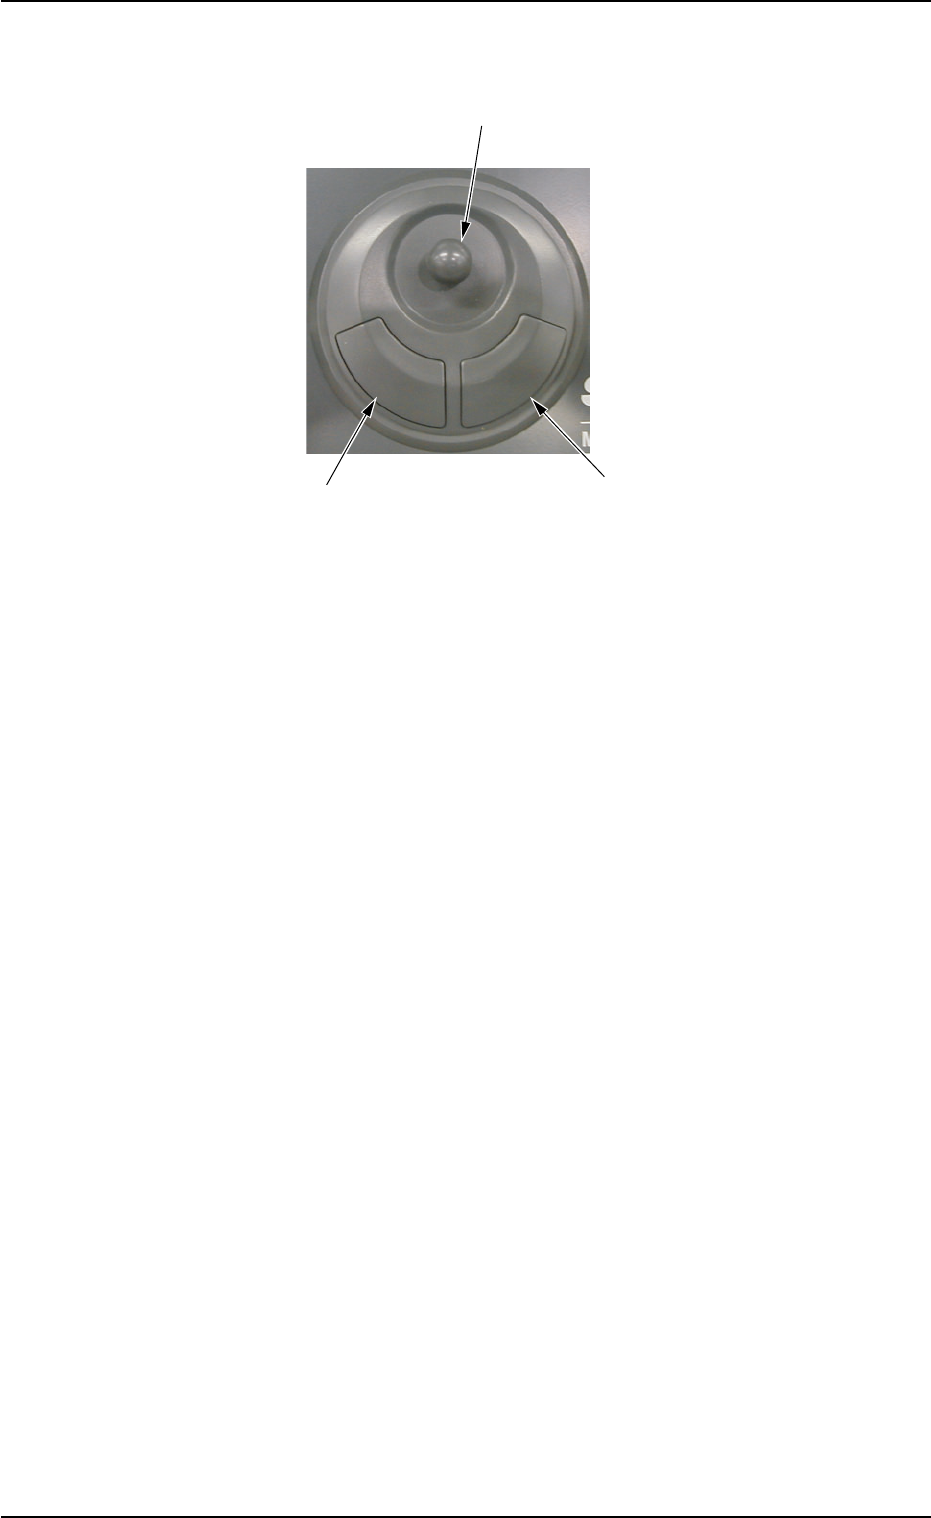
*11 Pointing Device
Fig. 1A14
This device is used to indicate where the pointer is on the operation
screen.
Basic Operations of Pointing Device
• Pointer
To point to an object on the operation screen, move the pointer with
the joystick.
• Click
To click, point the pointer (arrow mark) at the object you want to se-
lect, and quickly press and release the left button.
Quickly pressing and releasing the right button is called "Right-Click".
• Double-Click
To press the left button twice in rapid succession while keeping the
pointer motionless between clicks.
• Drag
To move an object on the screen from one place to another by point-
ing to it, holding the left button down, and pulling it to where you want
it to be, using the joystick. When the pointer has dragged the object
to the desired position, release the left button.
Joystick
Left Button
Right Button
0107-001 1-17 AHB01EOPP
2.3 Equipment for Operations