FlexTRAK 2MB Material Handler Addendum Rev 05.pdf - 第43页
FlexTRAK Series 2MB Mater ial Handler Adden dum Installation © 2023 Nordson Corporation 3-11 3. Turn the main c ircuit breaker (Figure 3-5) to the ON (up) po sition. Item Description 1 FlexTRAK-2MB Rear Access Panel 2 Ma…
FlexTRAK Series 2MB Material Handler Addendum Installation
3-10 © 2023 Nordson Corporation
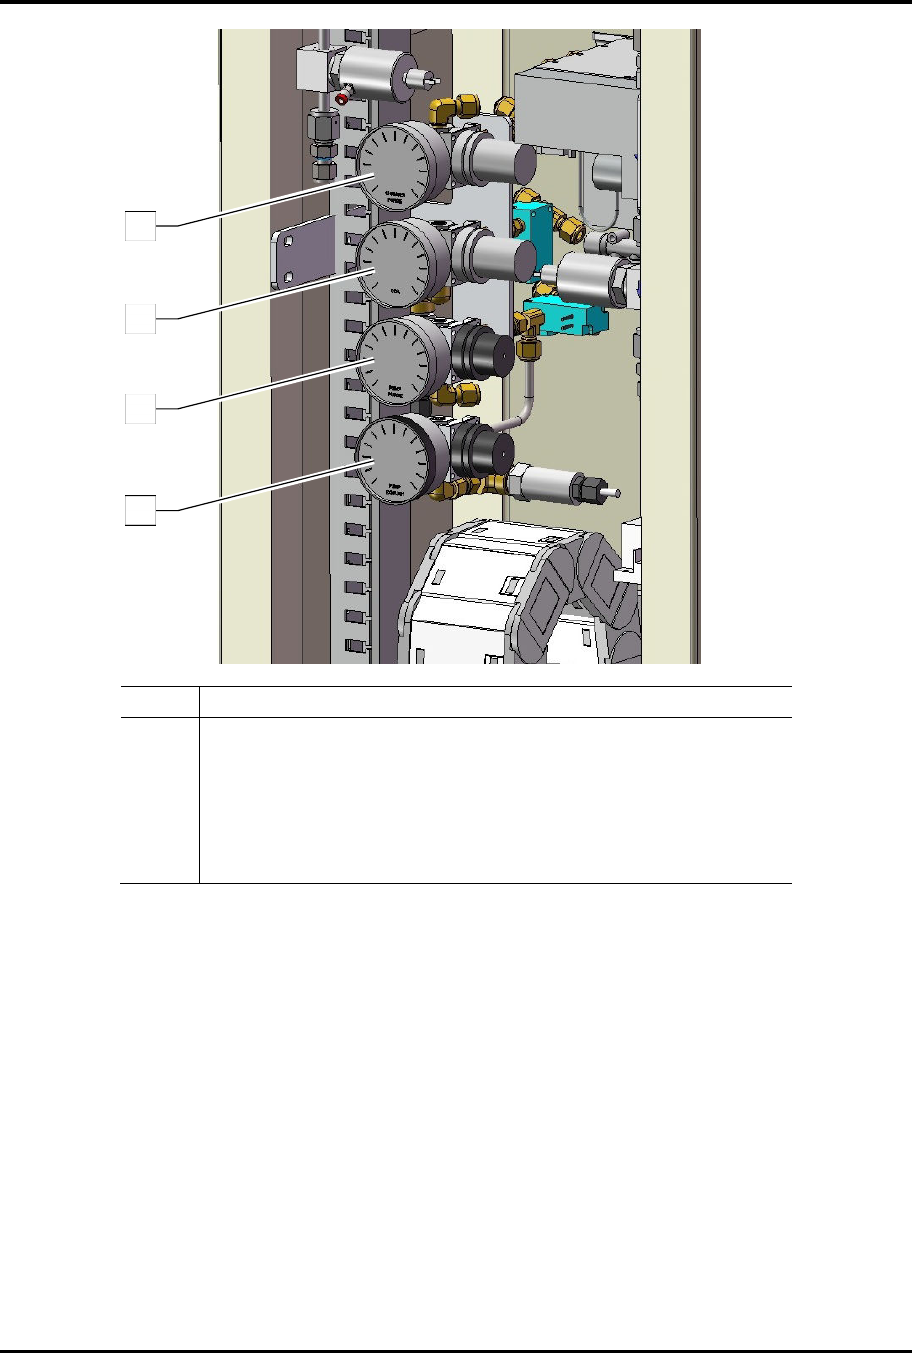
Item Description
1 Chamber Purge Gas (N
2
) Regulator and Gauge (30 psi max)
2 Main Air (CDA) Regulator and Gauge (80 psi max)
3 Vacuum Pump Purge (N
2
) Regulator and Gauge (5 psi max)
4
Optional Exhaust Purge (H
2
) Gauge & Regulator
(10 psi max) (refer to the Hydrogen Gas documentation provided
with the H2 option)
Figure 3-4 Air and Purge Gas Regulator/Gauge Location
4
3
2
1
FlexTRAK Series 2MB Material Handler Addendum Installation
© 2023 Nordson Corporation 3-11
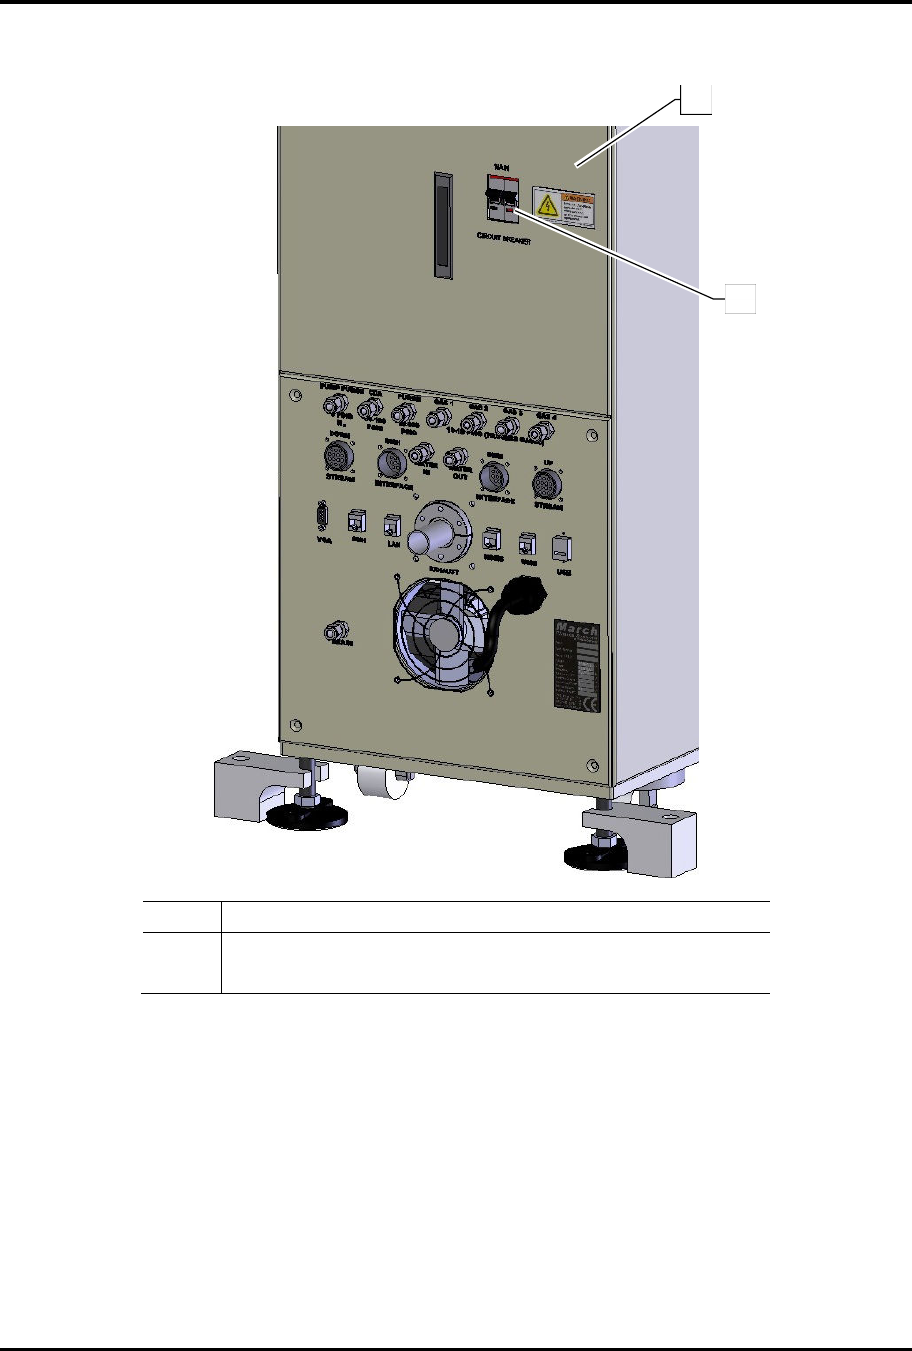
3. Turn the main circuit breaker (Figure 3-5) to the ON (up) position.
Item Description
1 FlexTRAK-2MB Rear Access Panel
2 Main Circuit Breaker
Figure 3-5 Main Circuit Breaker
1
2
FlexTRAK Series 2MB Material Handler Addendum Installation
3-12 © 2023 Nordson Corporation
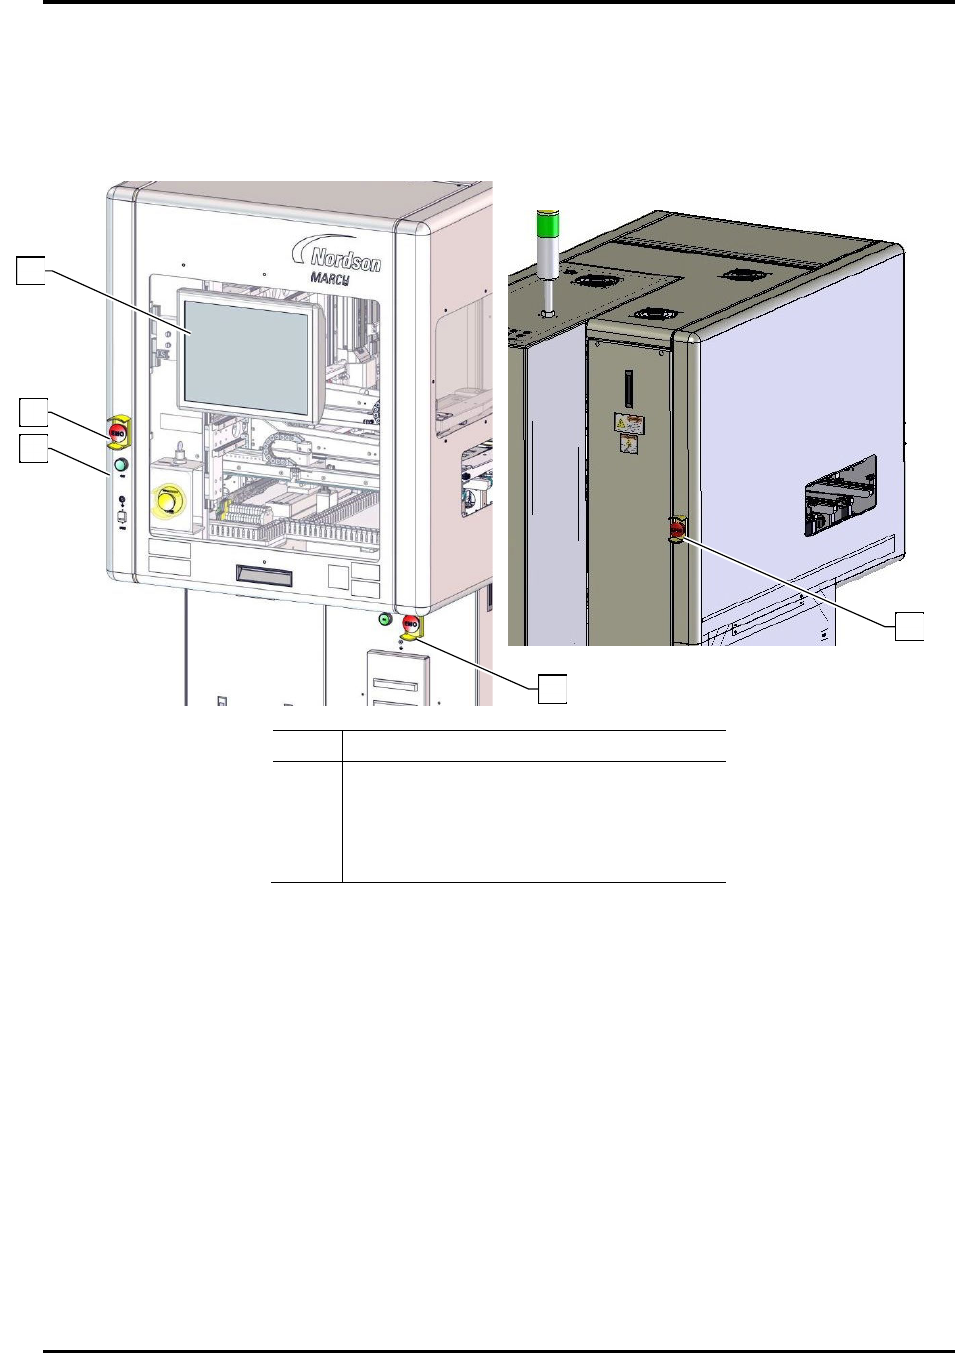
4. Verify that an EMO button has not been activated (Figure 3-6). If an EMO has been
activated, reset it by turning the button in the direction of the arrows until it pops out.
5. Press the green ON button on the front panel to start the system.
„ The system will start and load the HMI software.
Item Description
1 HMI Software
2 Front EMO Button (2)
3 Green ON Button (2)
4 Rear EMO Button
Figure 3-6 System Startup
6. Leak-check the CDA and purge gas lines as follows:
a. Close the valve on the supply line being checked.
b. Monitor the gauge inside the rear enclosure for at least one (1) minute.
c. If the pressure reading drops within one minute, there is a substantial leak in the line.
Find and repair any leaks before proceeding.
7. Open facility process gas supply valves and make sure pressure at the cylinders is 10 to
15 psi (0.7 to 1.0 bar).
2
4
3
1
4