Spectrum+Operating+Manual.pdf - 第102页
S2-9 XX X Se ri es Disp ensi n g Syst em IOM Man ual Calibration and Adjus tment 5-26 © 2023 Nordson Corporatio n Figure 5- 27 Heater Pa rame te rs W indow 7. Select OK . The He a ter P arameters Win dow closes and you…
S2-9XXX Series Dispensing System IOM Manual Calibration and Adjustment
© 2023 Nordson Corporation 5-25
4. Click on Setup .
The list box opens.
5. In the list box, double-click the heater to be calibrated. Generally, Heater 1 is the needle
heater and Heater 2 is the substrate heater.
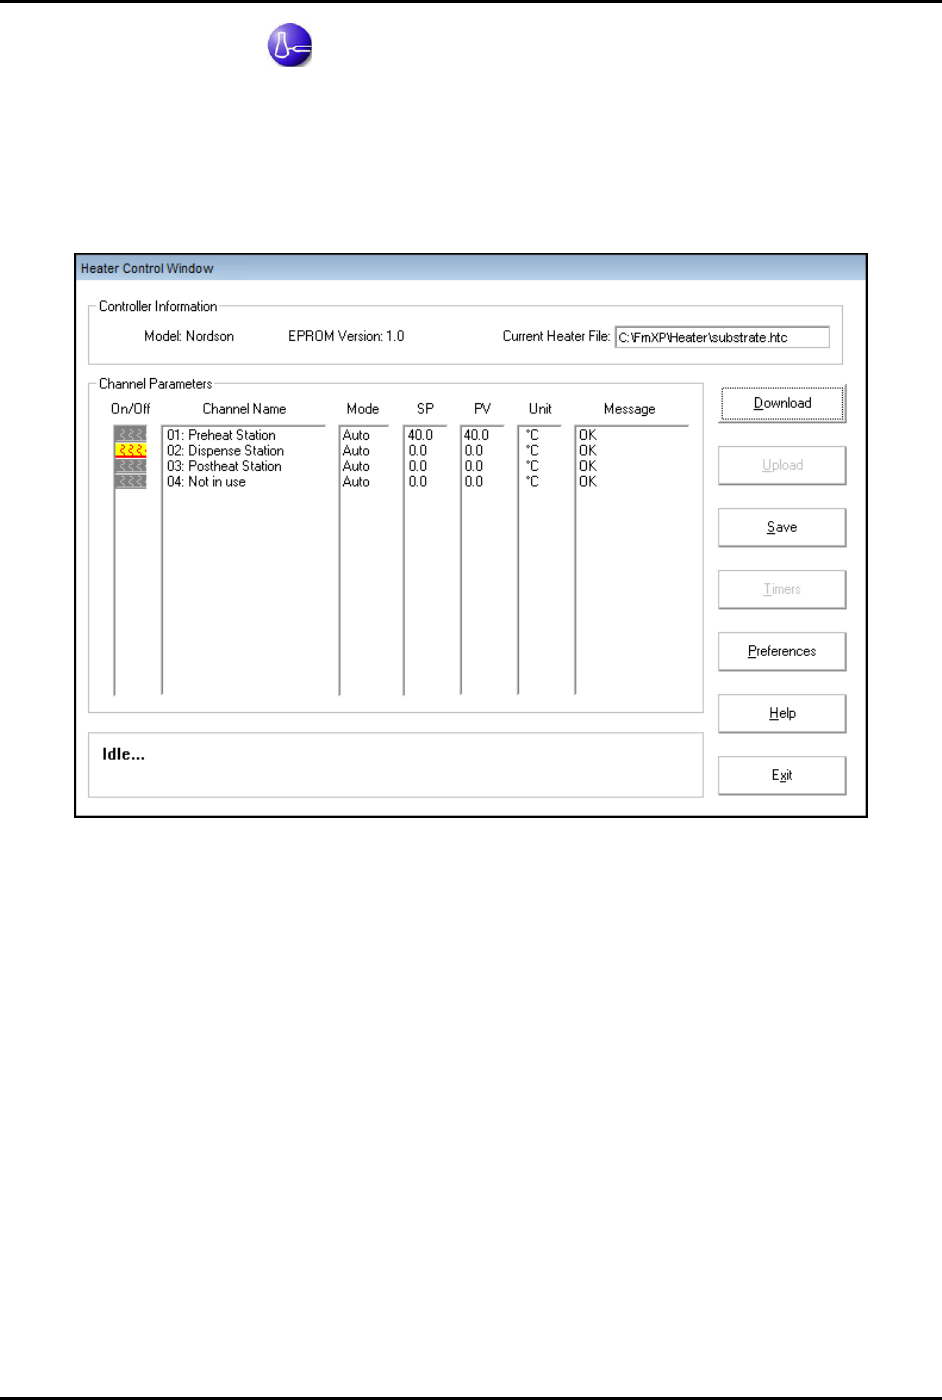
The Heater Control Window opens (Figure 5-30).
Figure 5-26 Heater Control Window
6. Enter a setpoint temperature value.
a. Double click on the channel name.
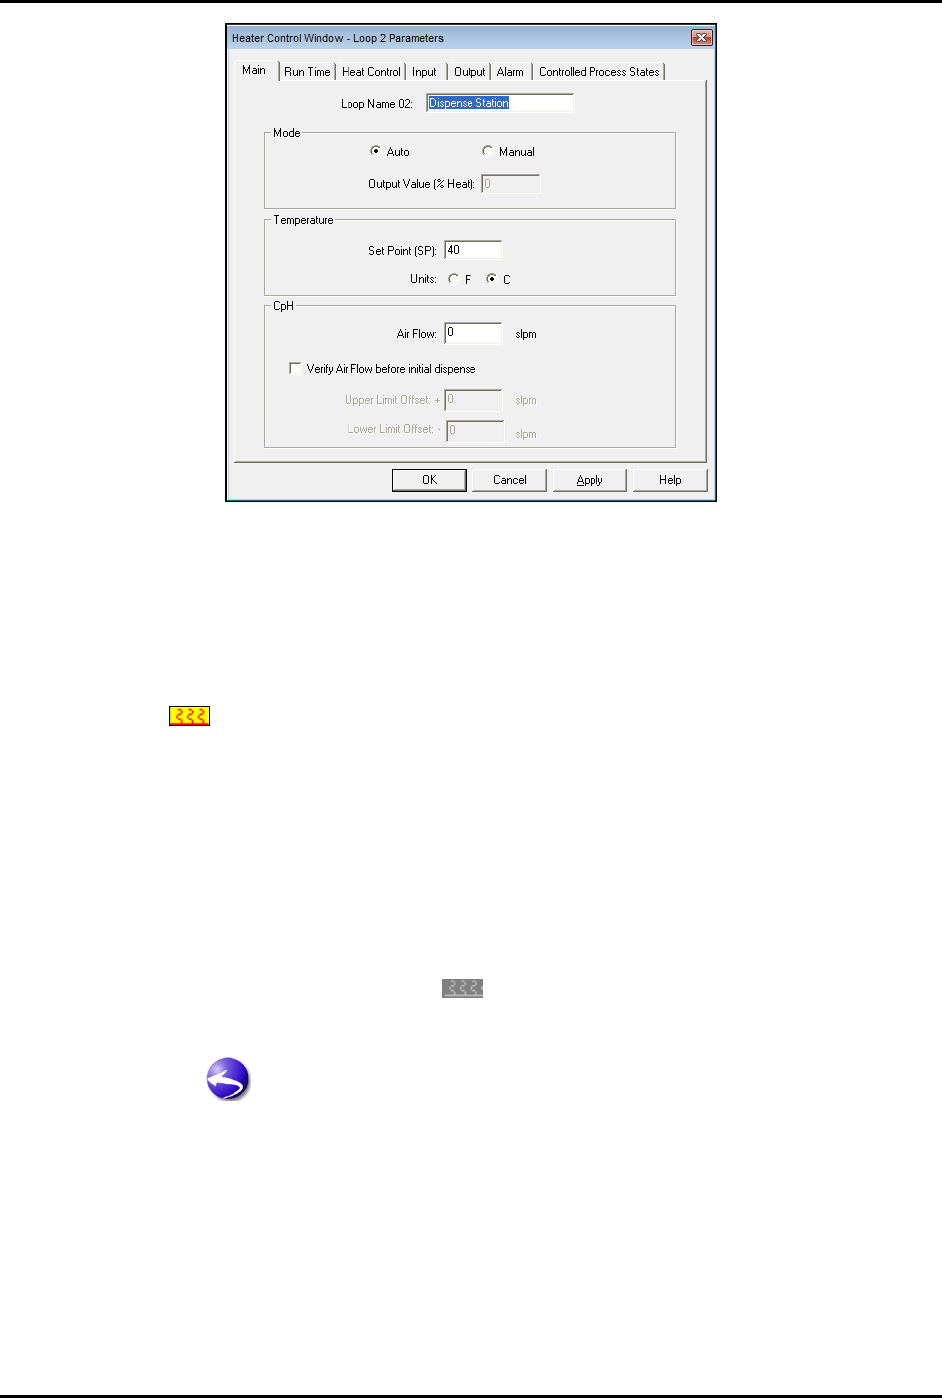
The Heater Parameters window opens (Figure 5-31).
b. Enter the setpoint value and click on
OK.
c. Repeat for each channel.
S2-9XXX Series Dispensing System IOM Manual Calibration and Adjustment
5-26 © 2023 Nordson Corporation
Figure 5-27 Heater Parameters Window
7. Select OK.
The Heater Parameters Window closes and you will return to the Heater Control
Window.
8. Activate the heater by double clicking the icon in the On/Off column until the heater loop
icon
turns yellow and red.
Allow time for the heater to reach the setpoint temperature.
9. Use a thermal measuring device to measure the temperature on the heating tooling.
If the temperature is different from the setpoint temperature, the heaters should be
calibrated, see 5.14.2 Heater Calibration.
10. If heater calibration is required, leave the heater on. If not, double-click the Heater On/Off
icon to turn the heater off.
The Heater On/Off icon is gray
when the heater is off.
11. Click on
Exit to exit the Heater Control Window.
12. Click on
to return to the Fluidmove Main Menu.
S2-9XXX Series Dispensing System IOM Manual Calibration and Adjustment
© 2023 Nordson Corporation 5-27
5.14.2 Heater Calibration
To calibrate the heaters:
1. In the Fluidmove Main Menu, select
Configuration > Setup Runtime Preferences >
Local Machine Offsets
.
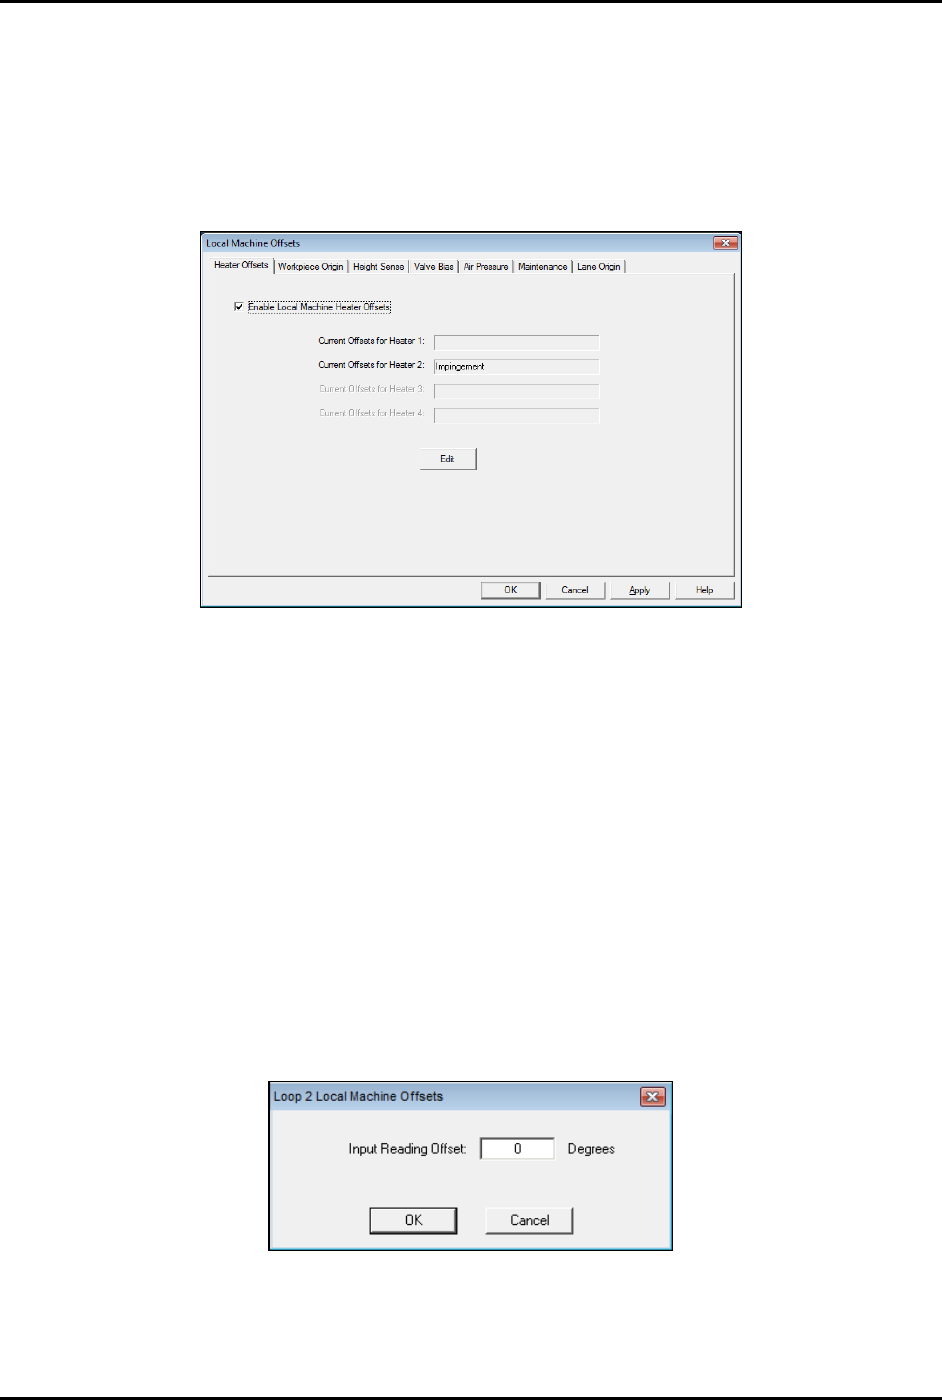
The Local Machine Offsets window opens (Figure 5-32).
Figure 5-28 Local Machine Offsets - Heater Offsets
2. Enable Local Machine Heater Offsets.
A checkmark in the box indicates Local Machine Heater Offsets is enabled. If not
checked, click on the box to enable it.
3. Select
Edit.
4. Select the heater to be calibrated (Heater 1, 2, 3 or 4).
The Heater Control window opens (Figure 5-31).
5. Double-click on the channel name.
6. Enter the temperature offset value in the Input Reading Offset prompt (Figure 5-33).
The temperature offset value is the difference in degrees between the heater setpoint
and actual measured temperature.
Figure 5-29 Input Temperature Offset Value
7. Perform the heater verification procedure again to verify calibration, see 5.14.1 Verifying
Heater Calibration.