Spectrum+Operating+Manual.pdf - 第129页
S2-9 XXX Se ri es Dispensing Sys te m IOM Man ual Maintenance © 2023 Nordson C orporatio n 6-17 Figure 6-9 Lubricat ing t h e X - Axi s Li ne ar Guide s Figure 6- 10 Lubricating the Y - Axis Lin ea r Guides
S2-9XXX Series Dispensing System IOM Manual Maintenance
6-16 © 2023 Nordson Corporation
17. Ensure adequate clearance between the pulley assemblies and side covers.
18. Close the dispensing area door.
6.10.2 Lubricating the X/Y Linear Guides
NOTE Use Linear Bearing PS2 grease included in the Grease Kit (Item 58).
WARNING! This procedure DOES NOT apply to the S2-9XXC (Cleanroom System). The
linear guide bearings on the S2-9XXC are packed with NSK Clean Grease LG2
at the factory. In addition, the end caps and grease fittings have been removed
and replaced with NSK Maintenance-Free Lube Blocks. The S2-9XXC DOES
NOT require additional lubrication.
To lubricate the X/Y linear guides
1. Perform a service shutdown, see 2.14 Service Shutdown.
2. If the grease gun is not loaded, load the grease gun, see 6.10.2 Loading the Grease Gun.
3. Open the dispensing area door.
4. Manually move the dispensing head to the front of the dispensing area.
5. Remove the X- and Y-axis covers, see 6.9 Removing and Installing the Axis Covers.
WARNING! Use Personal Protective Equipment when working with cleaning and lubrication
materials. Refer to the applicable SDS. Remove all spills and properly dispose of
contaminated materials.
6. Using an ammonia-based cleaner and a soft cloth, clean and wipe the X- and Y-rails.
Manually move the dispensing head as necessary to reach all parts of the rails.
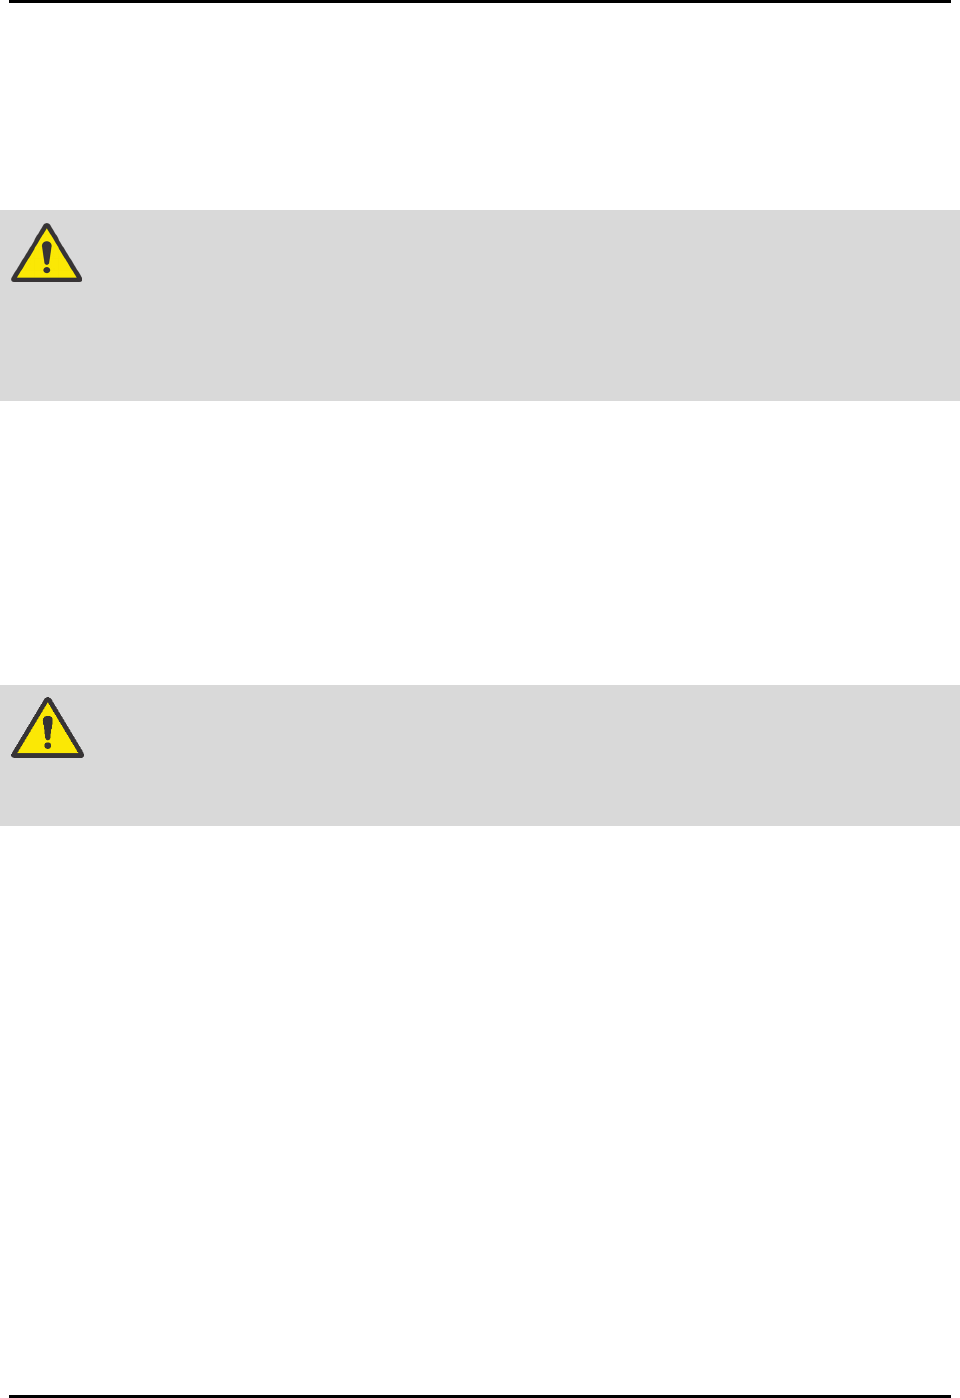
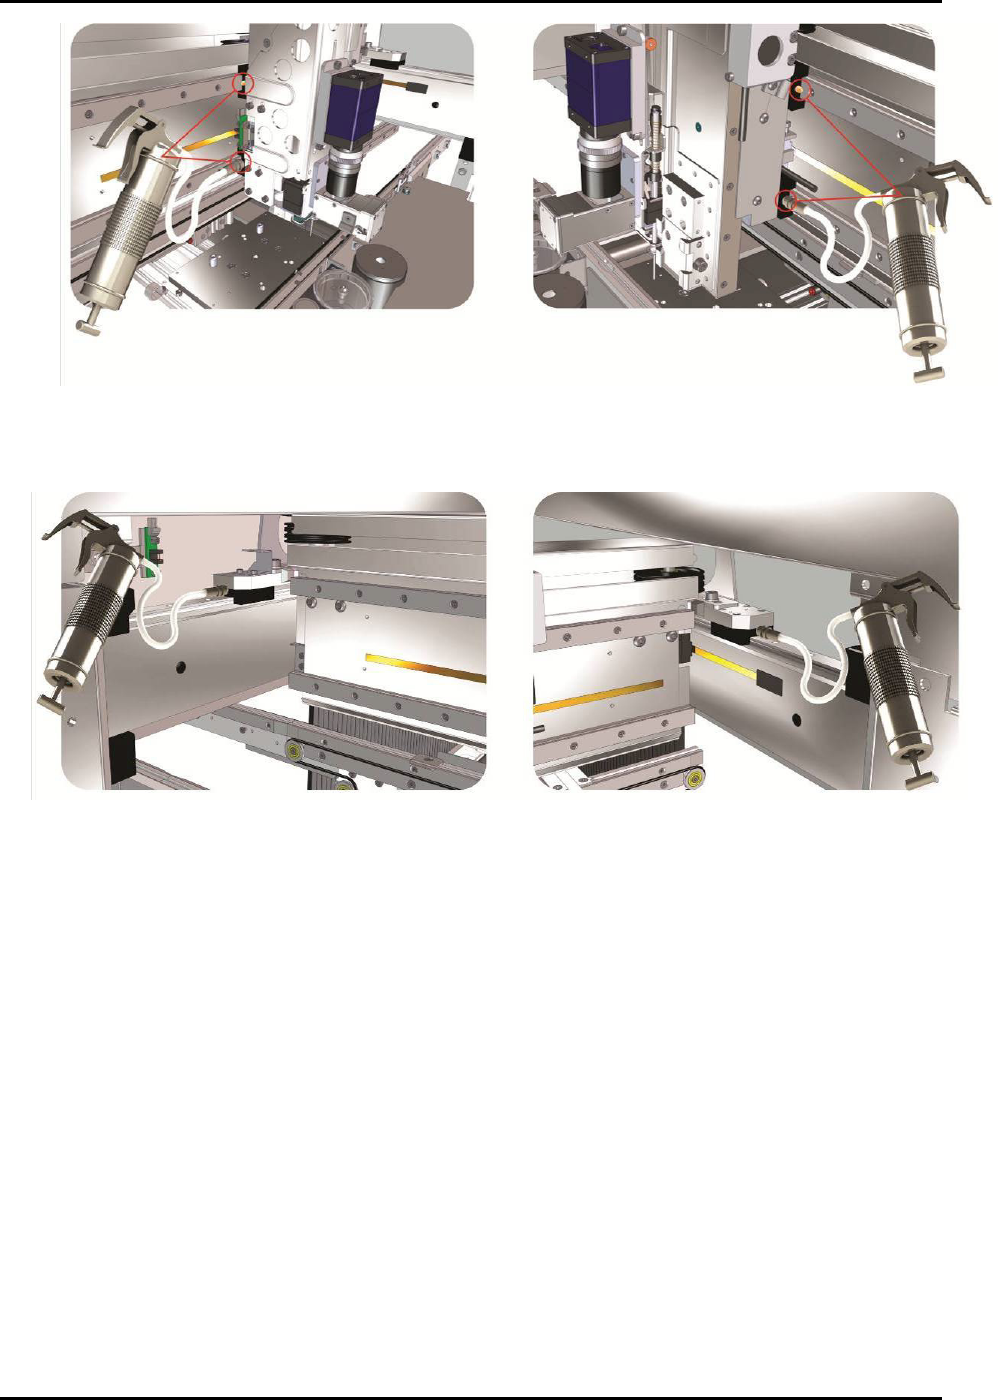
7. Locate the grease fitting on each of the three (3) X-beam linear bearing cars and four (4)
Y-rail linear bearing cars (Figure 6-9 and Figure 6-10).
8. Attach grease gun to each fitting and pull the grease gun lever one time to squirt grease into
the bearing.
9. Use a soft cloth to clean up any excess grease.
10. Replace the X-axis and Y-axis covers, see 6.9 Removing and Installing the Axis Covers.
11. Power on the dispensing system, see 4.3 Powering on the Dispensing System.
12. Use the arrow keys to move the dispensing head back and forth in both the X-axis and the
Y-axis.
13. Open the dispensing area door and use a soft cloth to remove any excess grease along the
rails.
S2-9XXX Series Dispensing System IOM Manual Maintenance
© 2023 Nordson Corporation 6-17
Figure 6-9 Lubricating the X-Axis Linear Guides
Figure 6-10 Lubricating the Y-Axis Linear Guides
S2-9XXX Series Dispensing System IOM Manual Maintenance
6-18 © 2023 Nordson Corporation
6.11 Tensioning the Cables
Periodic tensioning of the dispensing system mechanical drive cables can prevent premature failure of the
cables. For dispensing system operating in a 24/7 production environment, tension the mechanical drive
cables approximately every six months. For systems operating in a single-shift environment (eight hours a
day or less), this should be done once a year.
Tools and Materials Needed:
• Hex Wrench Set
WARNING! This procedure should only be performed by a trained service technician.
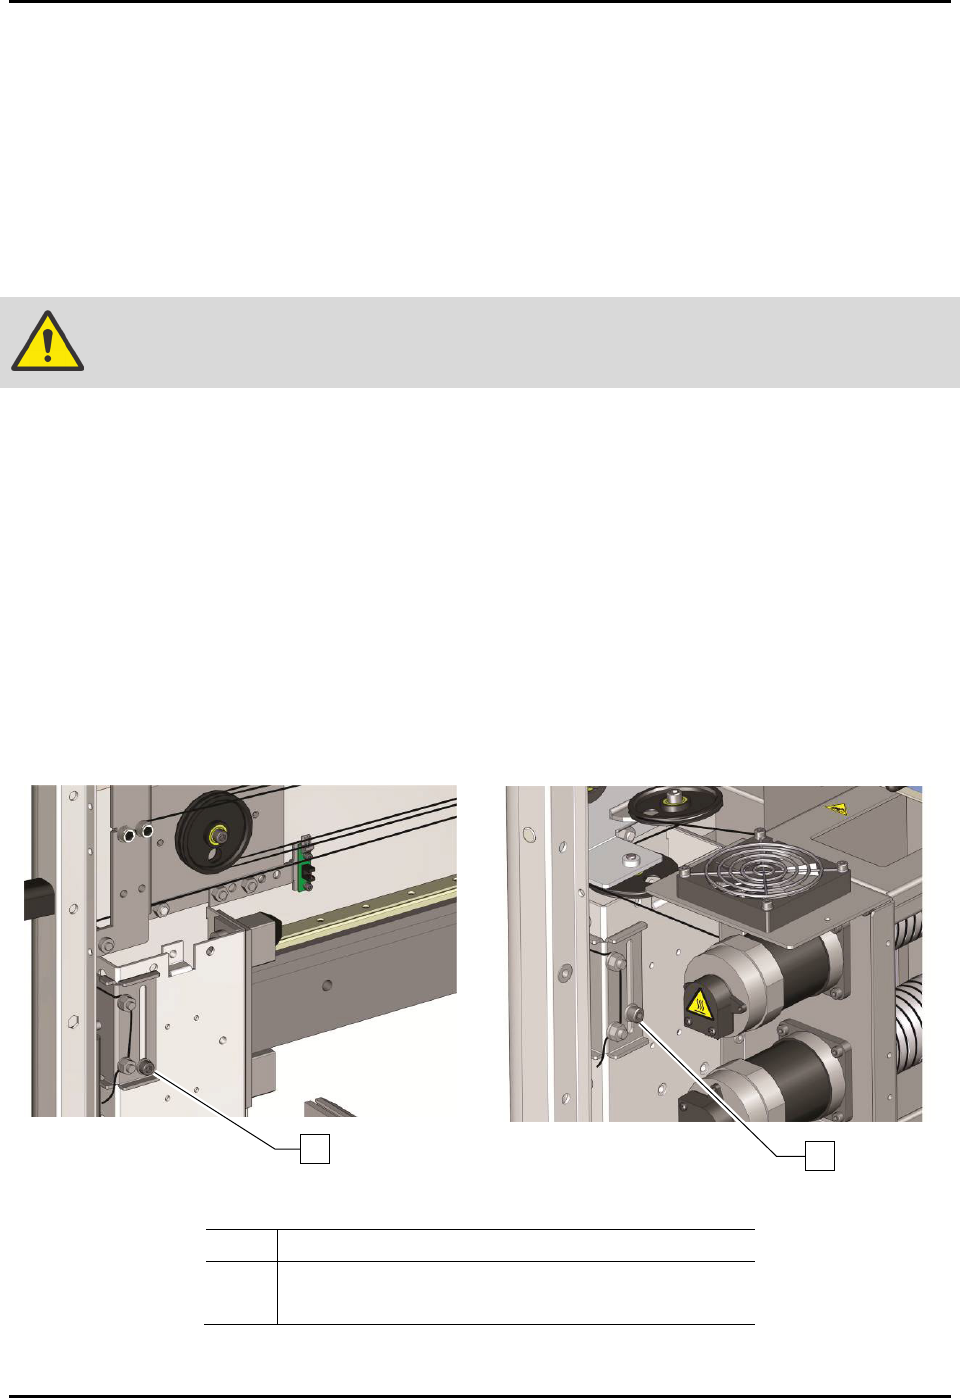
6.11.1 Tensioning the X/Y Cables
To tension the X/Y cables (Figure 6-11):
1. Perform a service shutdown, see 2.14 Service Shutdown.
2. Open the dispensing area door.
3. Loosen the X-axis and two (2) Y-axis tensioner screws.
4. Manually move the Z-head in a circle around the entire length and width of the dispensing
area approximately five (5) times.
5. Stop in the center of the dispensing area.
6. Retighten the tensioner screws.
Figure 6-11A Tensioning the X-Axis Cables
Figure 6-11B Tensioning the Y-Axis Cables
Item
Description
1 X-Axis Tensioner Screw
2 Y-Axis Tensioner Screw (only 1 shown)
Figure 6-11 Tensioning the Cables
2
1