Spectrum+Operating+Manual.pdf - 第164页
S2-9 XX X Se ri es Disp ensi n g Syst em IOM Man ual Parts Replacement 8-12 © 2023 Nordson Corporatio n I tem Description 1 M iddle S ection 2 Aperture Di sk 3 Lowe r Secti on Figu re 8-8 Rep lacing th e Aper ture Disk I…
S2-9XXX Series Dispensing System IOM Manual Parts Replacement
© 2023 Nordson Corporation 8-11
Item
Description
Item
Description
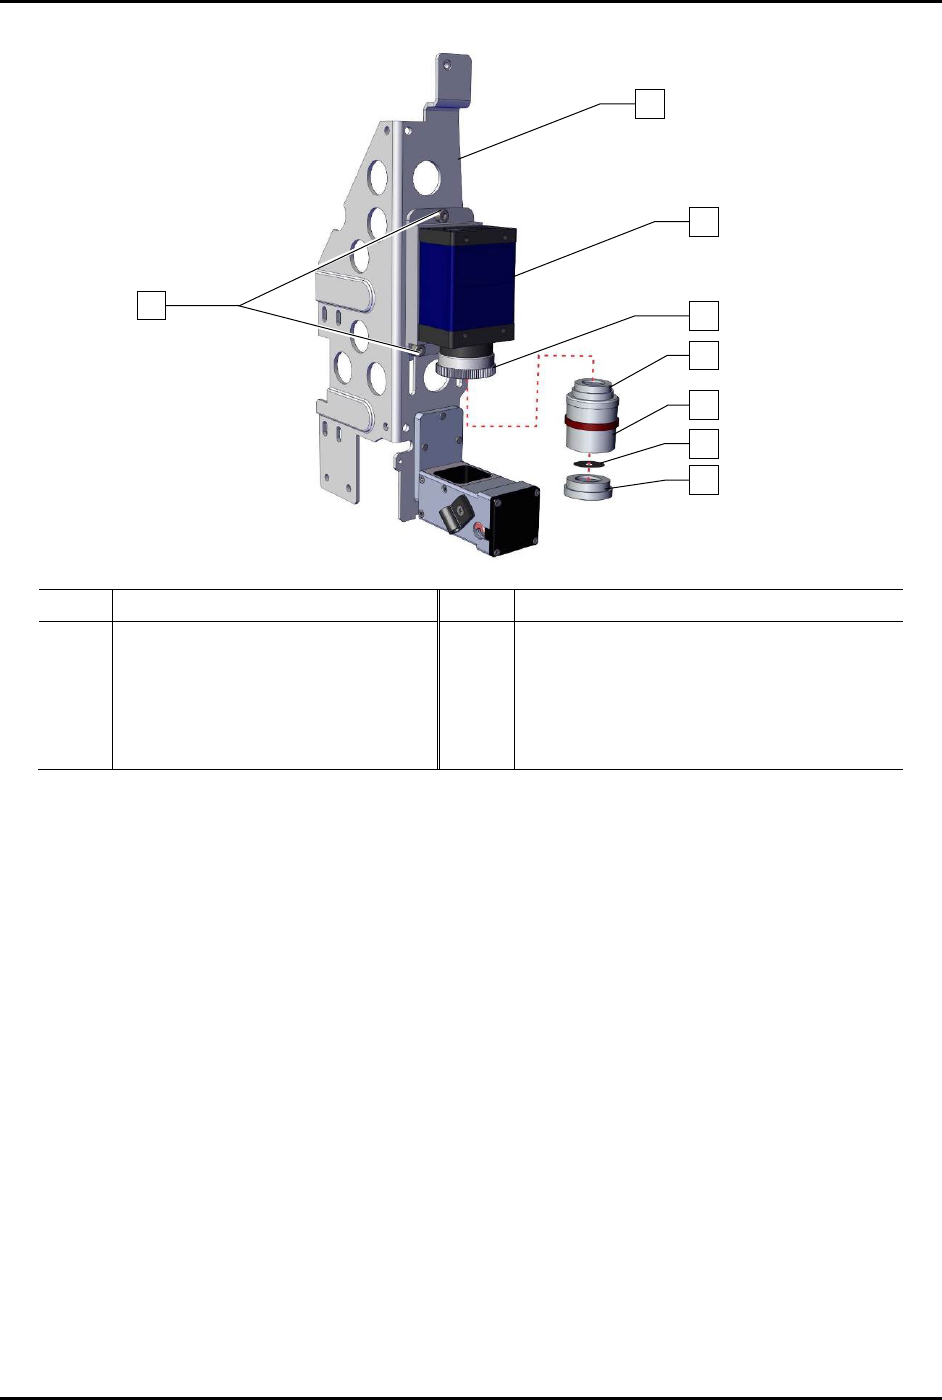
1 Bracket 5 Upper Section
2
Screw (Third screw is located
opposite of lower left screw)
6 Middle Section
3 Camera (Item 55) 7 Aperture Disk (Item 56)
4 2x Optical Lens (Item 57) 8 Lower Section
Figure 8-7 Lens Assembly
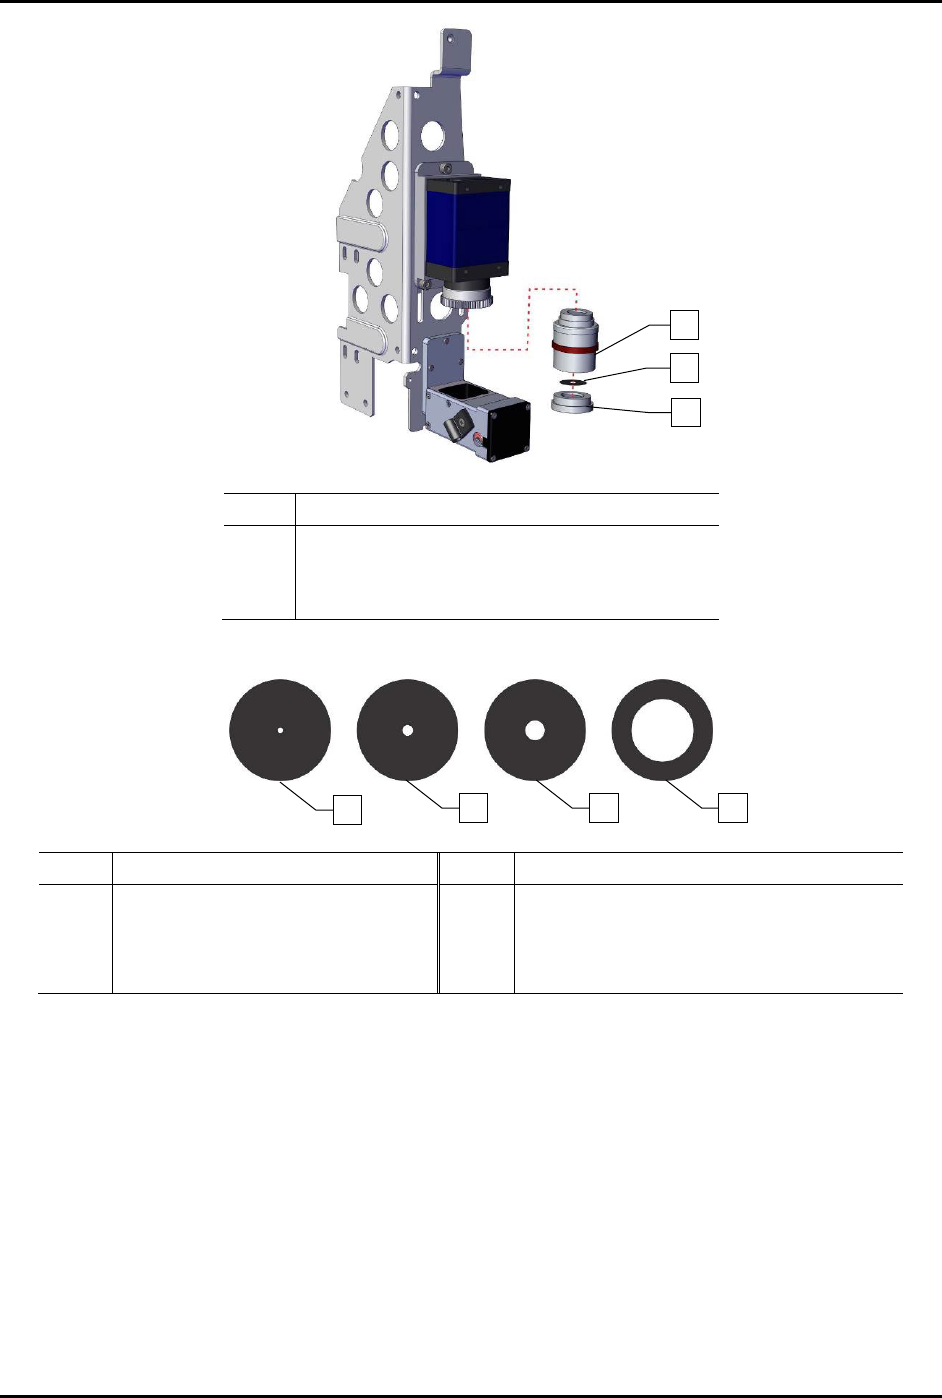
7. Before installing lens (Item 57), remove the lower section from the middle section by
unscrewing the lower section counterclockwise (Figure 8-8).
8. Remove the aperture disk (Figure 8-8).
9. Install one aperture disk into the lower section appropriate for the application, the F4
aperture disk is recommended as a starting point (Figure 8-9).
NOTE New dispensing systems are shipped with one (1) lens and four (4) aperture disks with
the F4 aperture disk already installed. Replacement lenses are shipped with the F1.4
aperture disk installed and must have the F1.4 aperture disk removed. Aperture disks
are also available to order as a set (Item 56).
1
3
4
7
6
5
8
3x
2
S2-9XXX Series Dispensing System IOM Manual Parts Replacement
8-12 © 2023 Nordson Corporation
Item
Description
1 Middle Section
2 Aperture Disk
3 Lower Section
Figure 8-8 Replacing the Aperture Disk
Item Description Item Description
1
F16 (Good Depth of Field,
Low Light Transmission)
3 F4 (Standard)
2 F8 4
F1.4 (Narrow Depth of Field,
Good Illumination)
Figure 8-9 Aperture Disks
1
2
3
4
2
1
3
S2-9XXX Series Dispensing System IOM Manual Parts Replacement
© 2023 Nordson Corporation 8-13
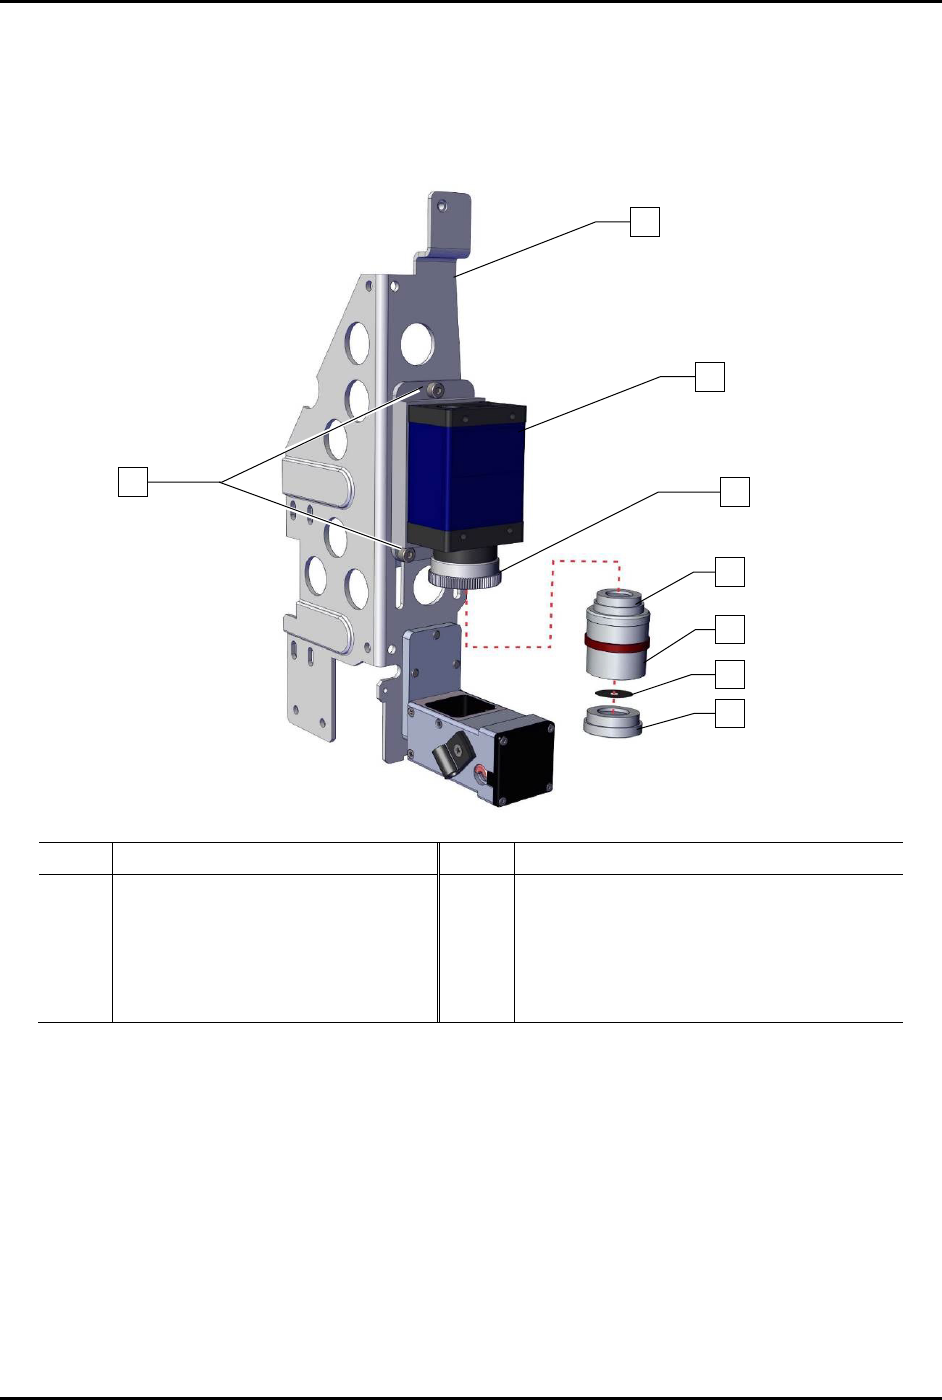
10. Install the lower section onto the middle section by hand-tightening clockwise
(Figure 8-10).
11. Install the lens onto the 2x optical lens clockwise until hand tightened.
12. Focus the camera, see 5.4 Focusing the Camera.
Item
Description
Item
Description
1
Bracket
5
Upper Section
2
Screw (Third screw is located
opposite of lower left screw)
6 Middle Section
3 Camera (Item 55) 7 Aperture Disk
4
2x Optical Lens
8
Lower Section
Figure 8-10 Replacing the Camera Lens
1
3
4
7
6
5
8
x3
2