Spectrum+Operating+Manual.pdf - 第82页
S2-9 XX X Se ri es Disp ensi n g Syst em IOM Man ual Calibration and Adjus tment 5-6 © 2023 Nordson Corporatio n 3. Click on Calibr ate . The Cali brat io n wi ndow op ens ( Figure 5-5). Figure 5-5 C ali bration Win do…
S2-9XXX Series Dispensing System IOM Manual Calibration and Adjustment
© 2023 Nordson Corporation 5-5
5.5 Calibrating the Camera
NOTE This procedure assumes the dispensing system has been powered on, Fluidmove is
running, a substrate is available, and the camera has been focused. The camera is self-
calibrating when using the calibrate button from the Setup Vision window. The software
compares the pixel count to machine units by moving away from the taught image by a
known value, finding the image again, and assigning a pixel-count-to-machine-unit value.
With this value established, the vision system can accurately find the substrate and
dispense at the correct location (provided the vision target image is within the field of
view).
NOTE If the camera is ever refocused to accommodate a different part height, the calibration
routine MUST be run again.
To calibrate the camera:
1. In the Fluidmove Programming Window, click the
Load a Board icon.
The conveyor will transport the substrate to the dispense station and the lift mechanism
will lift it off the conveyor belt.
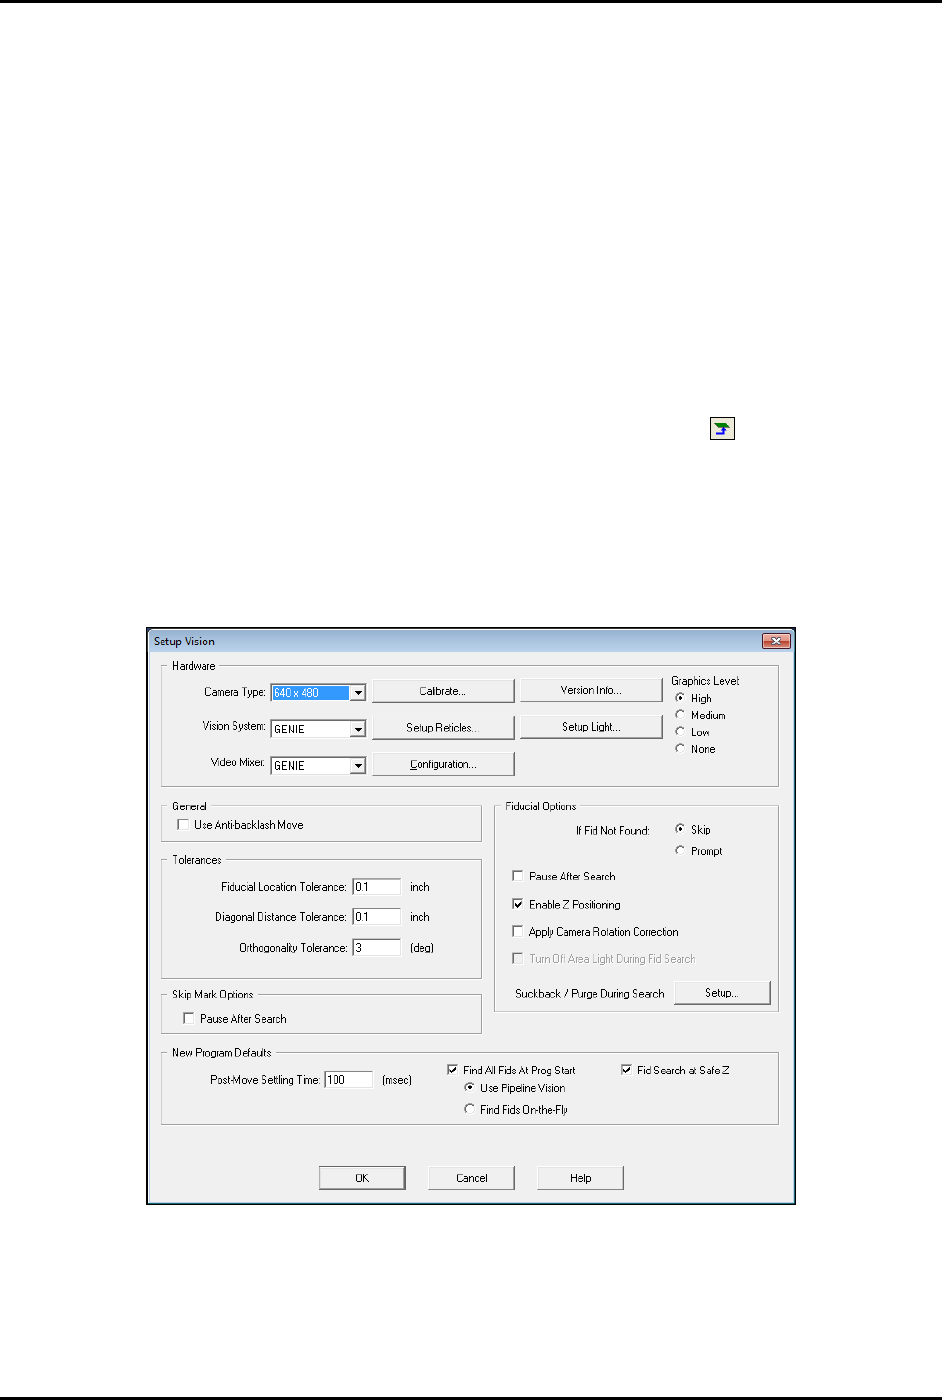
2. In the Fluidmove Main Window, click on
Configuration > Setup Vision.
The Setup Vision window opens (Figure 5-4).
Figure 5-4 Setup Vision
S2-9XXX Series Dispensing System IOM Manual Calibration and Adjustment
5-6 © 2023 Nordson Corporation
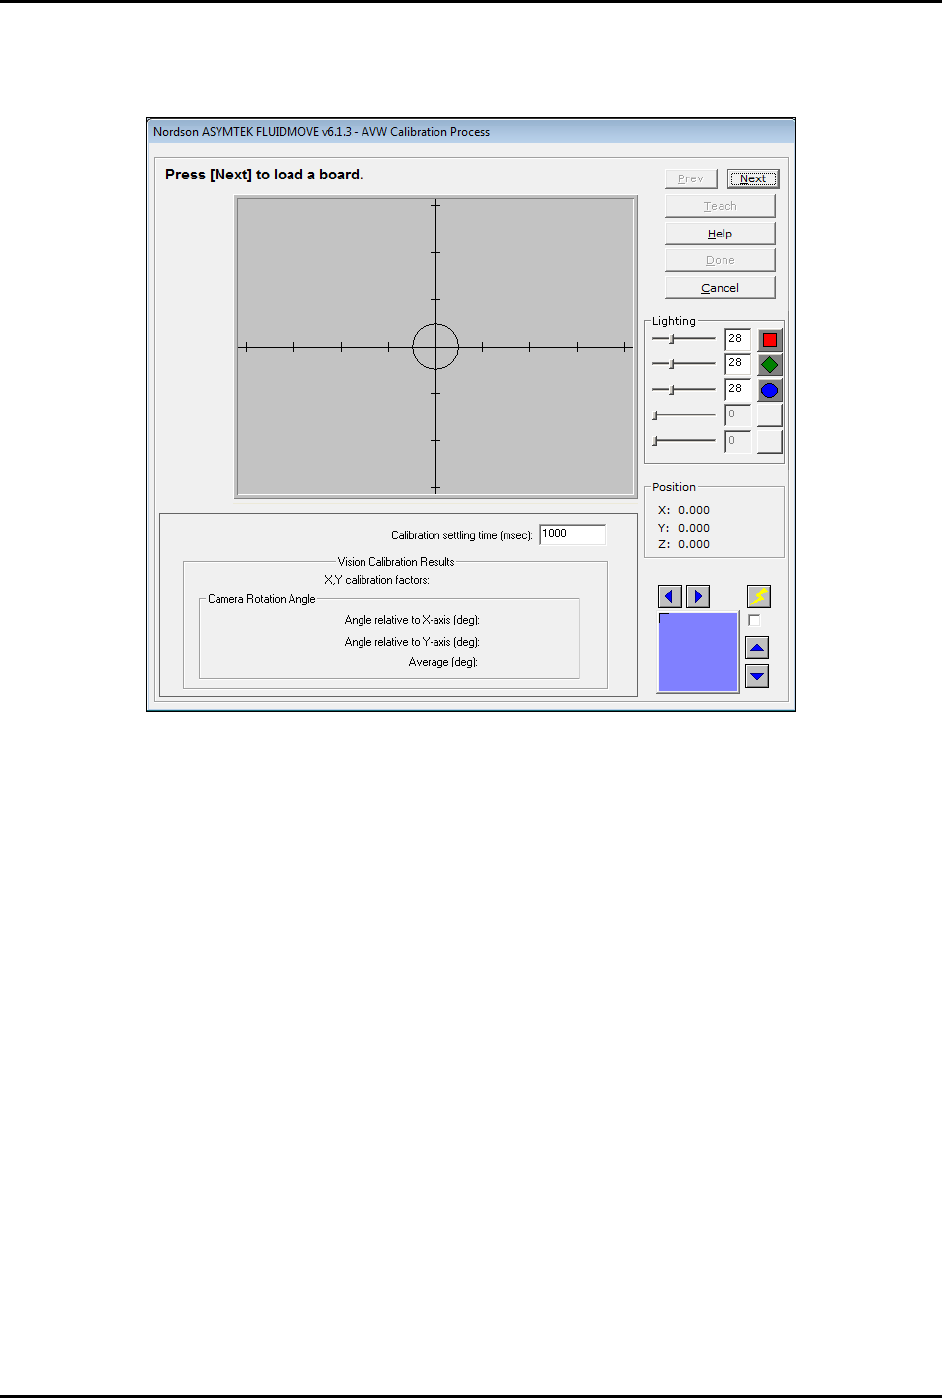
3. Click on Calibrate.
The Calibration window opens (Figure 5-5).
Figure 5-5 Calibration Window
4. Position the camera over a fiducial and adjust the light level to obtain a good image
contrast. Refer to the Fluidmove User Guide or Fluidmove Online Help.
5. If the image is not in focus, focus the camera, see 5.4 Focusing the Camera.
6. Click on
Next.
7. Verify that the fiducial image is centered and click on
Next.
The vision system will take a snap image of the fiducial.
8. If the fiducial is acceptable, select
Next. If not, select Prev and define a new fiducial.
NOTE The fiducial should fit inside the green square on the camera image.
9. After the camera calibration sequence is complete, verify that the X and Y values are
relatively close (within 10 increments) of each other. If there is a large difference, repeat the
calibration process and define a new fiducial.
10. If the results are satisfactory, select
Done to save the calibration results.
NOTE Machine Offsets must be performed after calibrating the camera. Refer to the Fluidmove
User Guide or Fluidmove Online Help for more information.
S2-9XXX Series Dispensing System IOM Manual Calibration and Adjustment
© 2023 Nordson Corporation 5-7
5.6 Calibrating the Scale
NOTE The scale should only need to be calibrated once during installation. However, if the scale
is moved, recalibration is recommended.
Tools and Materials Needed:
• 50g Calibration Weight
• Screwdriver
• Latex gloves or tweezers
To calibrate the scale:
1. Power on the dispensing system, see 4.3 Powering on the Dispensing System.
2. Start Fluidmove. Refer to the Fluidmove User Guide or Fluidmove Online Help.
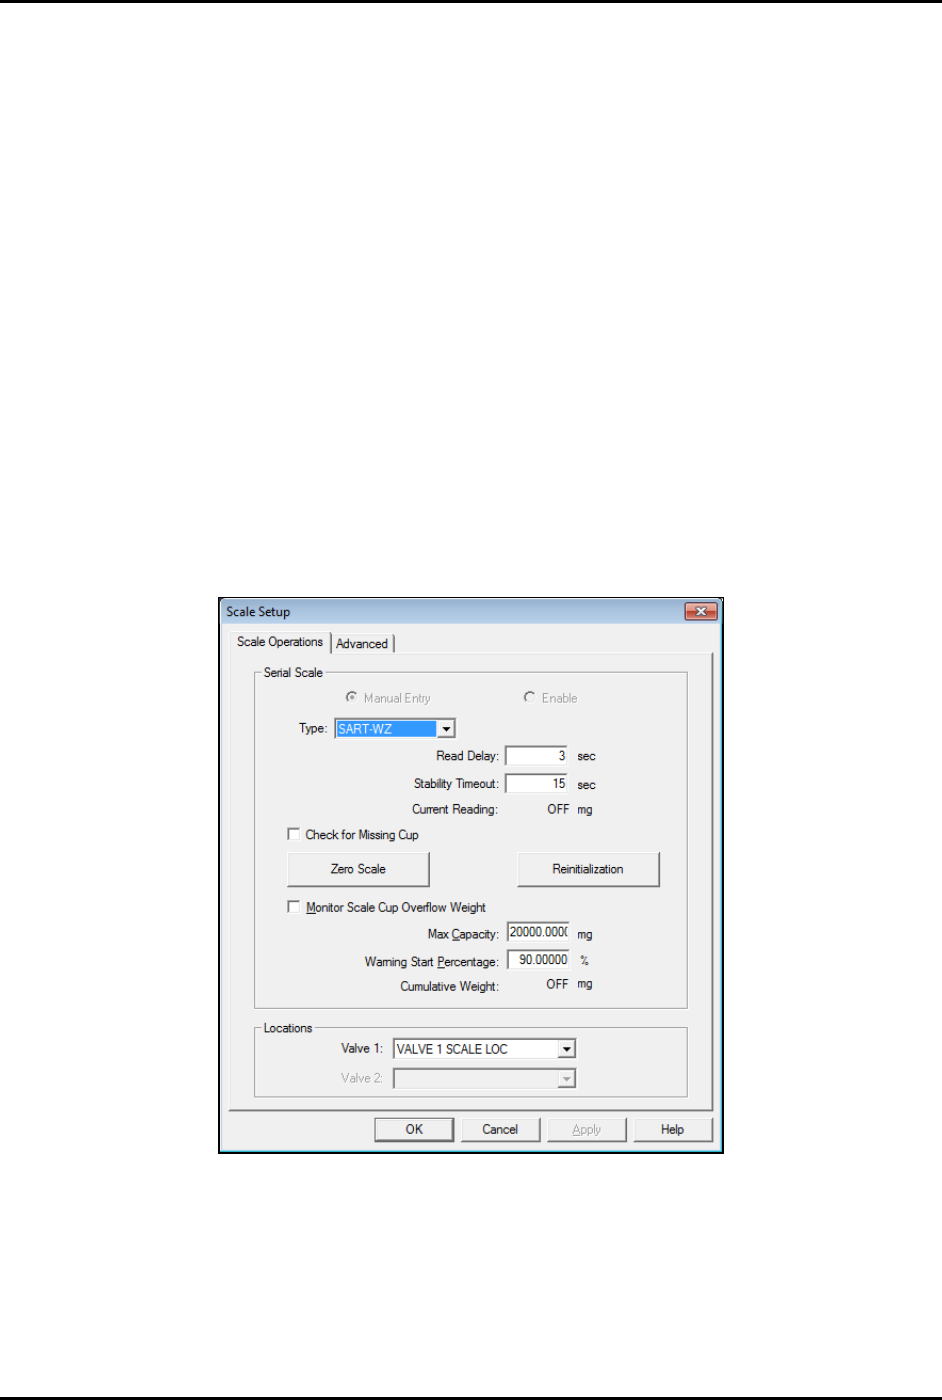
3. Select
Configuration > Setup Scale from the Main Window.
The Scale Setup window opens (Figure 5-6).
4. Select “SART-WZ” from the Type pull-down menu.
Figure 5-6 Setup Scale - Scale Operations Tab