Spectrum+Operating+Manual.pdf - 第157页
S2-9 XXX Se ri es Dispensing Sys te m IOM Man ual Parts Replacement © 2023 Nordson C orpor ation 8-5 8.10 Removing and In stalling the Dispense Station Cover Tools and Materials Needed : • Hex Key Set (Item 59) To remove…
S2-9XXX Series Dispensing System IOM Manual Parts Replacement
8-4 © 2023 Nordson Corporation
8.9 Removing and Installing the Top Cover and
Components
Tools and Materials Needed:
• Hex Key Set (Item 59)
• Adjustable Wrench
WARNING! Ensure the dispensing system has been completely shutdown before attempting
to remove any panel.
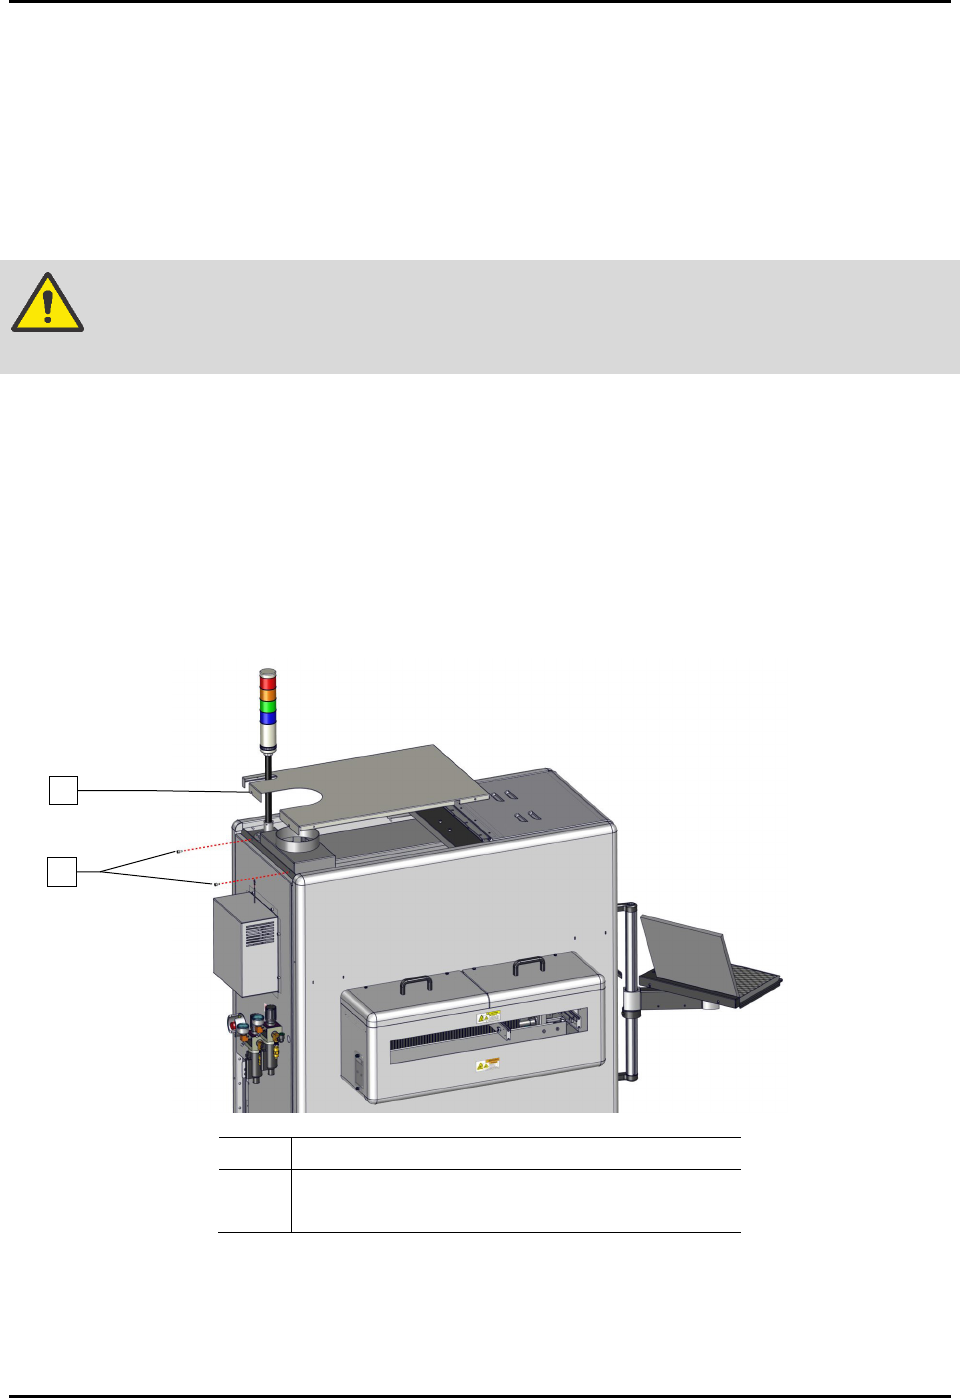
To remove and install the top cover (Figure 8-1):
1. Perform a service shutdown, see 2.14 Service Shutdown.
2. Remove the two (2) screws securing the top cover to the dispensing system.
3. Remove the top cover from the dispensing system.
4. Align the top cover to the alignment holes on the dispensing system.
5. Install the two (2) screws securing the top cover to the dispensing system.
Item
Description
1 Top Cover
2
Screws (2)
Figure 8-1 Replacing and Installing the Top Cover
1
2
S2-9XXX Series Dispensing System IOM Manual Parts Replacement
© 2023 Nordson Corporation 8-5
8.10 Removing and Installing the Dispense Station Cover
Tools and Materials Needed:
• Hex Key Set (Item 59)
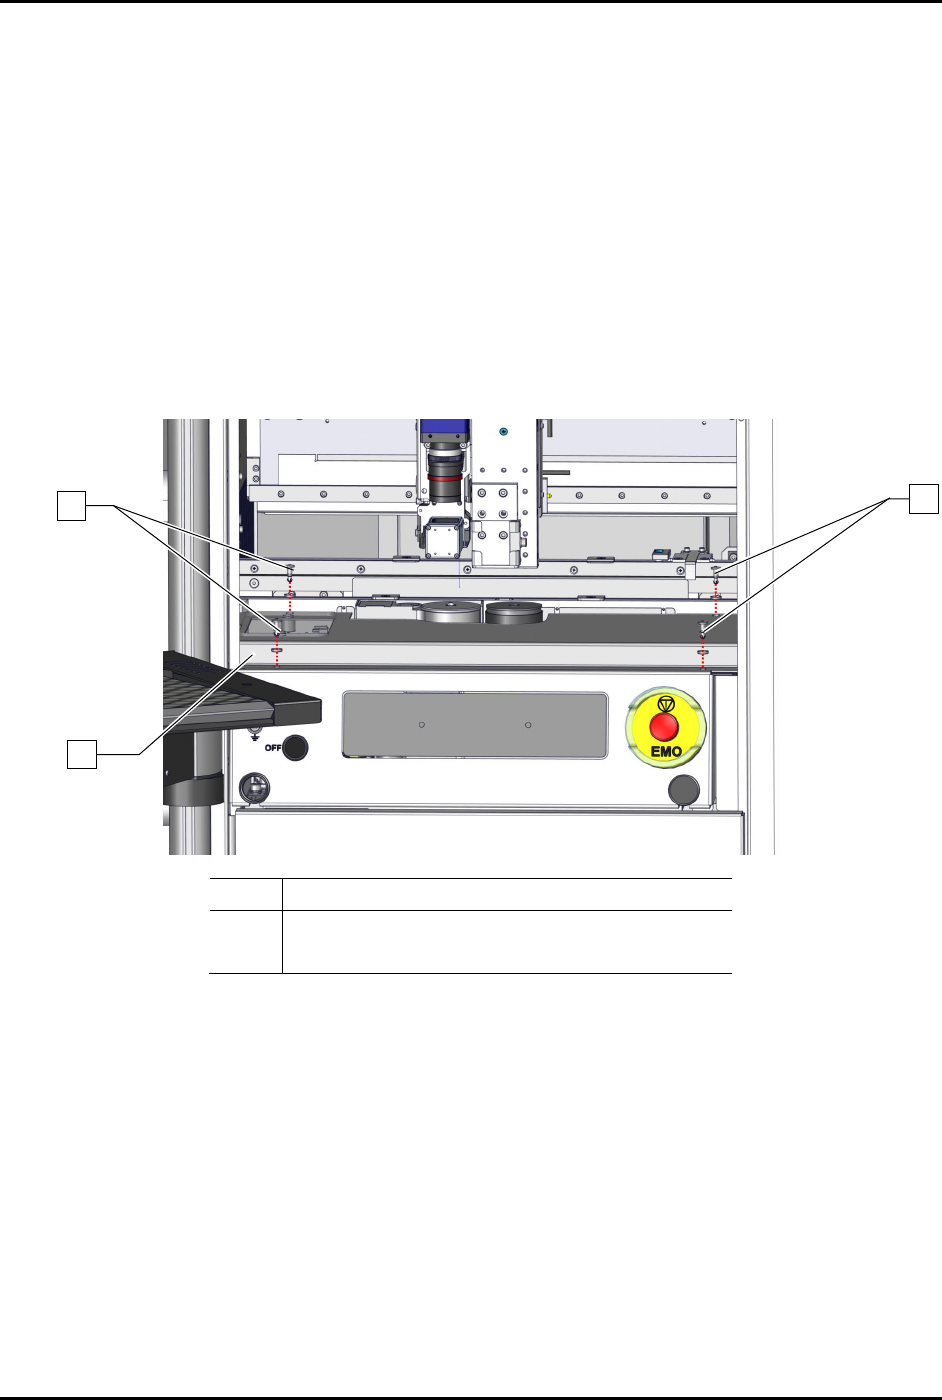
To remove the dispense station cover (Figure 8-2):
1. Perform a service shutdown, see 2.14 Service Shutdown.
2. Open the dispensing area door.
3. Remove the four (4) screws and four (4) washers securing the dispense station cover to the
dispensing station.
4. Remove the dispense station cover from the dispensing system.
Item Description
1 Screws and Washers (4 ea.)
2 Dispense Station Cover
Figure 8-2 Replacing the Dispense Station Cover
To install the dispense station cover (Figure 8-2):
1. Secure the dispense station cover to the dispensing system with four (4) screws and four (4)
washers.
2. Close the dispensing area door.
1
1
2
S2-9XXX Series Dispensing System IOM Manual Parts Replacement
8-6 © 2023 Nordson Corporation
8.11 Replacing the Dispense Station Components
Tools and Materials Needed:
• Hex Key Set (Item 59)
• Bubble Level
• Torque Wrench
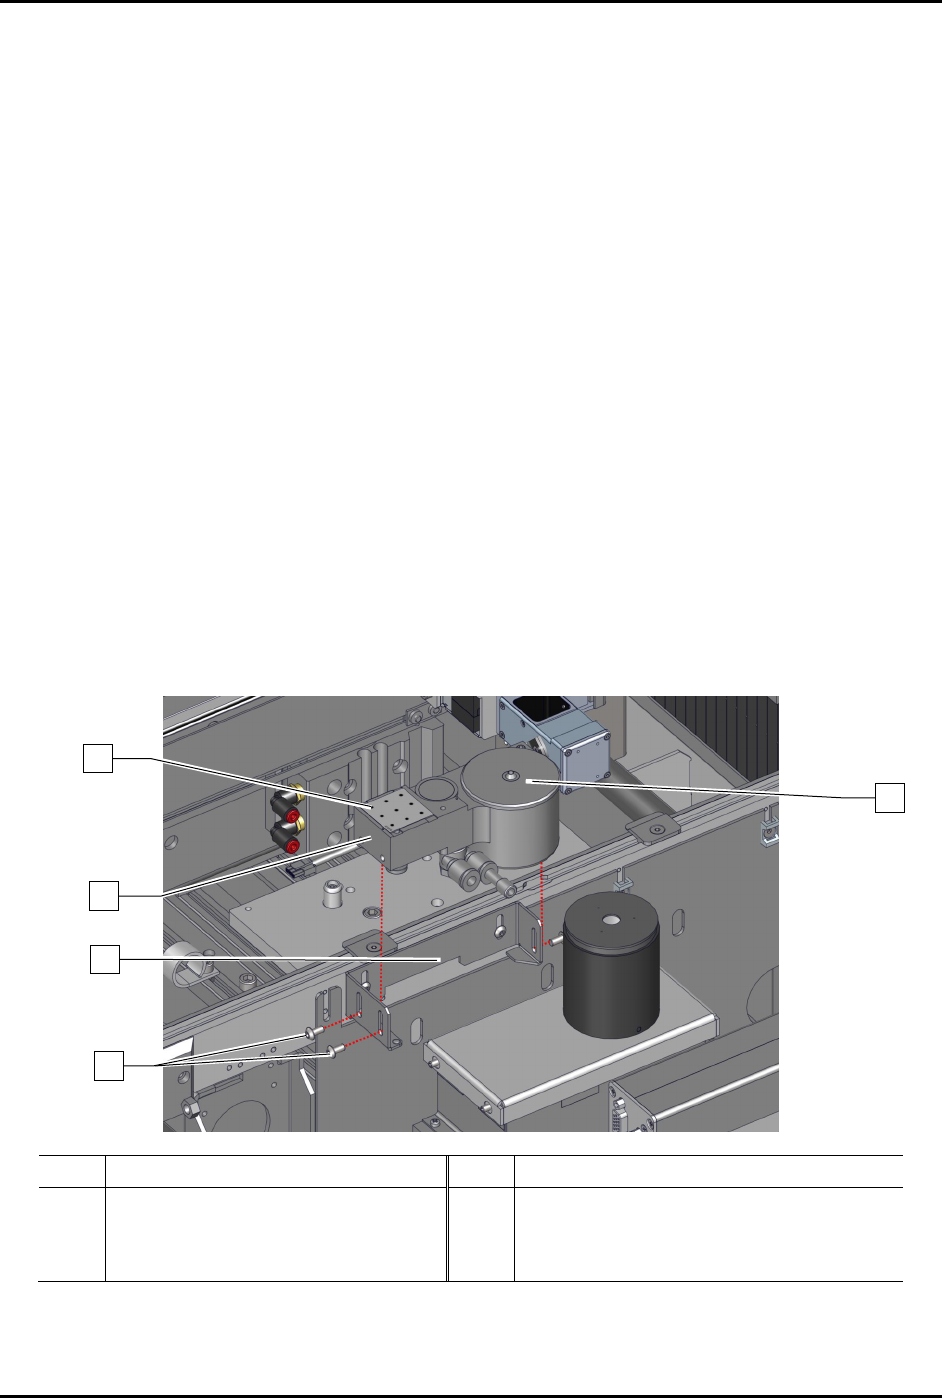
8.11.1 Replacing the Service Station
To remove the service station (Figure 8-3):
1. Perform a service shutdown, see 2.14 Service Shutdown.
2. Open the dispensing area door.
3. Remove the dispense station cover, see 8.8 Removing and Installing the Dispense Station
Cover.
4. Remove the dispensing station cover from the dispensing system.
5. Remove the dispense tile and purge station lid from the service station.
6. Disconnect the pneumatic
and electrical connections from the service station.
7. Loosen, do not remove, the three (3) screws securing the service station to the service
station bracket.
8. Remove the service station from the service station bracket.
Item
Description
Item
Description
1 Dispense Tile 4 Service Station Bracket
2 Purge Station Lid 5 Service Station (Item 44)
3 Screws (3)
Figure 8-3 Replacing the Service Station
1
2
4
5
3