Spectrum+Operating+Manual.pdf - 第138页
S2-9 XX X Se ri es Disp ensi n g Syst em IOM Man ual Maintenance 6-26 © 2023 Nordson Corporatio n 6.13 Tensioning t he Co nve yor Be lts To tension the conve yo r belts ( Figure 6- 18 ): 1. P er form a serv ice sh utdo w…

S2-9XXX Series Dispensing System IOM Manual Maintenance
© 2023 Nordson Corporation 6-25
9. Remove the gauge from under the encoder.
10. Manually move the dispensing head up and down and make sure that the encoder LED
remains green when in motion.
If the LED turns red or orange when the axis is in motion, repeat Step 4 through Step 11
and adjust the encoder height again.
If you notice that the LED turns red or orange in a specific location, it may be due to an
obstruction or a damaged encoder strip. Try using a soft cloth and mild cleanser to clean
that location. If the problem is not resolved, repeat Step 4 through Step 11 and adjust
the encoder height again.
11. When the LED stays green throughout the entire dispensing head travel, close the
dispensing area door and restart Fluidmove.
12. Observe the dispensing head motion to ensure the dispensing head initializes properly and
finds home correctly.
S2-9XXX Series Dispensing System IOM Manual Maintenance
6-26 © 2023 Nordson Corporation
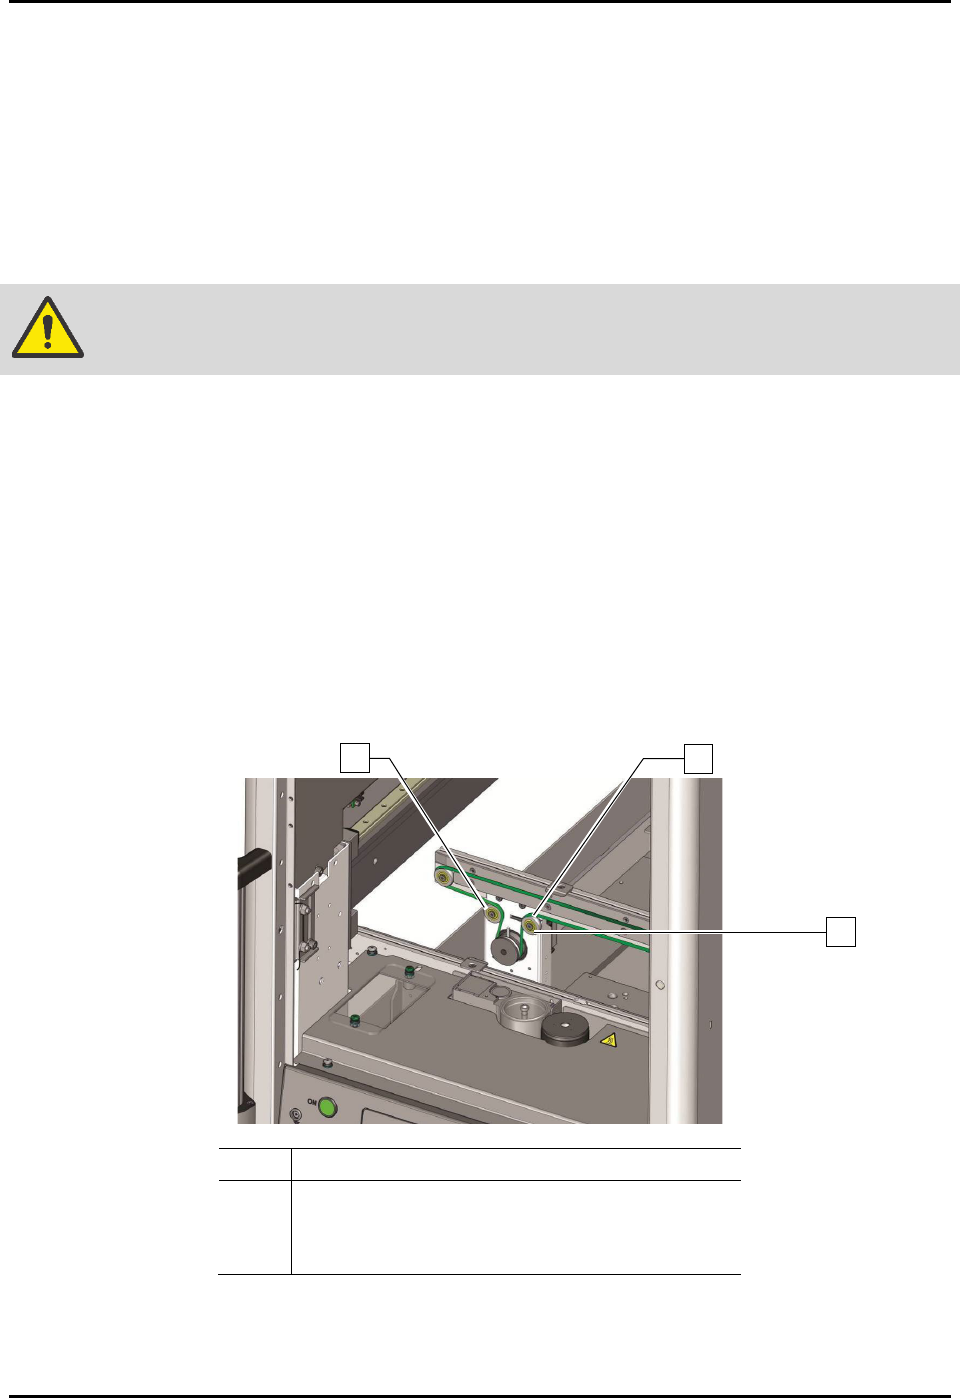
6.13 Tensioning the Conveyor Belts
To tension the conveyor belts (Figure 6-18):
1. Perform a service shutdown, see 2.14 Service Shutdown.
2. If applicable, lift the heater tooling assembly out the dispense station to provide access to
the conveyor belt adjustment pulley.
There is a belt adjustment pulley for each belt.
WARNING! Make sure the heater tooling is cool before removal.
3. Loosen, do not remove, the belt tensioner screw located on the belt adjustment pulley.
Hold the bolt on the back of the belt adjustment pulley while loosening the screw so
that it will not turn with the screw.
4. Move belt tension pulley right and left until the desired tension is obtained.
5. Tighten the belt tensioner screw.
6. Torque the belt tensioner screw to 9.8 Nm (87 in-lbs).
7. Repeat Step 3 through Step 6 for the other conveyor belt.
8. If the dispensing system is equipped with dual conveyors, perform Step 3 through Step 6 for
the other conveyor.
Item Description
1
Conveyor Belt
2 Belt Adjustment Pulley
3
Belt Tensioner Screw
Figure 6-18 Tensioning the Conveyor Belts
NOTE If the conveyor belts need to be replaced, see 8.12 Replacing the Conveyer Belts.
3
1
2

© 2023 Nordson Corporation 7-1
7 Troubleshooting
7.1 Overview
If you have difficulty operating your dispensing system, use this section to identify a possible solution to
the problem. If you have difficulties not listed in this section, or the suggested solution does not correct
the problem, contact Asymtek Technical Support.
NOTE There are no user serviceable parts inside the electrical modules. Refer to the Fluidmove
User Guide or Fluidmove Online Help for assistance with the Fluidmove software.
7.2 Safety First
Operation of your dispensing system involves heat, air pressure, electrical power, mechanical devices,
and the use of hazardous materials. Read this manual in its entirety before attempting any system or
component operation. It is essential for all personnel working on or around the dispensing system to fully
understand the hazards, risks, and safety precautions associated with operating the system. When properly
operated and maintained, the dispensing system is safe and reliable. See Section 2 - Safety for additional
information.
WARNING! Allow only qualified personnel to perform system troubleshooting. Observe and
follow the safety instructions in this document and all other related
documentation. Failure to do so may cause serious bodily injury to the user or
damage to the equipment.
WARNING! DO NOT hot swap connections when working with electrical and pneumatic
power supplies. Turn the main circuit break off before disconnecting the external
power plug from the facility.
7.3 Record Keeping
The type of procedure performed should be recorded in maintenance records for the dispensing system.
Dates, part numbers/serial numbers of replaced parts, names of technicians, and other pertinent data
should be recorded.