Spectrum+Operating+Manual.pdf - 第165页
S2-9 XXX Se ri es Dispensing Sys te m IOM Man ual Parts Replacement © 2023 Nordson C orpor ation 8-13 10. Insta ll the low er secti on onto the mi ddle sec tion by ha nd - ti ghte ning clo ckwise (F igu re 8- 10 ). 11. I…
S2-9XXX Series Dispensing System IOM Manual Parts Replacement
8-12 © 2023 Nordson Corporation
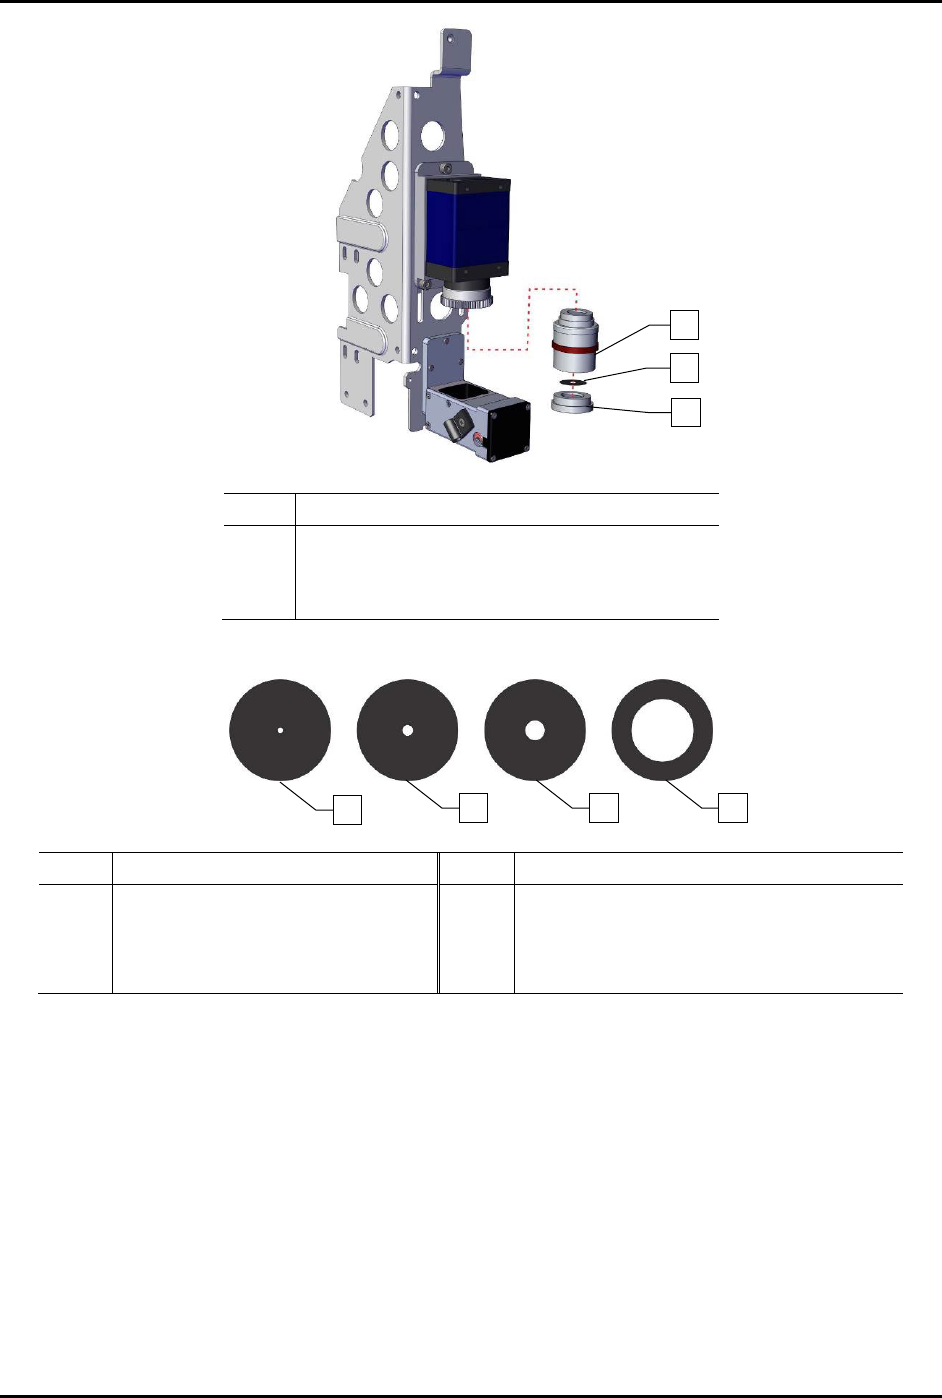
Item
Description
1 Middle Section
2 Aperture Disk
3 Lower Section
Figure 8-8 Replacing the Aperture Disk
Item Description Item Description
1
F16 (Good Depth of Field,
Low Light Transmission)
3 F4 (Standard)
2 F8 4
F1.4 (Narrow Depth of Field,
Good Illumination)
Figure 8-9 Aperture Disks
1
2
3
4
2
1
3
S2-9XXX Series Dispensing System IOM Manual Parts Replacement
© 2023 Nordson Corporation 8-13
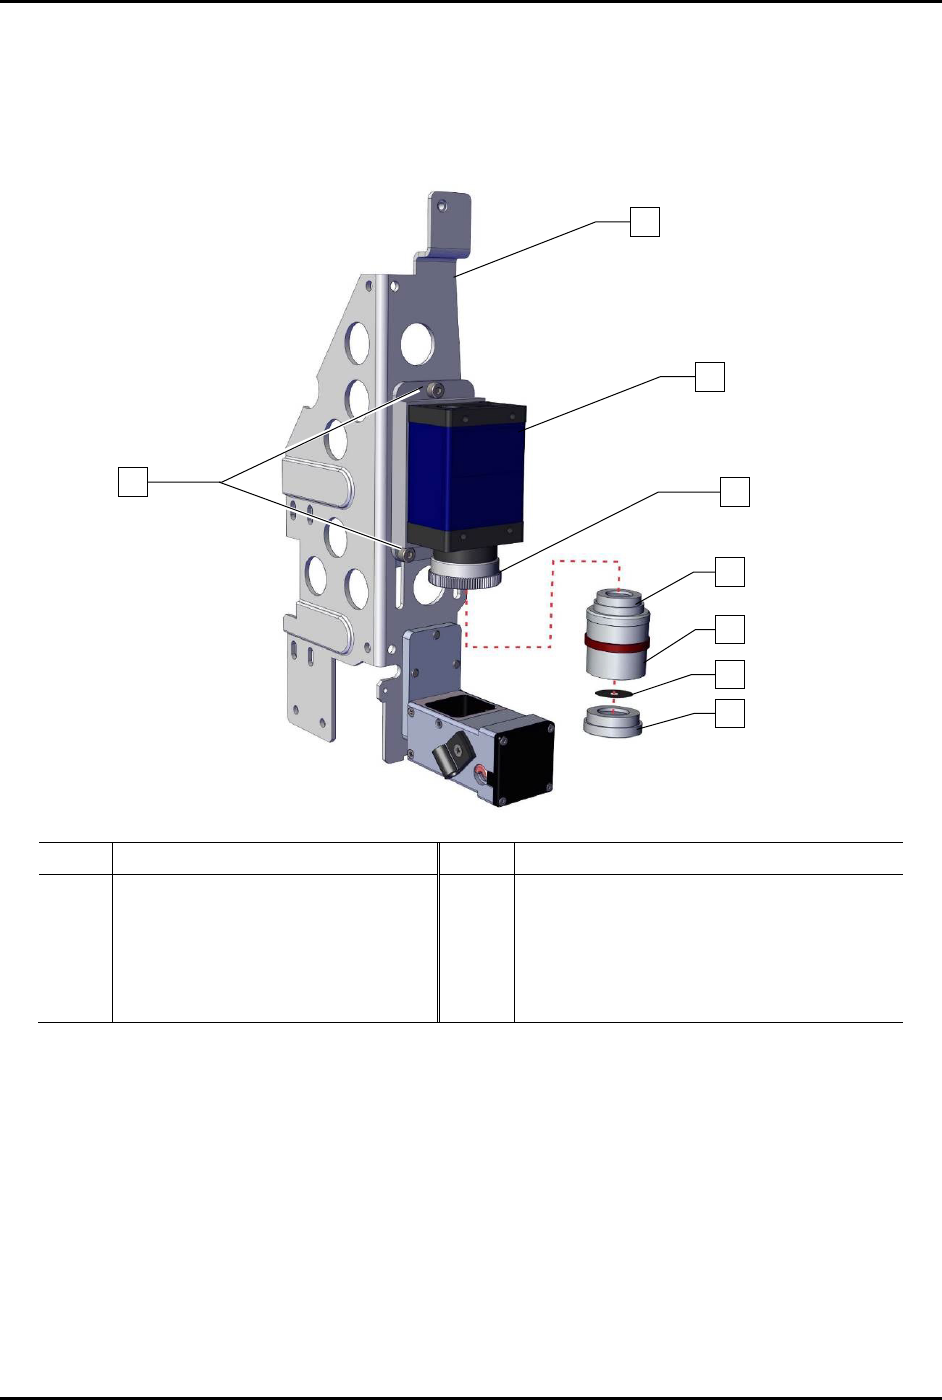
10. Install the lower section onto the middle section by hand-tightening clockwise
(Figure 8-10).
11. Install the lens onto the 2x optical lens clockwise until hand tightened.
12. Focus the camera, see 5.4 Focusing the Camera.
Item
Description
Item
Description
1
Bracket
5
Upper Section
2
Screw (Third screw is located
opposite of lower left screw)
6 Middle Section
3 Camera (Item 55) 7 Aperture Disk
4
2x Optical Lens
8
Lower Section
Figure 8-10 Replacing the Camera Lens
1
3
4
7
6
5
8
x3
2
S2-9XXX Series Dispensing System IOM Manual Parts Replacement
8-14 © 2023 Nordson Corporation
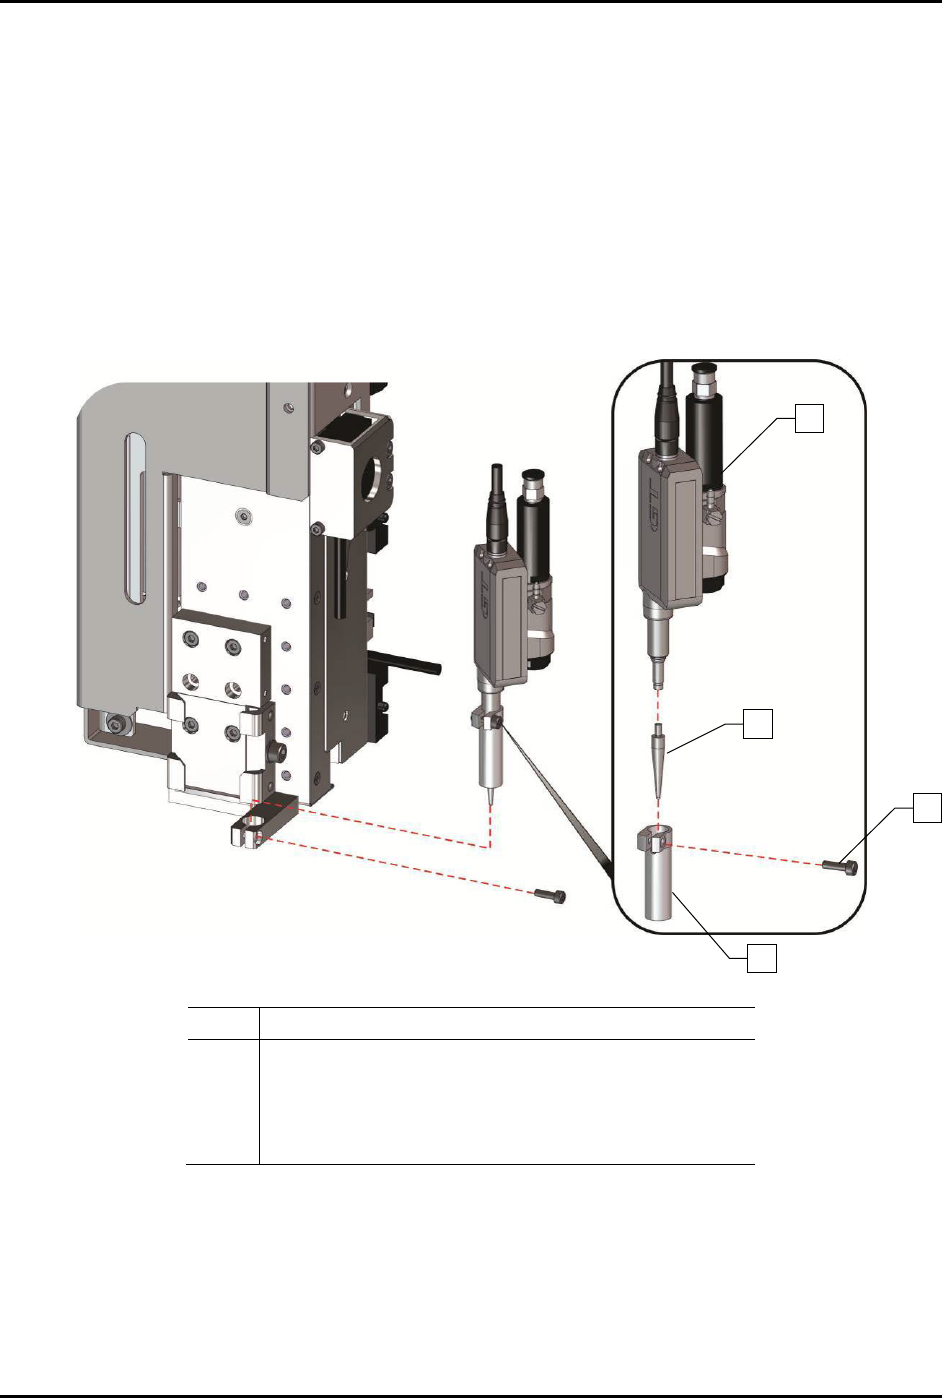
8.12.2 Replacing the Mechanical/Tactile Height Sensor Probe
To replace the height sensor probe (Figure 8-11):
1. Pull the height sensor probe down.
2. Loosen the height sensor locking screw on the front of the height sensor assembly and
remove the height sensor sleeve.
3. Remove the height sensor probe by turning it counterclockwise and sliding it out.
4. Install a new height sensor probe and turn it clockwise to tighten it.
5. Replace the height sensor sleeve and tighten the locking screw.
Item
Description
1 Height Sensor Assembly (Item 54)
2 Height Sensor Probe
3 Height Sensor Probe Locking Screw (front)
4 Height Sensor Sleeve
Figure 8-11 Replacing the Height Sensor Probe
1
2
3
4