Spectrum+Operating+Manual.pdf - 第70页
在线预览 Spectrum+Operating+Manual.pdf PDF 文档。
S2-9XXX Series Dispensing System IOM Manual Installation
© 2023 Nordson Corporation 3-17
3.14 Adjusting the Main Air Pressure
The main air inlet provides regulated air pressure to the dispensing system from your facility air source.
You can adjust the main air pressure with the main air regulator.
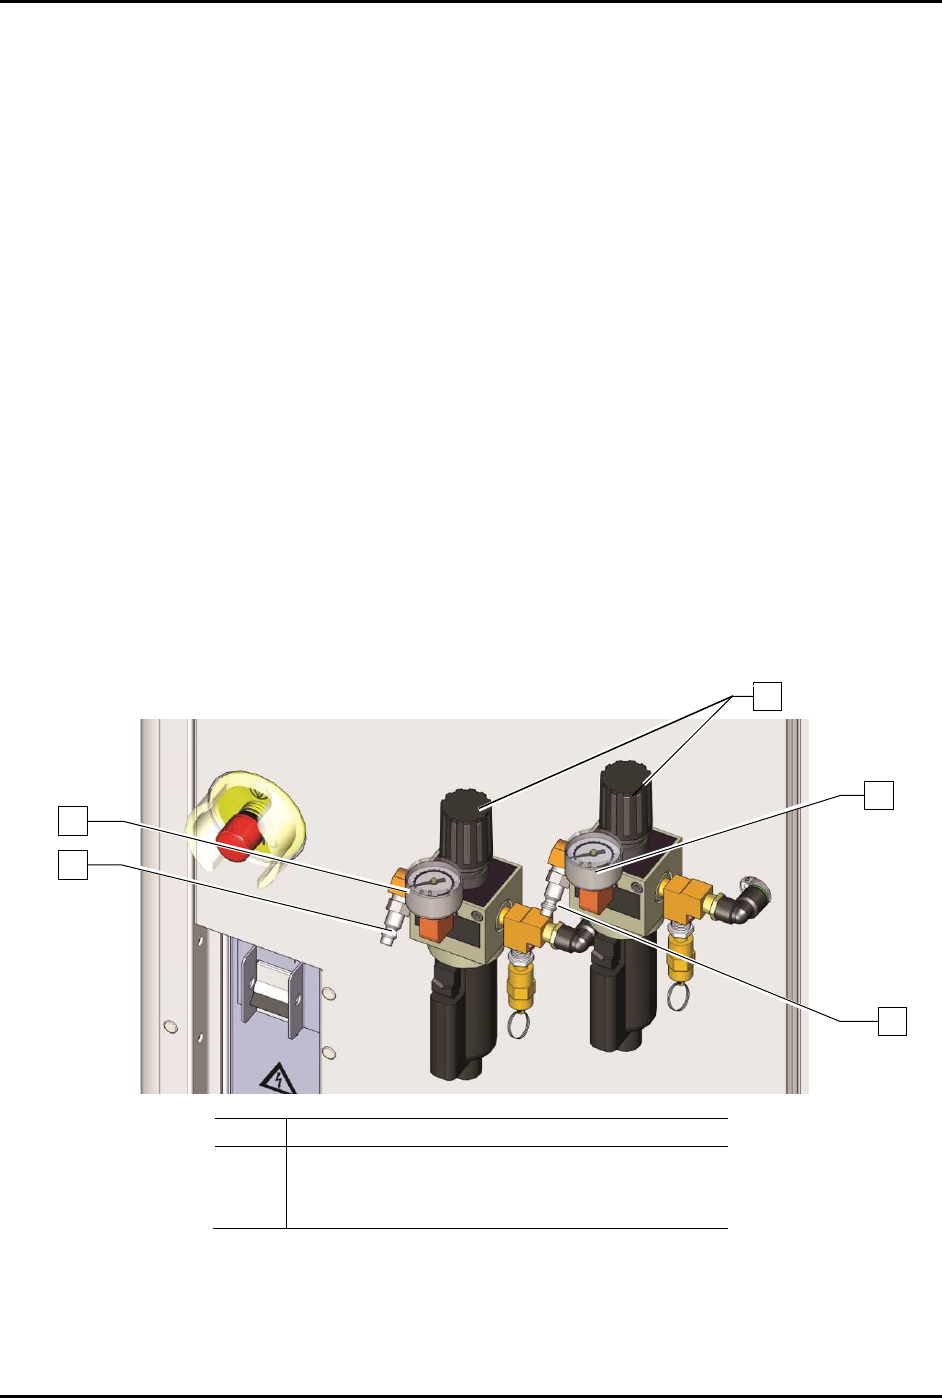
To adjust the main air pressure (Figure 3-16):
1. Verify that the facility air is connected to the main air pressure regulator inlet.
2. Locate the main air regulator at the rear of the dispensing system.
3. Rotate the main air regulator counterclockwise until the main air gauge registers zero (0).
4. Rotate the knob clockwise until the main air pressure gauge registers 621 to 689 kPa
(90 to 100 psi).
For accurate pressure adjustment, lower the pressure below the desired level and then
increase to the desired pressure.
5. If the main air pressure gauge fails to register pressure, verify that the dispensing system is
connected to the facility air source.
If there is an air leak, identify the source, shut off the
facility air, and fix the leak before
proceeding.
NOTE The regulator assembly is equipped with a relief valve to protect the system components.
Increasing the pressure above 655 kPa (95 psi) may trigger the relief valve. If so, reduce
the air pressure below 655 kPa (95 psi).
Item
Description
1
Main Air Inlet
2
Main Air Gauge
3
Main Air Regulator
Figure 3-17 Main Air Pressure Regulator and Gauge Sets
3
2
2
1
1
© 2023 Nordson Corporation 4-1
4 Operation
4.1 Overview
The sections that follow describe the general sequence of actions necessary to power on and shutdown the
dispensing system. This section covers the following topics:
• Powering on the Dispensing System
• Daily Routine Procedures
• Starting Fluidmove for Windows
• Running Production
• Camera States
• Shutdown
WARNING! DO NOT operate the dispensing system unless you have been trained to do so.
Operating the dispensing system without proper training may result in personal
injury or dispensing system damage.
4.2 Safety First
Operation of your dispensing system involves heat, air pressure, electrical power, mechanical devices,
and the use of hazardous materials. Read this manual in its entirety before attempting any system or
component operation. It is essential for all personnel working on or around the dispensing system to fully
understand the hazards, risks, and safety precautions associated with operating the system. When properly
operated and maintained, the dispensing system is safe and reliable. See Section 2 - Safety for additional
information.
4.3 Powering on the Dispensing System
To power on the dispensing system (Figure 4-1):
1. Verify that the main power cord is connected to the main power inlet and the facility power
source.
2. Verify that the facility air is at the recommended pressure level and connected to the main air
pressure regulator inlets, see
3.12 Connecting the Power and Air Supply.
3. Turn the main circuit breaker on the back of the system to the
ON position.
4. Check the EMO buttons to see if they have been activated. If one has been activated, deactivate
it by turning the red knob clockwise until the knob pops out.
5. Make sure the interlock signal is not interrupted. Close the dispensing area door if applicable.
6. Turn the laptop computer power button
ON (l).
The laptop computer should begin the boot up sequence.
7. Press the ON (l) button on the front panel.
The dispensing system should be in a powered-up state and the digital gauges and green
power button should be on. If not, make sure the power cord is properly connected to the
dispensing system and to an active facility power source.