Spectrum+Operating+Manual.pdf - 第156页
S2-9 XX X Se ri es Disp ensi n g Syst em IOM Man ual Parts Replacement 8-4 © 2023 Nordson Corporatio n 8.9 Removing and Inst alling the Top Cov er and Components Tools and Materials Needed : • Hex Key Set (Item 59) • Adj…

S2-9XXX Series Dispensing System IOM Manual Parts Replacement
© 2023 Nordson Corporation 8-3
8.5.1 Return Material Authorization
Contact Asymtek Technical Support to obtain a Return Material Authorization (RMA) before returning
any parts.
NOTE Find your local Technical Support contact on the Asymtek web page,
www.nordsonasymtek.com.
8.6 Record Keeping
The type of service performed should be recorded in the dispensing system maintenance records. Dates,
part numbers/serial numbers of replaced parts, names of technicians, and other pertinent data should be
recorded.
8.7 Unpacking and Inspecting Replacement Parts
Replacement parts are shipped to distributor or customer facilities in individual shipping cartons. Review
the packing slip to ensure that the correct parts were received. Contact Asymtek Technical Support if any
discrepancies are discovered.
Before unpacking your spare parts, visually inspect the carton for damage. If applicable, check the
"Tip & Tell" and "Shockwatch" devices for indications of improper shipping and handling. Inform the
freight carrier of any damage.
8.8 Cleaning and Inspection
Always clean the area made visible after a failed part is removed from the dispensing system. Inspect the
area for signs of what may have caused the part to fail. This may help prevent future part damage.
While removing parts that will be reinstalled, visually inspect them for damage. If found undamaged,
retain them for reinstallation. Replace damaged parts and hardware as appropriate.
S2-9XXX Series Dispensing System IOM Manual Parts Replacement
8-4 © 2023 Nordson Corporation
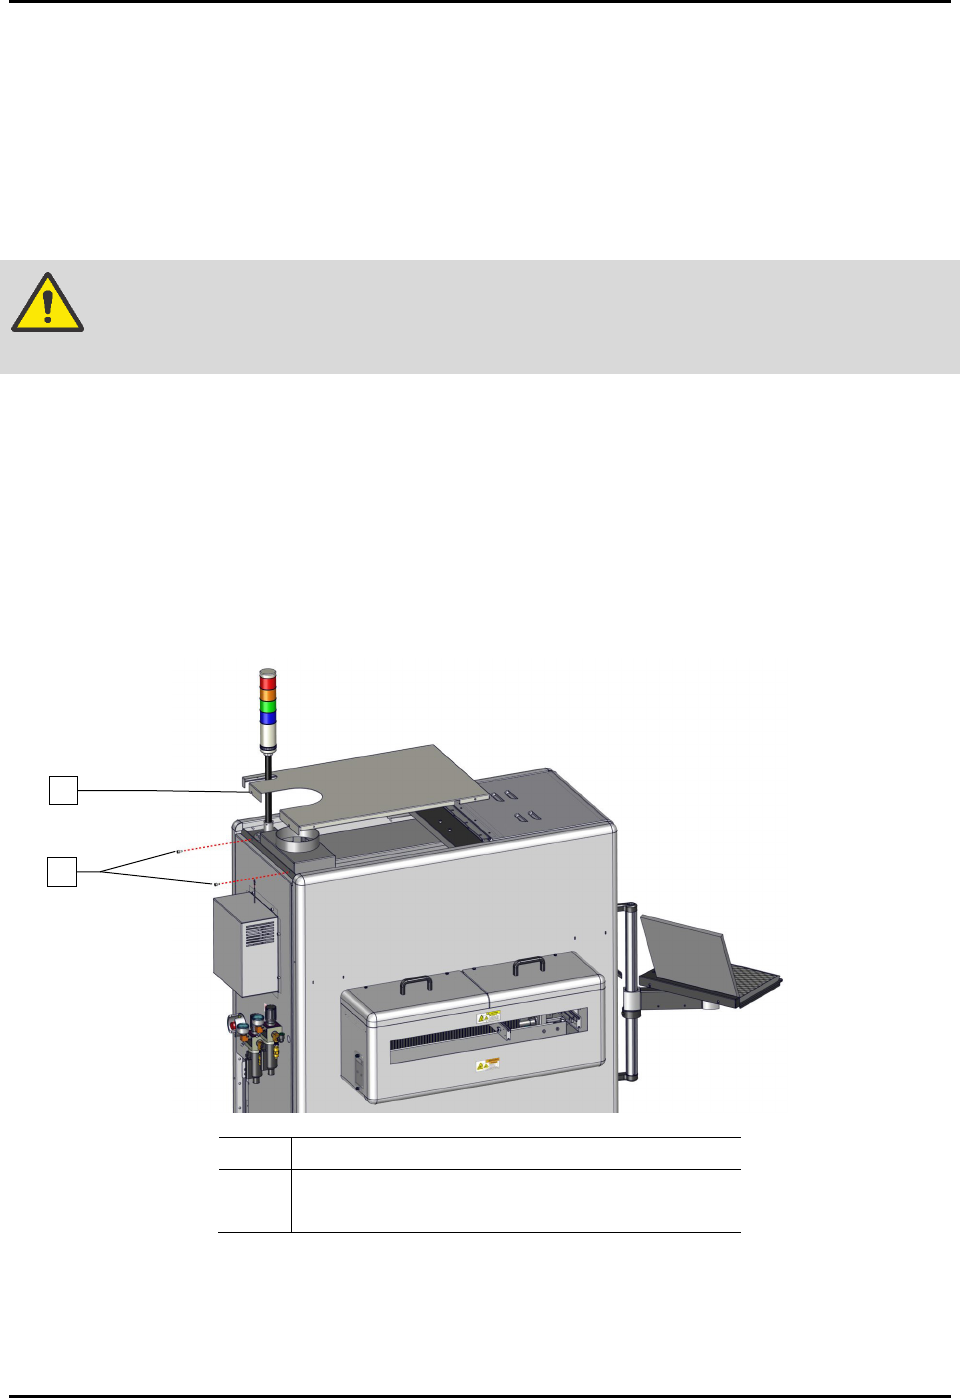
8.9 Removing and Installing the Top Cover and
Components
Tools and Materials Needed:
• Hex Key Set (Item 59)
• Adjustable Wrench
WARNING! Ensure the dispensing system has been completely shutdown before attempting
to remove any panel.
To remove and install the top cover (Figure 8-1):
1. Perform a service shutdown, see 2.14 Service Shutdown.
2. Remove the two (2) screws securing the top cover to the dispensing system.
3. Remove the top cover from the dispensing system.
4. Align the top cover to the alignment holes on the dispensing system.
5. Install the two (2) screws securing the top cover to the dispensing system.
Item
Description
1 Top Cover
2
Screws (2)
Figure 8-1 Replacing and Installing the Top Cover
1
2
S2-9XXX Series Dispensing System IOM Manual Parts Replacement
© 2023 Nordson Corporation 8-5
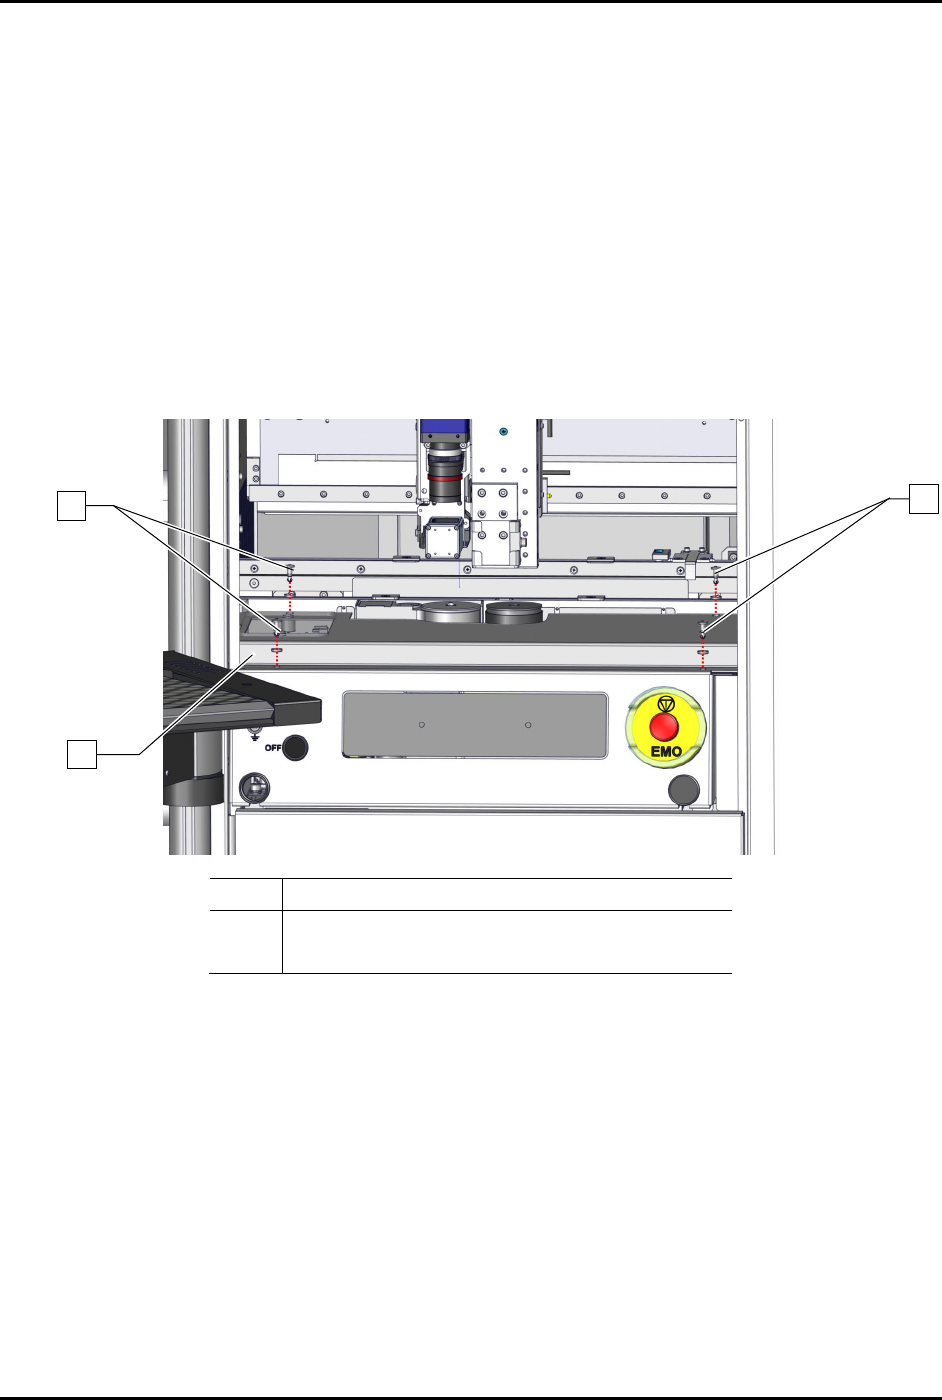
8.10 Removing and Installing the Dispense Station Cover
Tools and Materials Needed:
• Hex Key Set (Item 59)
To remove the dispense station cover (Figure 8-2):
1. Perform a service shutdown, see 2.14 Service Shutdown.
2. Open the dispensing area door.
3. Remove the four (4) screws and four (4) washers securing the dispense station cover to the
dispensing station.
4. Remove the dispense station cover from the dispensing system.
Item Description
1 Screws and Washers (4 ea.)
2 Dispense Station Cover
Figure 8-2 Replacing the Dispense Station Cover
To install the dispense station cover (Figure 8-2):
1. Secure the dispense station cover to the dispensing system with four (4) screws and four (4)
washers.
2. Close the dispensing area door.
1
1
2