3OM-1050-002.pdf - 第145页
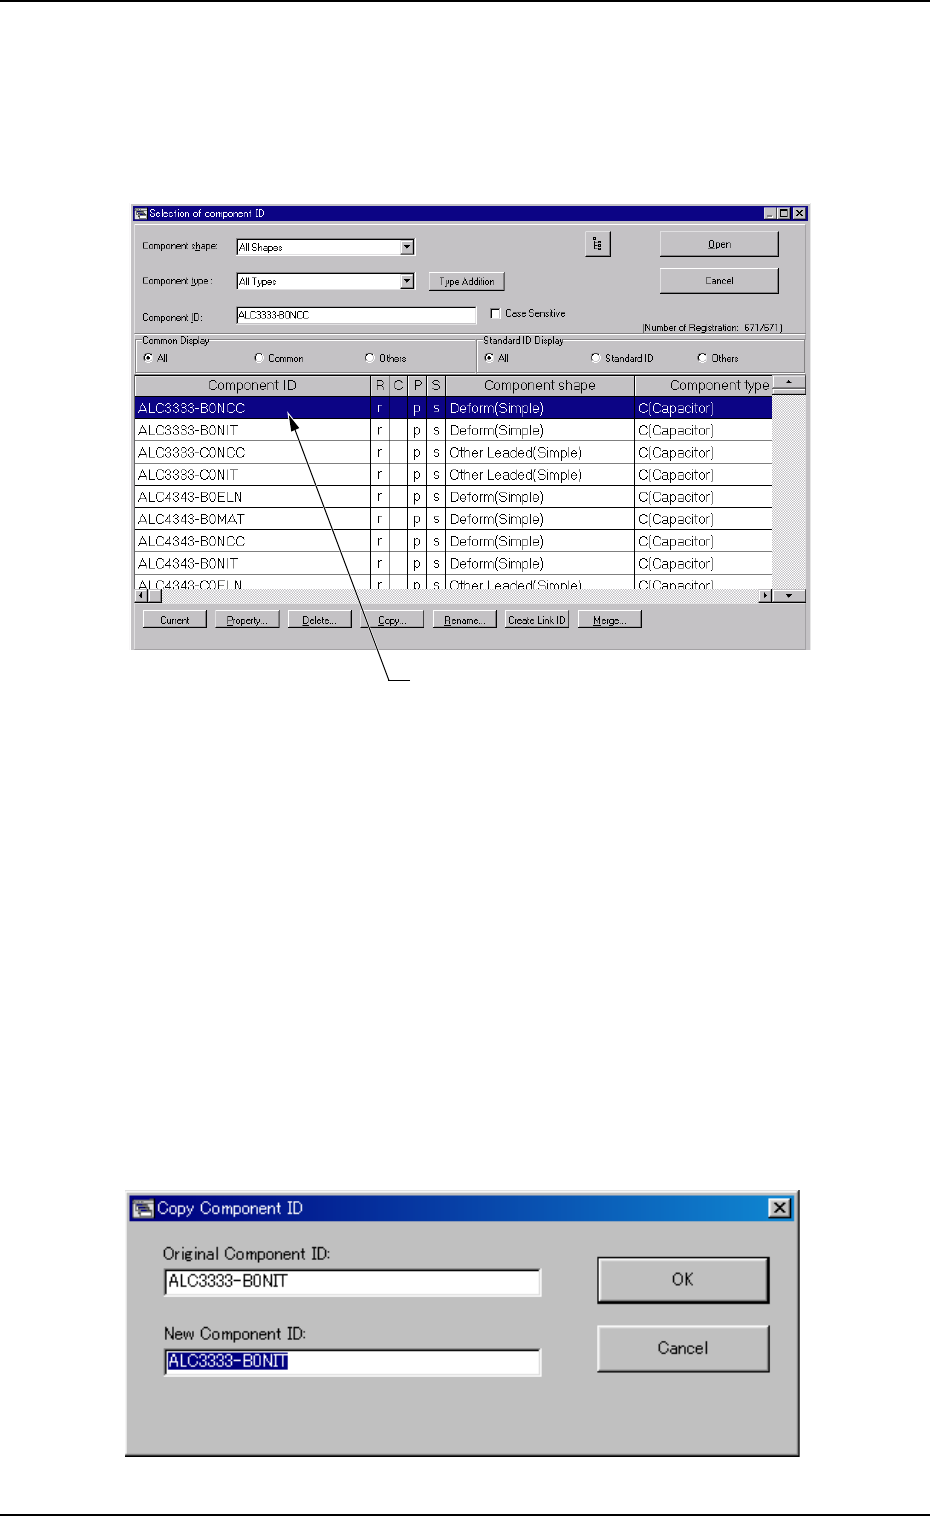
(3) Enter a new component ID in the "New Component ID:" text box and press the [OK] button. The original component ID is copied and created as a new one. 2.3.4 Renaming a Component ID (1) Select the component I…
2.3.2 Deleting a Component ID
(1) Select the component ID to be deleted.
The selected component ID turns blue, indicating that it is se-
lected.
Fig. 3C5-1
(2) Press the [Delete...] button.
The "Confirmation" dialog box opens. When the [YES] button is
pressed, the selected component ID is deleted. Pressing the [NO]
button closes the "Confirmation" dialog box without deleting the
component ID.
2.3.3 Copying a Component ID
(1) Select the component ID to be copied.
The selected component ID turns blue, indicating that it is se-
lected.
(2) Press the [Copy...] button.
The "Copy Component ID" dialog box opens.
Fig. 3C5-2
Selected Component ID
2.3 Basic Usage of the "Selection of component ID" Window
0301-006 3 - 8 AFO01EDTP
(3) Enter a new component ID in the "New Component ID:" text box
and press the [OK] button. The original component ID is copied
and created as a new one.
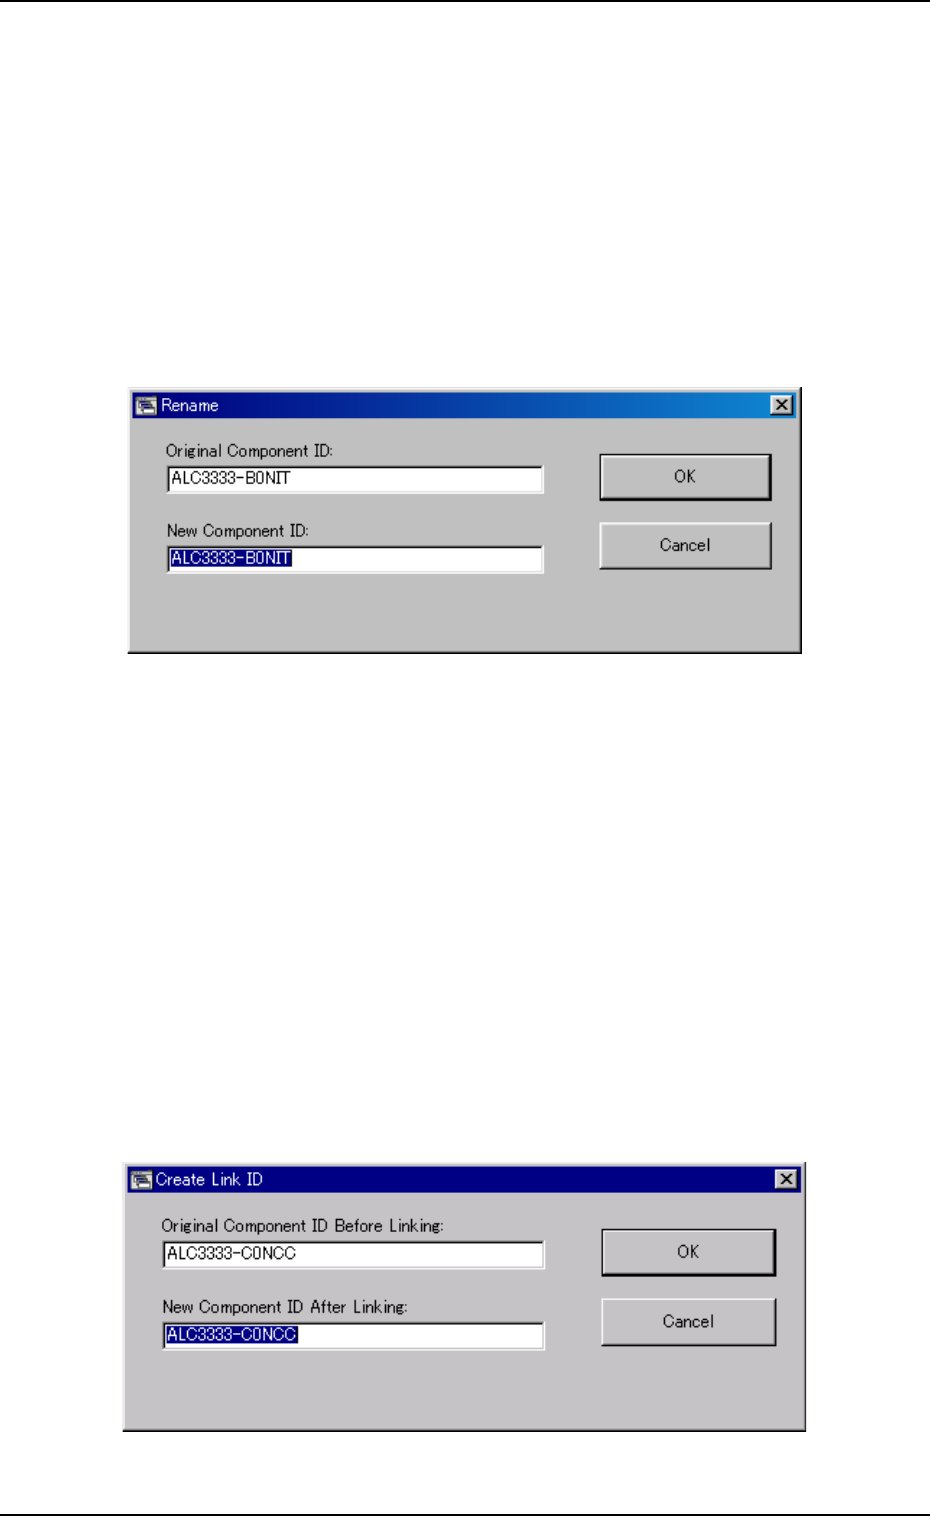
2.3.4 Renaming a Component ID
(1) Select the component ID to be renamed.
The selected component ID turns blue, indicating that it is se-
lected.
(2) Press the [Rename...] button.
The "Rename" dialog box opens.
Fig. 3C5-3
(3) Enter a new component ID in the "New Component ID:" text box
and press the [OK] button.
The name of the original component ID is changed to the new
one.
2.3.5 Creating a Link ID
(1) Select the component ID as an original component ID before link-
ing.
The selected component ID turns blue, indicating that it is se-
lected.
(2) Press the [Create Link ID] button.
The "Create Link ID" dialog box opens.
Fig. 3C5-4
0210-005 3 - 9
AFO01EDTP
2.3 Basic Usage of the "Selection of component ID" Window
(3) Enter a link ID to be created in the "New Component ID After
Linking" text box and press the [OK] button.
A new link ID is created.
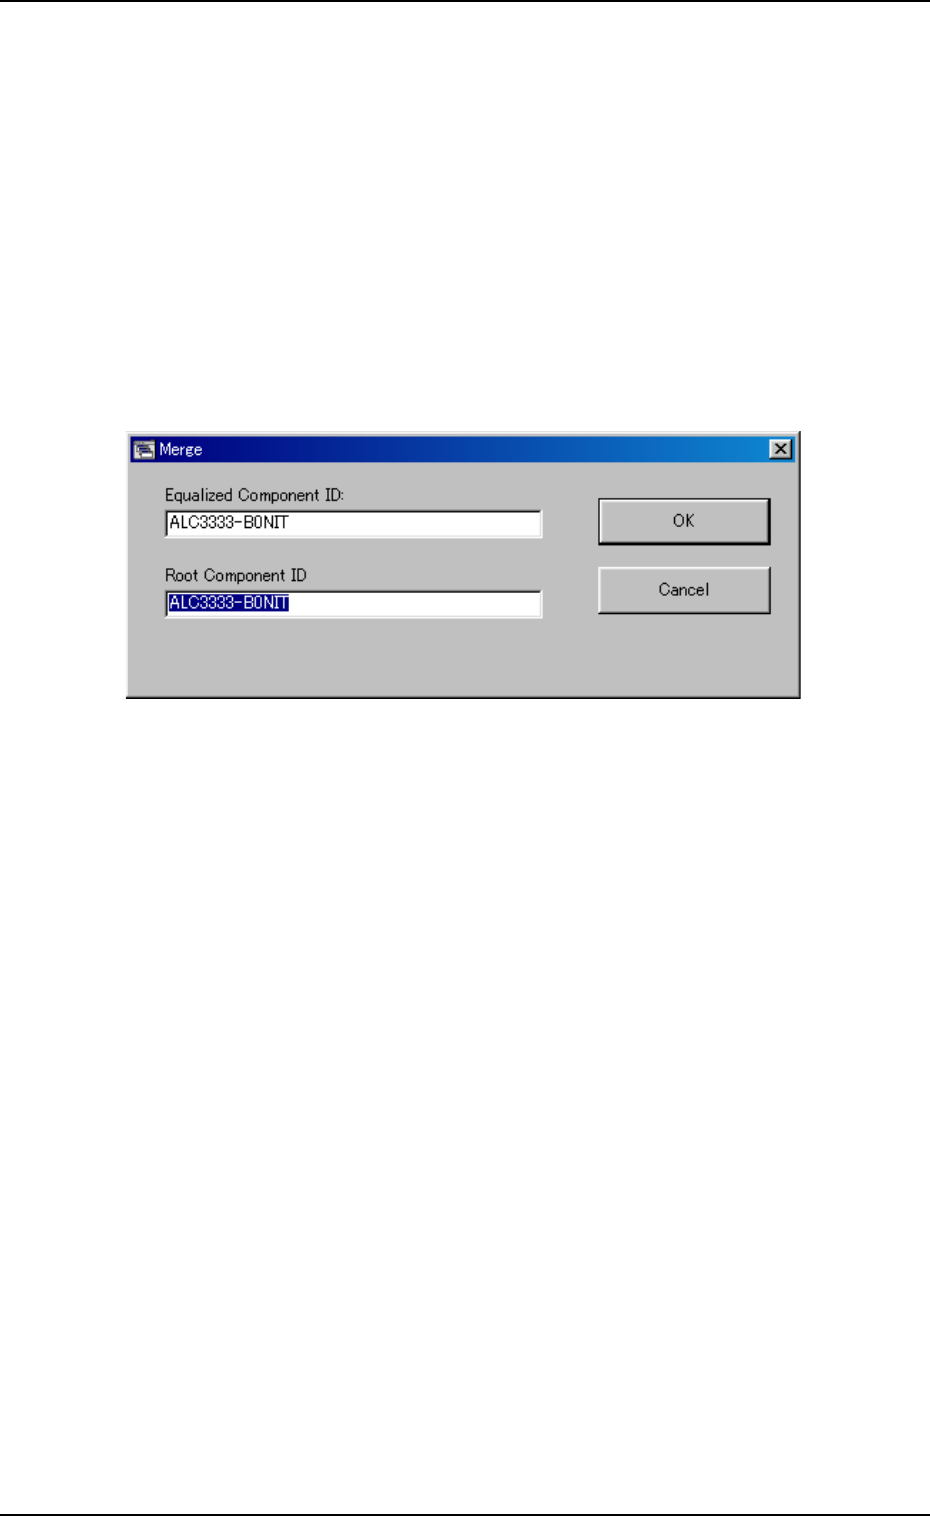
2.3.6 Merging Component IDs
(1) Select the component ID to be merged.
The selected component ID turns blue, indicating that it is se-
lected.
(2) Press the [Merge...] button.
The "Merge" dialog box opens.
Fig. 3C5-5
(3) Enter a component ID to be linked in the "Root Component ID"
text box and press the [OK] button.
The component ID is merged.
2.3 Basic Usage of the "Selection of component ID" Window
0207-004 3-10 AFO01EDTP