N7201A652E.pdf - 第129页
NPM- TT2 EJM1EE-MB-02 O-04 2-4-1 -4 Preparatio n Removing the thin type single feeder 2 Remove it from the dedicated attachment 1 Pull out the feeder How to hold the feeder Hold the parts w ith both hands ● When the tape…
NPM-TT2 EJM1EE-MB-02O-04
Preparation of the
intelligent feeder 2
2-4-1-3
Operating procedure
2-4-1
Prepara-
tions
before
produc-
tion
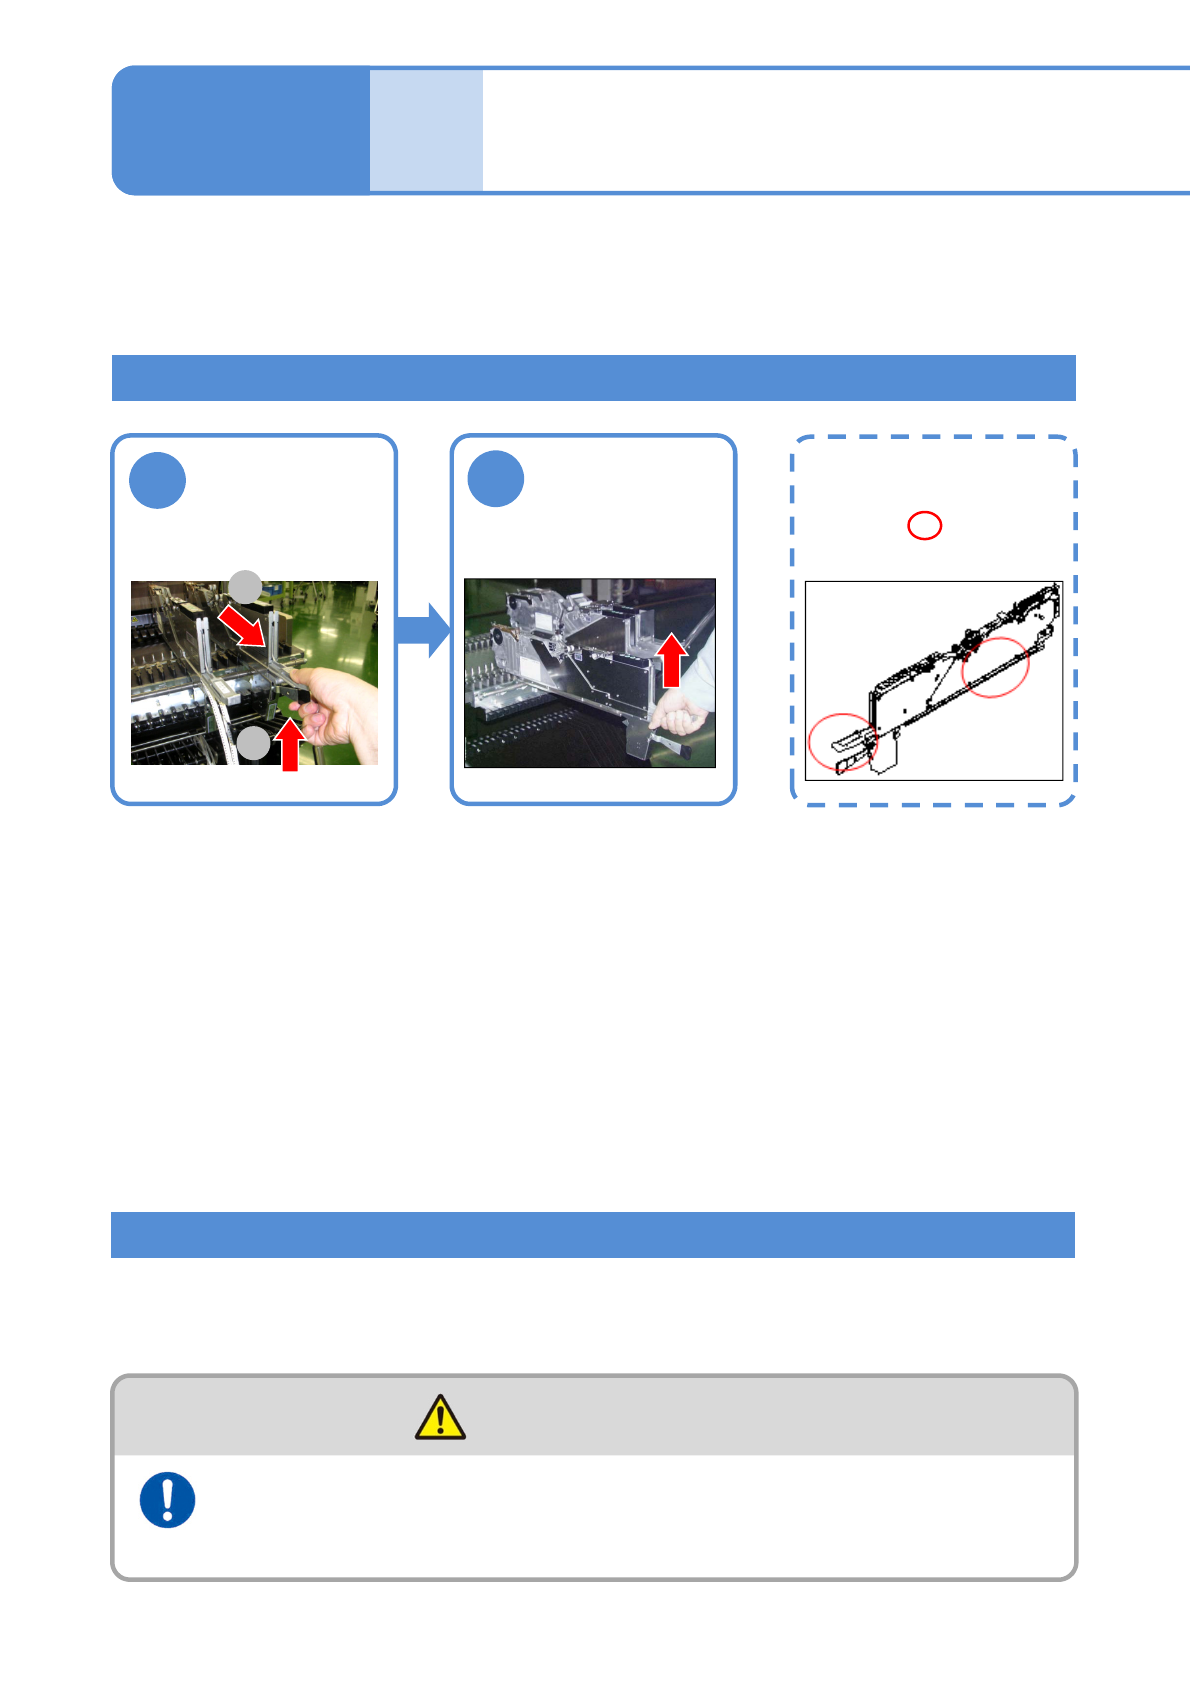
Removing the double tape feeder
2
1
1
2
Lift up the rear
side and remove
the feeder with
both hands
Pull up the lever
and pull out the
feeder
How to hold the feeder
Hold the parts with
both hands
Using a preparation with production use feeders set to
the feeder cart allows you to exchange all feeders at once during production changeover. (→[Maintenance]
P.3-2)
Batch exchange using the feeder cart (option)
Pay attention to your surroundings when you move the feeder
cart
(Risk of injury in a collision with the cart )
WARNING
Describes how to remove the double tape feeder and thin type single feeder.
(→[ Intelligent Tape Feeder ] operating manual)
The removal method of the intelligent stick feeder is the same as the one of the double tape feeder.
(→[ Intelligent Stick Feeder] operating manual)
NPM-TT2 EJM1EE-MB-02O-04
2-4-1-4
Preparation
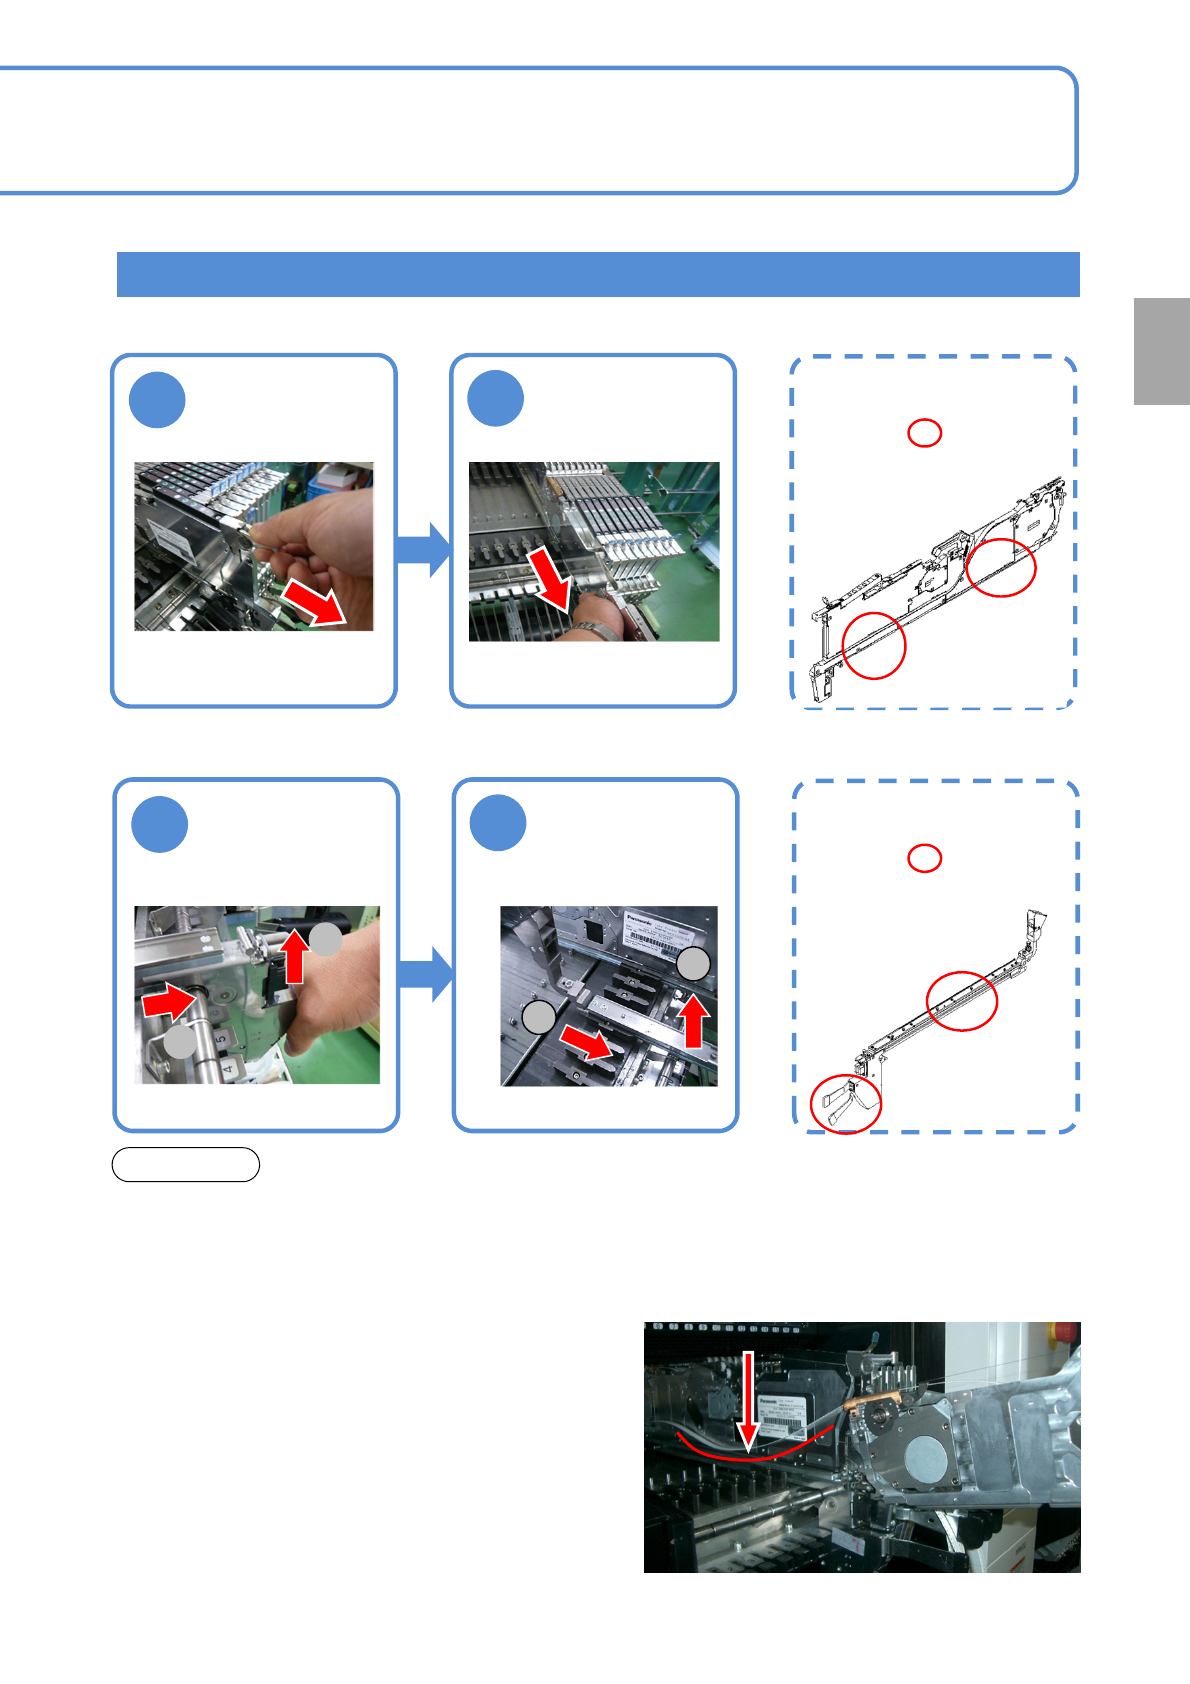
Removing the thin type single feeder
2
Remove it from
the dedicated
attachment
1
Pull out the
feeder
How to hold the feeder
Hold the parts with
both hands
●When the tape feeder is removed during production, remove in such a way that you
push the tape edge down.
●Do not put the tape feeder back in the middle of removal. Doing so may cause the
machine to stop due to blocking the light of the feeder opening sensor by the tape edge.
NOTE
2
Lift it up at the
stopper position
and remove
1
Pull up the lever
and pull out the
attachment
This procedure is performed when using the thin type single feeder.
1
2
■Removing the dedicated attachment
How to hold the feeder
Hold the parts with
both hands
1
2
■Removing the thin type single feeder
NPM-TT2 EJM1EE-MB-02O-04
Preparation of the
intelligent feeder 3
Attaching the separator to the feeder cart
(If the large reel is too heavy to operate smoothly)
1
Attach a spindle to the separator
Separator
Spindle
Screw
M4x8L
Attachment hole
For large reel
(2 locations)
●Choose an attachment hole
according to the reel size.
●Choose a spindle (accessory)
according to the mounting
pitch.
2
Attach the
separator to the
cart
Separator
Insert the top of the
upper side into the holder.
Separator
Fit the lower end through
the gap in the reel guide.
Attach it to sit on the
spacer.
3
Make sure that
the reel can
rotate
2-4-1-5
1
2
3
Separator
Operating procedure
2-4-1
Prepara-
tions
before
produc-
tion
Accessories
Part No.: N610119865AA
For 21 mm pitch (L: 19.2 mm)
Part no.: KXFB058WA00・・・2
pcs
For 42 mm pitch (L: 40.2 mm)
Part no.: KXFB058XA00・・・2 pcs
For 63 mm pitch (L: 61.2 mm)
Part no.: KXFB058YA00・・・2 pcs
For 84 mm pitch (L: 82.2 mm)
Part no.: KXFB058ZA00・・・2 pcs
Spacer