N7201A652E.pdf - 第340页
NPM- TT2 EJM1EE-MB-04 O-03 4-2-9 -4 Produc- tion data teaching Placement coor dina tes teac h 3 Operating procedure 4-2-9 3 + 4 4 A B A B Once an action starts, the button chang es to “Stop”. The hea d moves to the next …
NPM-TT2 EJM1EE-MB-04O-03
4-2-9-3
Setting
change
1
2
Set a PCB on the PCB entrance
1
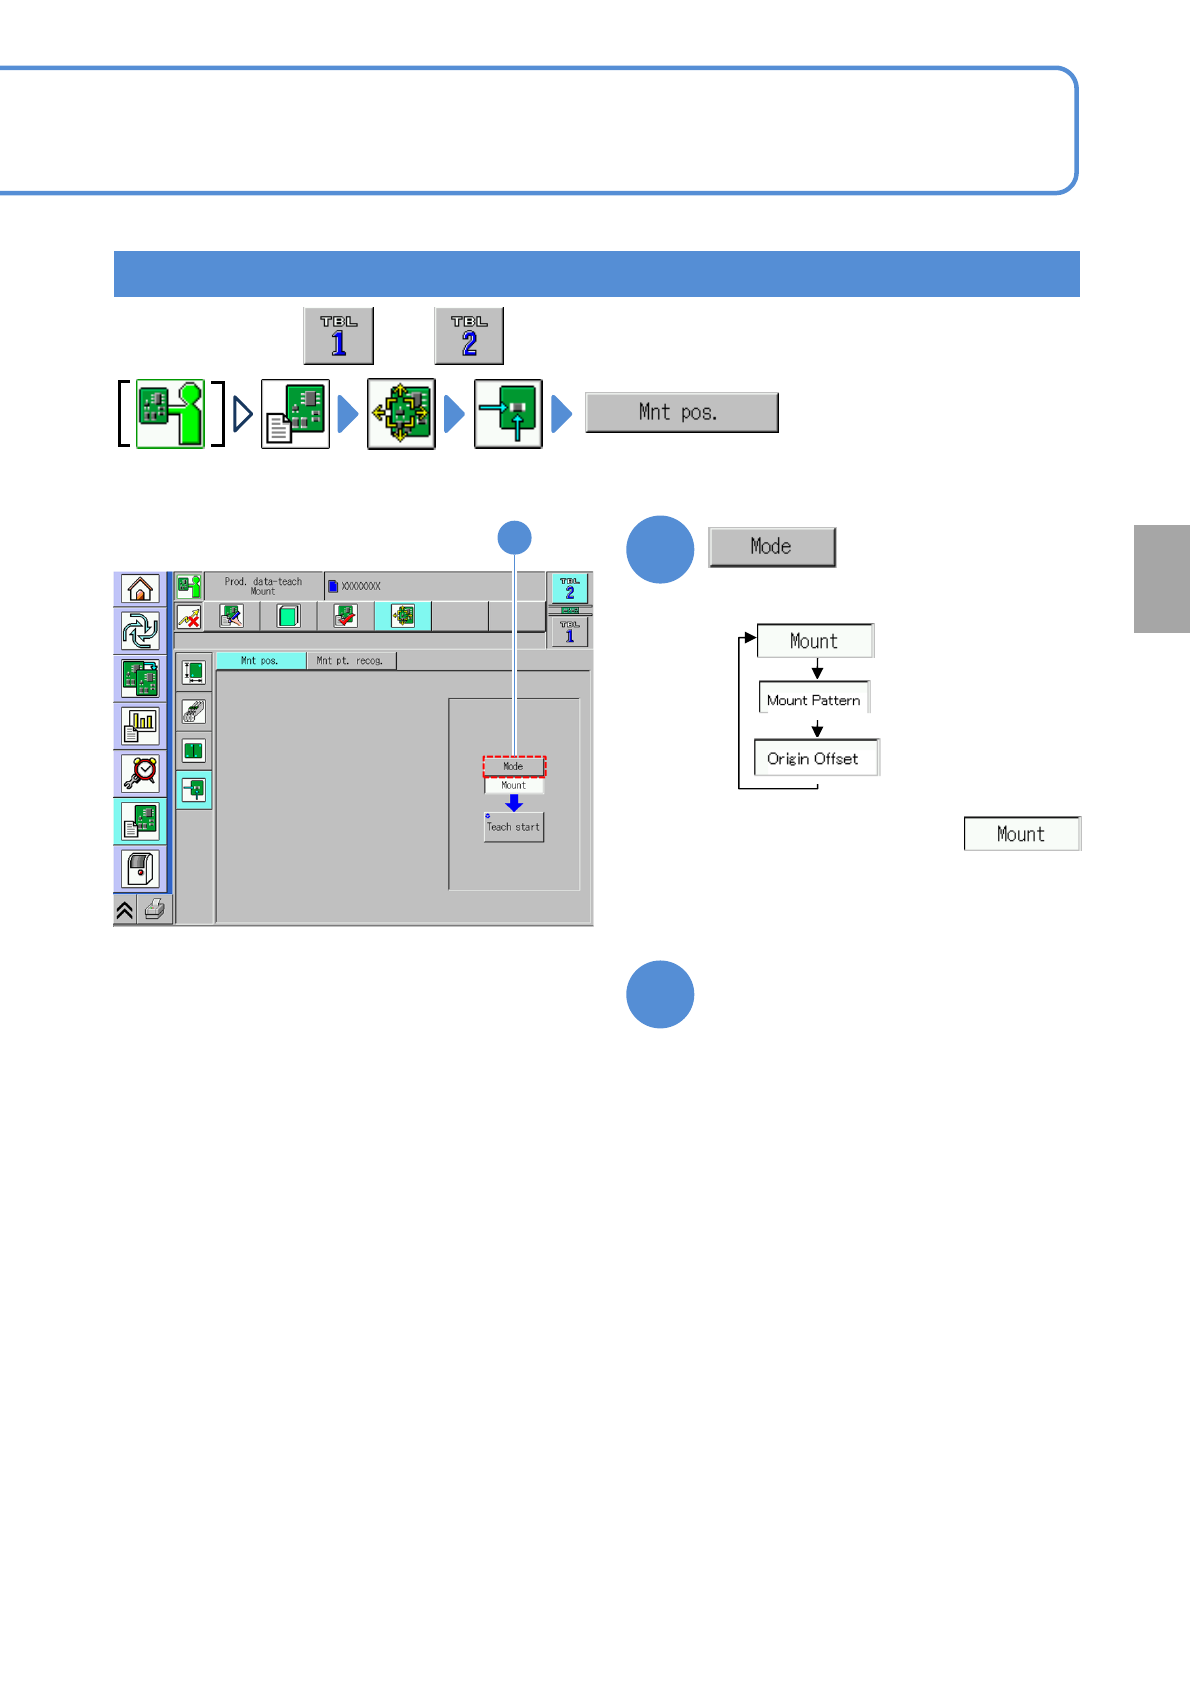
Choose a teaching mode
●
The description below
assumes to be chosen
●Perform on both and .
Teaching with component (measuring method: 1 point) 1
NPM-TT2 EJM1EE-MB-04O-03
4-2-9-4
Produc-
tion data
teaching
Placement coordinates
teach 3
Operating procedure
4-2-9
3
+
4
4
A
B
A B
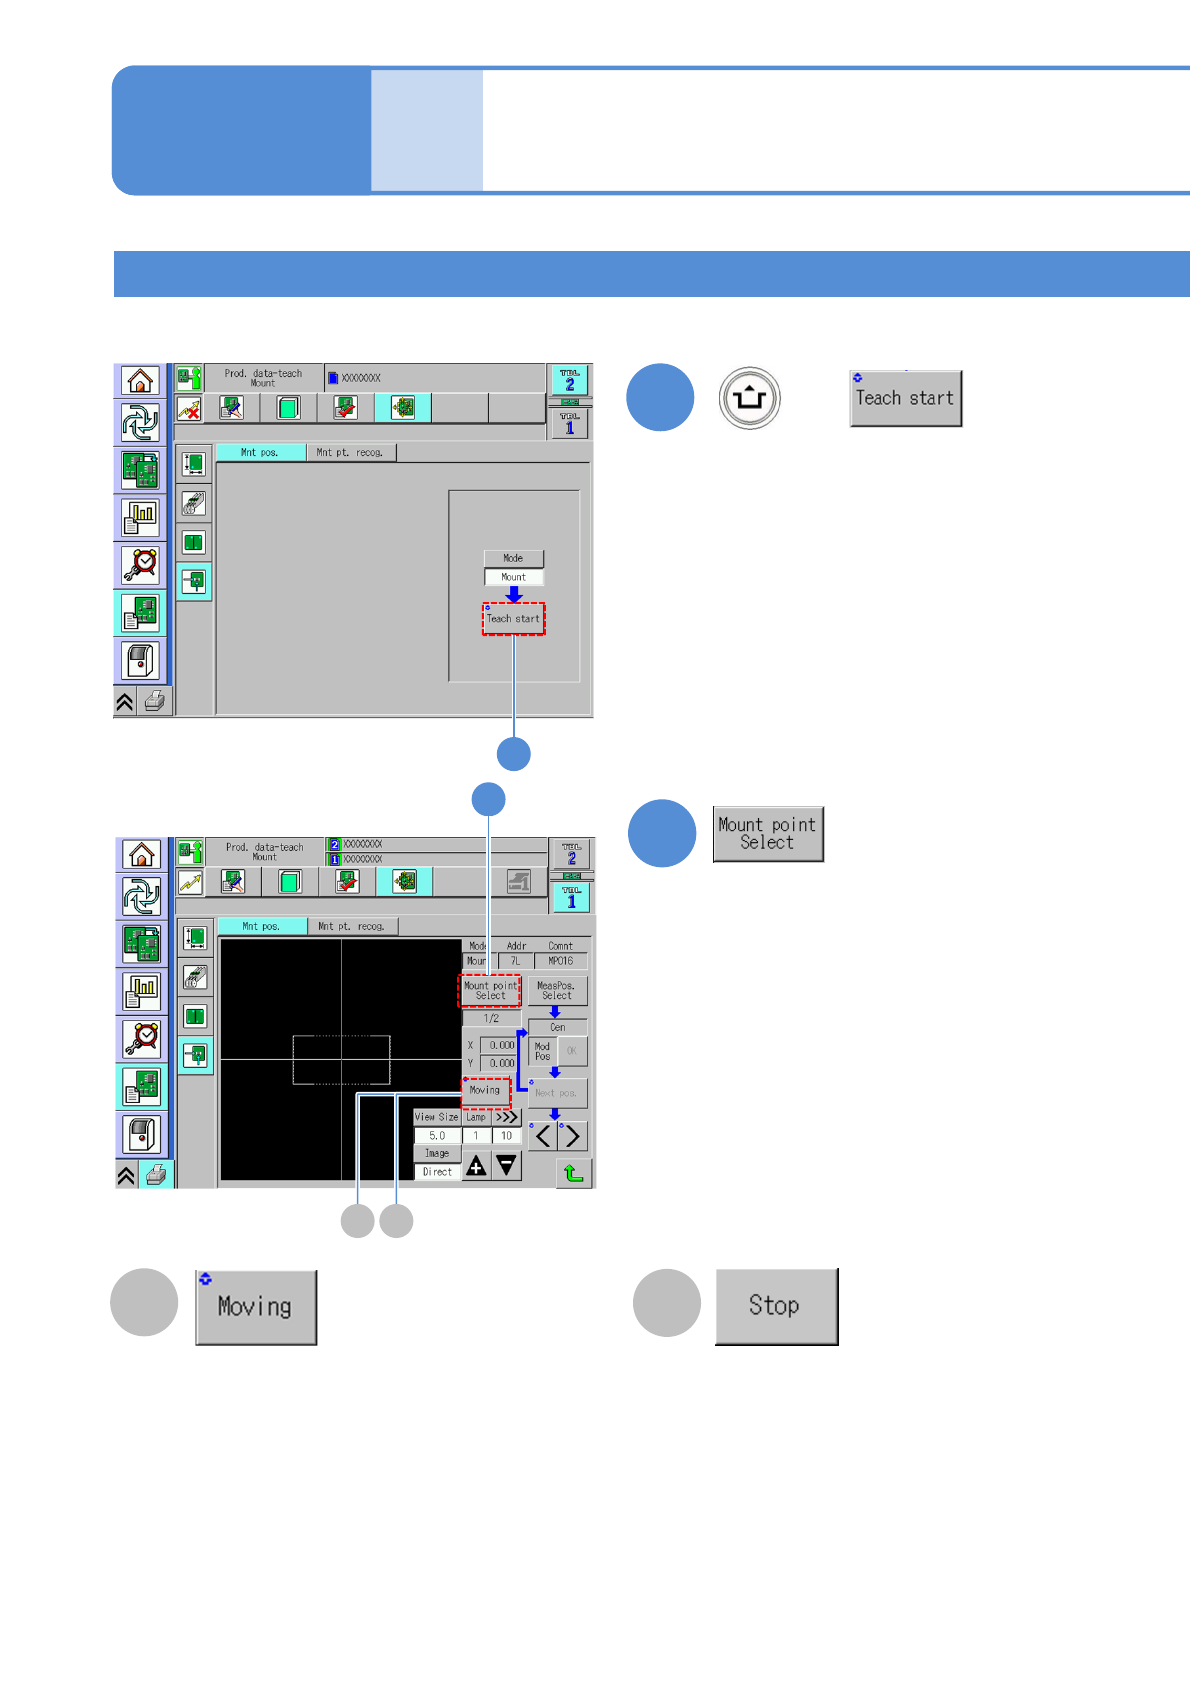
Once an action starts, the button changes to “Stop”.
The head moves to the next coordinates and after it
stops and the time set on Teach image confirm
*1)
has
elapsed, it automatically moves to the next coordinates.
The action is repeated until the last coordinates
Press the [Stop] button on the coordinate you want
perform teaching.
*1) (→ 5-1-2
-2 “Teach image confirm”)
If you press this button, the head stops on the
coordinate and you can perform teaching.
Once an action starts, the button changes to
“Moving”.
Pressing the [Moving] button starts moving from
next coordinates.
●Movement also stops by pressing the [STOP]
key. However, if independent placement is
performed, the machine stops as single stop.
Teaching with component (measuring method: 1 point) 2
3
NPM-TT2 EJM1EE-MB-04O-03
4-2-9-5
Setting
change
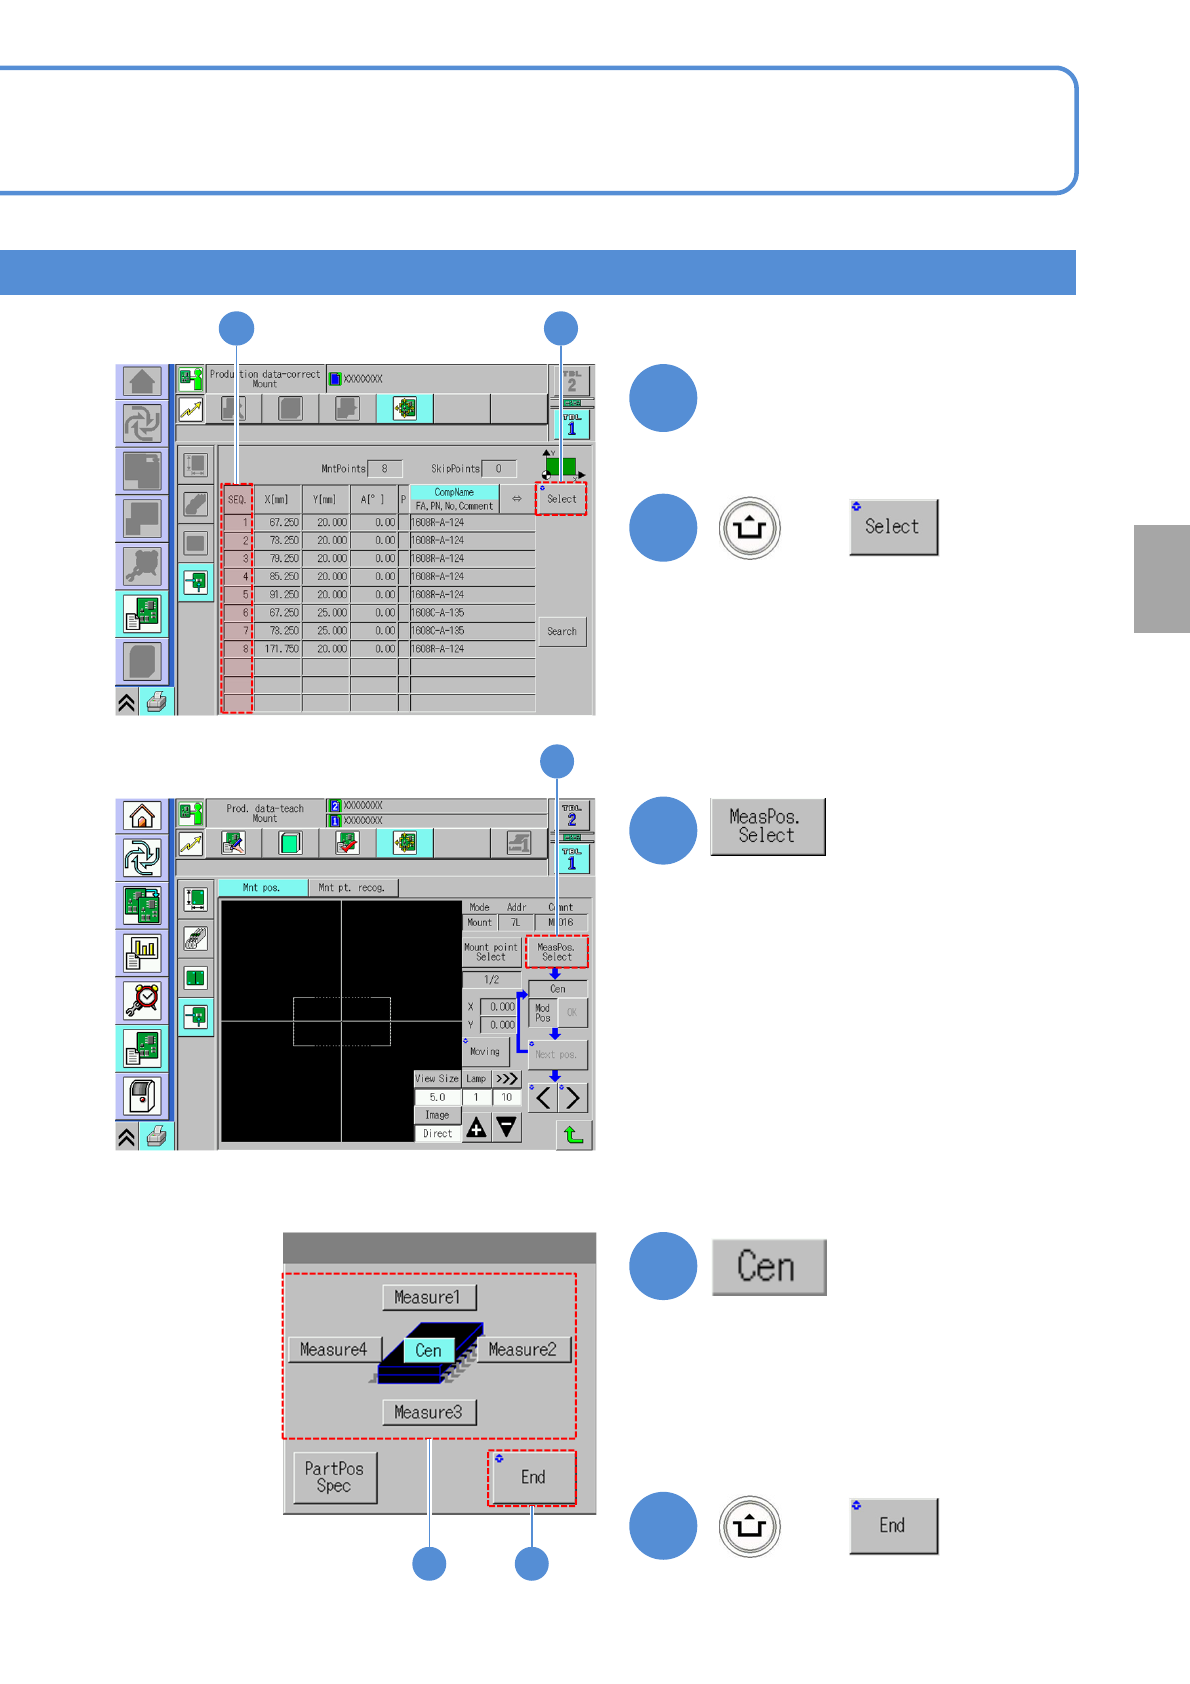
5
Choose SEQ number of a
component to evaluate
6
6
+
5
7
7
8
9
8 9
+
●The component shape is displayed
when both the length and width of the
component maximum outer size are
below 2.0mm and the placement
angle is 45 degree basis.