Dek-265GSX-User-Manual.pdf.pdf - 第106页
8. Insert a 0.25mm feeler between the deflector and the screen. Tighten the screws checking that the 0.25mm gap remains. 9. Repeat Steps 7 and 8 for the other deflector. 10. Lower the front printhead cover. 11. Press the…
STAGE 10
Running a Product in Run Mode
1.
Select Setup (F6)
Setup
2.
Select Mode (F1) until Auto is indicated in the mode option on the screen.
Mode
3.
Select Exit (F8).
Exit
4.
Select Run (F1). If squeegees are being used continue with Step 5, if
ProFlow is being used go to Step 19.
Run
5. During the first print stroke, when the squeegee is down printing on the
board, select Stop Cycle (F2). The print cycle stops and the printer lid bolt
releases allowing access to the print carriage.
Stop
Cycle
6. Lift the front printhead cover.
7. Release the screws holding one paste deflector allowing it to drop into
contact with the screen.
Software Version 6 User Manual 1.89
MACHINE PROGRAMMING
STAGE 10
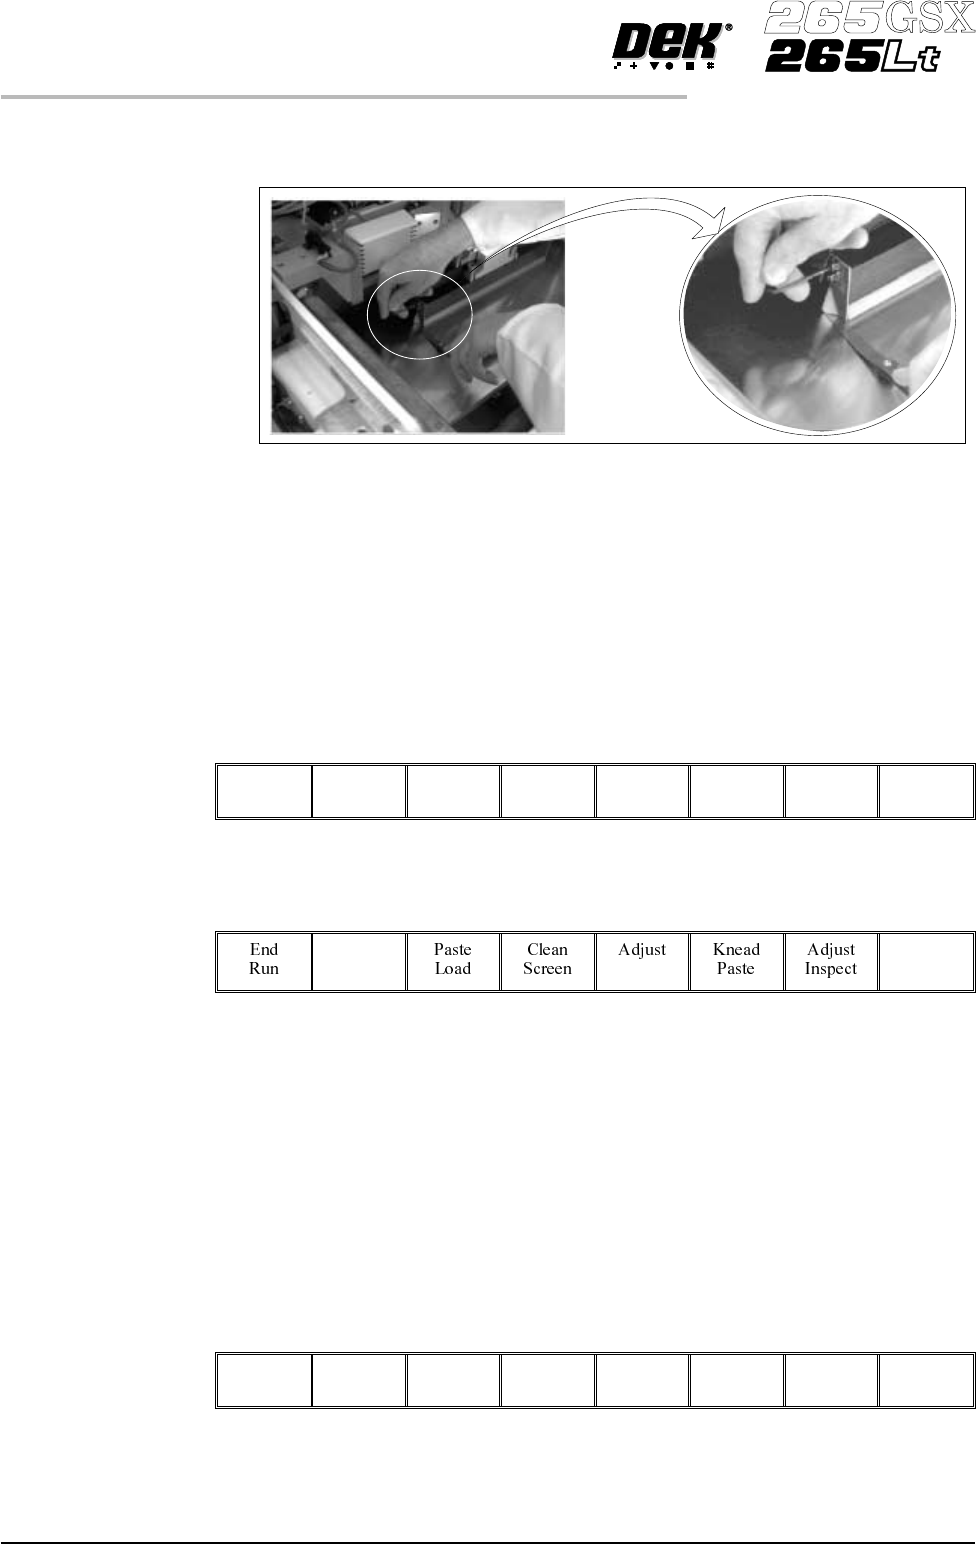
8. Insert a 0.25mm feeler between the deflector and the screen. Tighten the
screws checking that the 0.25mm gap remains.
9. Repeat Steps 7 and 8 for the other deflector.
10. Lower the front printhead cover.
11.
Press the System button.
12.
Select Continue (F1).
Continue
13.
Afterthesqueegeehasmovedapproximately20mm,selectStopCycle(F2).
Stop
Cycle
14. Lift the front printhead cover. Check the deflectors are not touching the
screen.
15. Lower the front printhead cover.
16.
Press the System button.
17.
Select Continue (F1).
Continue
18. Repeat Steps 5 - 17 for the other squeegee.
1.90 User Manual Software Version 6
MACHINE PROGRAMMING
STAGE 10

19. The printer operates continuously. The menu bar displays the following
options, these may be selected at any time during a print run:
End Run Selecting this option stops the printer on completion of the current print cycle.
Stop Cycle Selecting this option stops the printer immediately, halting all actions.
Paste Load Selecting this option allows the operator to load paste to the screen either
manually or automatically.
Clean Screen Selecting this option allows the operator to clean the screen in addition to the
programmed cleaning intervals.
Adjust Selecting this option allows the operator to adjust any of the main process
parameters displayed on the pop-up menu without having to access the main
menu or stop the machine.
The machine continues to run using the existing values, when Exit (F8) is
selected the new values are used.
To save the new values, select Setup (F6), select Edit Data (F3), select Save
(F2), select Exit (F8).
Knead Paste Selecting this option runs the knead paste process in addition to the programmed
cleaning intervals.
Adjust Inspect Selecting this option allows the operator to edit 2D inspection parameters.
NOTE
Global Limits, Limit Sets and Sit parameters can be edited. Site Co-ordinates
can not be adjusted. Any changes made to inspection parameters are saved on
exit.
Software Version 6 User Manual 1.91
MACHINE PROGRAMMING
STAGE 10