Dek-265GSX-User-Manual.pdf.pdf - 第369页
22. Carefully remove the empty ProFlow cassette (1) from the carrier (2) by lifting the ProFlow cassette clear of the retaining pins (3) sited at each end of the carrier unit. NOTE Numbers in brackets refer to figure bel…
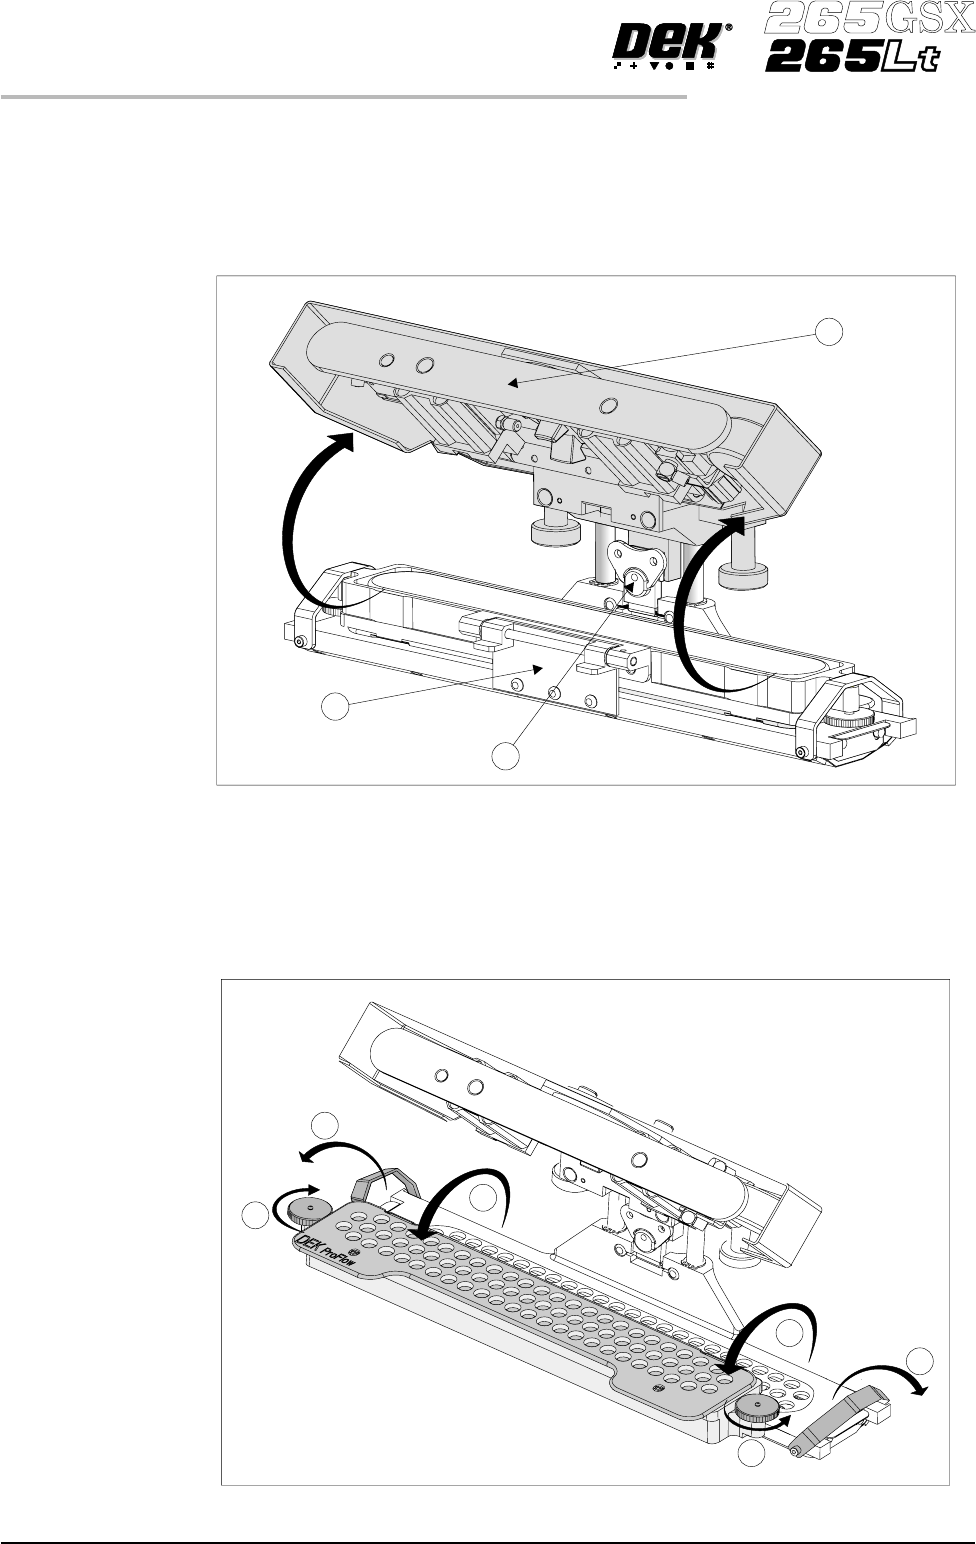
20. To gain access to the transfer head (1), release the latch on the front of the
pressure mechanism (2) and raise the mechanism forward and upwards to
engage the spring locking device.
NOTE
Numbers in brackets refer to figure below.
21. To release the carrier from the transfer head, unscrew the thumbscrews (1) at
each end of the carrier to loosen the clamp brackets. Hinge the clamp
brackets (2) outwards. Hinge the carrier and ProFlow cassette (3) towards
the front of the machine exposing the top of the ProFlow cassette.
NOTE
Numbers in brackets refer to figure below.
9.54 User Manual Software Version 6
CONSUMABLE REPLENISHMENTS
PROFLOW
2
1
3
2
2
1
1
3
3
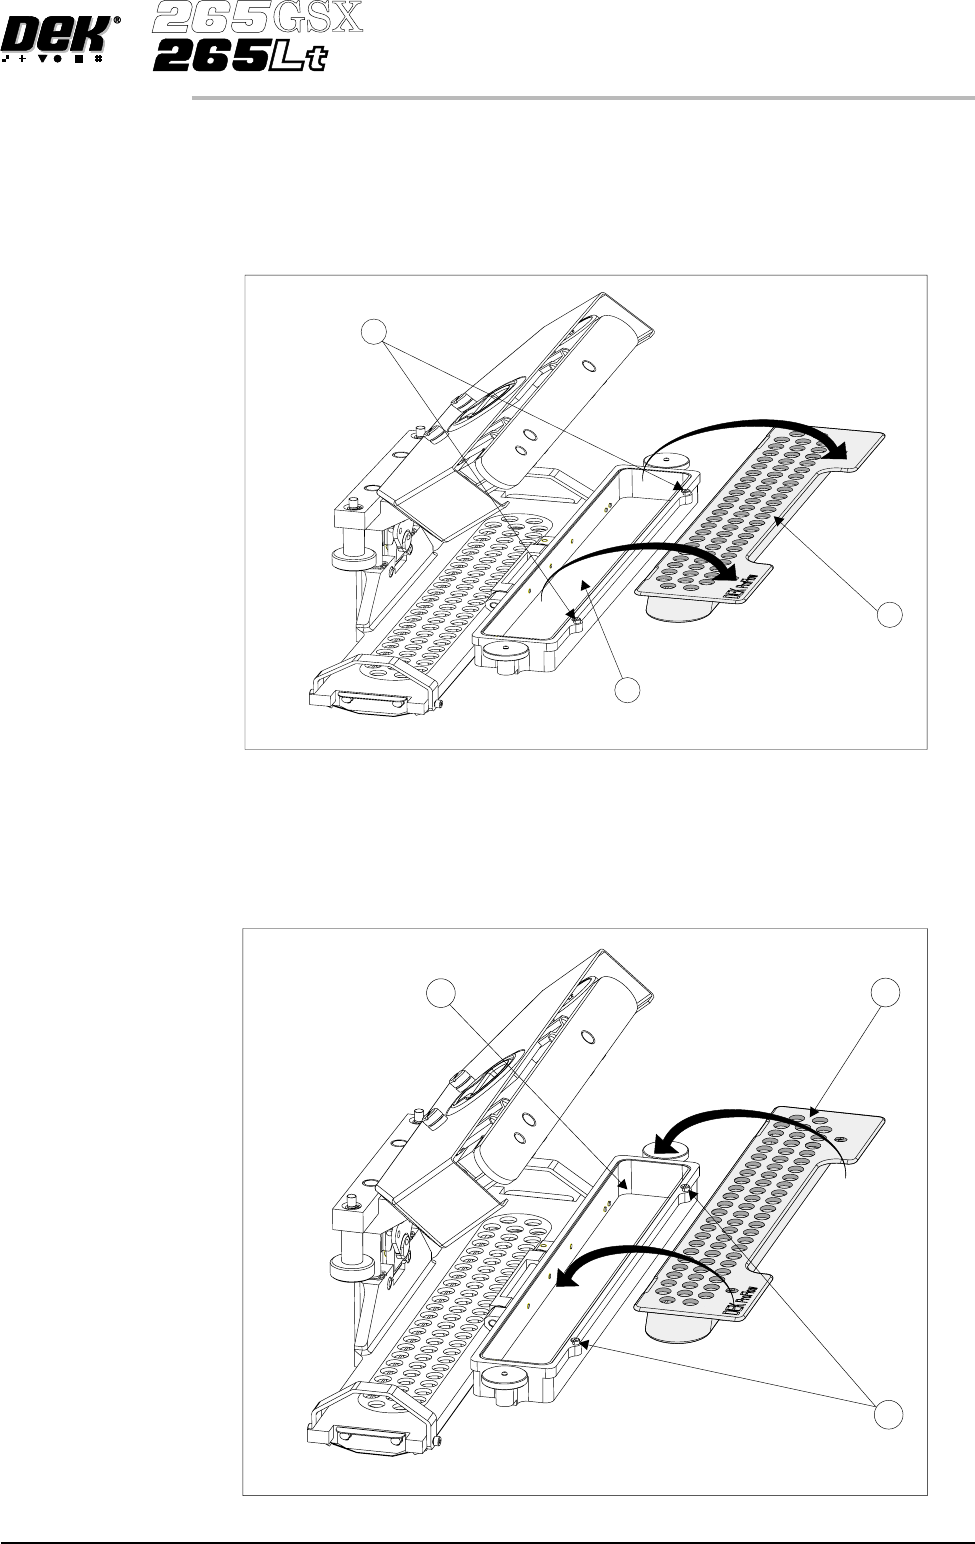
22. Carefully remove the empty ProFlow cassette (1) from the carrier (2) by
lifting the ProFlow cassette clear of the retaining pins (3) sited at each end of
the carrier unit.
NOTE
Numbers in brackets refer to figure below
23. Disposeof the empty cassette in accordance with local authority guidelines.
24. Fit a new cassette (1) into the carrier recess (2) and secure into place with the
retaining pins (3).
NOTE
Numbers in brackets refer to figure below.
Software Version 6 User Manual 9.55
CONSUMABLE REPLENISHMENTS
PROFLOW
3
1
2
3
1
2
25. Remove the sealing foil from the top of the new ProFlow cassette.
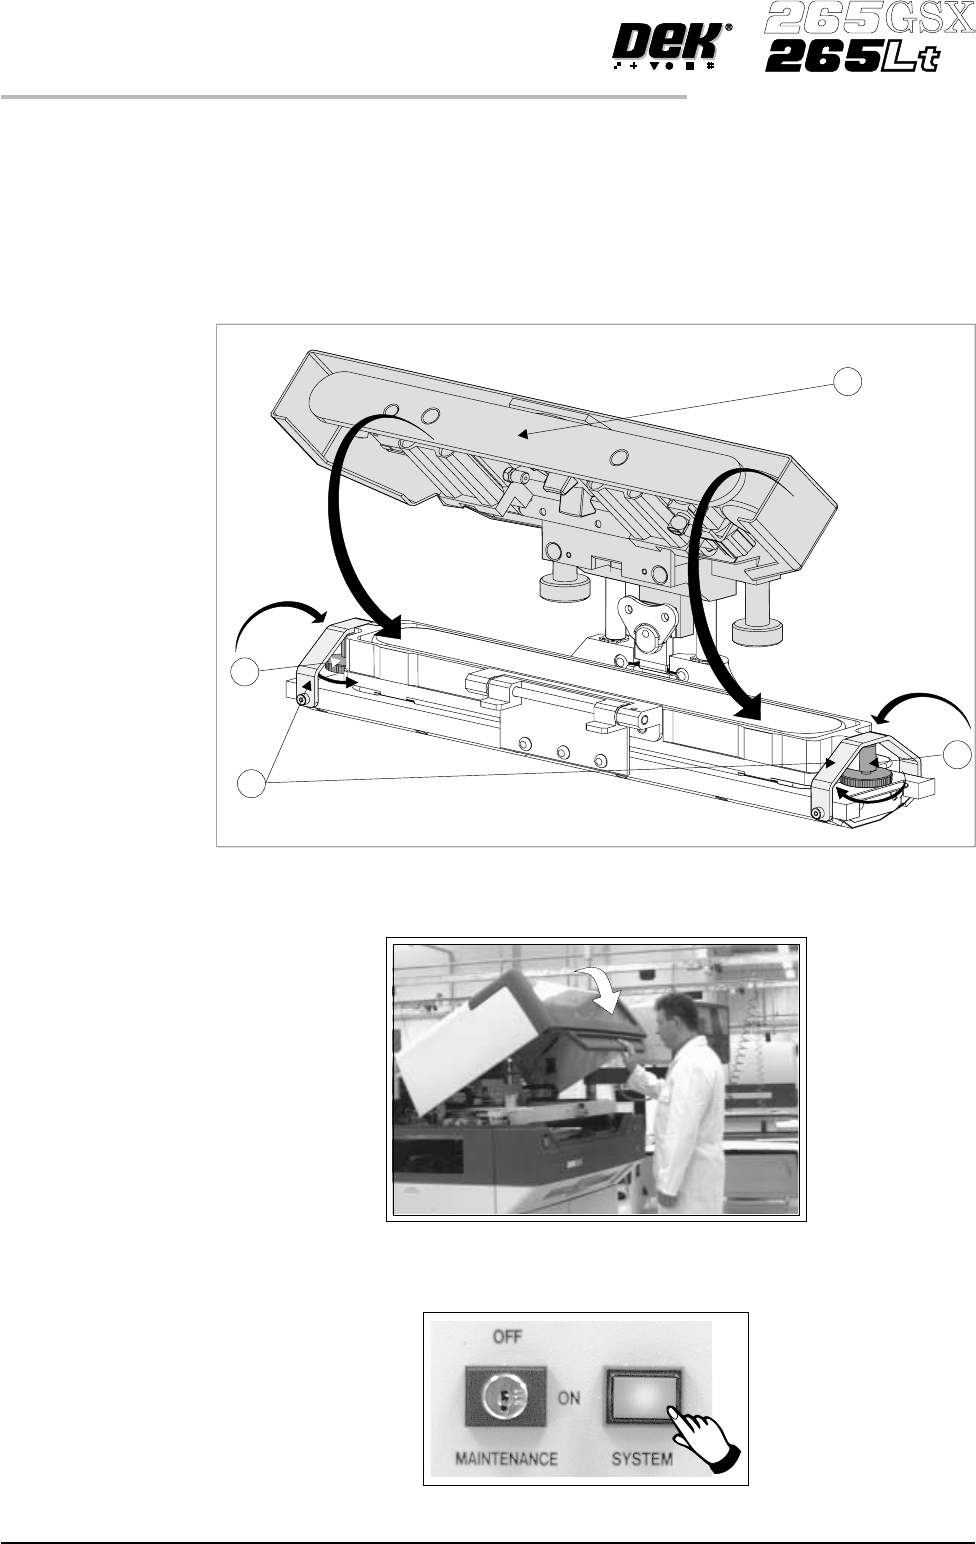
26. Hinge the clamp brackets (1) inwards to position the cassette onto the
transfer head, secure in place by tightening the thumbwheels (2).
27. Lower the pressure mechanism (3) in place until the latch engages.
NOTE
Numbers in brackets refer to figure below.
28. Close the printhead cover.
29.
Press the System button.
9.56 User Manual Software Version 6
CONSUMABLE REPLENISHMENTS
PROFLOW
2
2
1
3