Dek-265GSX-User-Manual.pdf.pdf - 第278页
2Di SETUP Preparation For 2Di inspection functionality the machine requires 2D Inspection to be set to enabled. Set Preferences 1. Select Maint. Maint. 2. Select Set Prefs . Set Prefs 3. Set 2D inspection to enabled usin…

Adjustment During
Print Cycle
Most inspection parameters may be adjusted whilst a print cycle is in progress.
The parameters that may be adjusted are:
• Global Limits
• Limit Sets
• Site Parameters
NOTE
The site coordinate parameters are not available whilst a print cycle is in
progress.
To access the parameter adjustment menu during a print cycle select Adjust
Inspect.
Adjust
Inspect
The following window is displayed:
The New Pre-images button is only available if Pre-image is set to 1.
NOTE
If an error occurs when adjusting inspection parameters during a print cycle,
the adjustment page closes.
Any changes made are saved.
Software Version 6 User Manual 8.13
2Di INSPECTION
MODULE OVERVIEW
SiteName
SitePriority
StencilInspectType
BoardInspectType
SiteAlignment
LimitSetID
PasteScaling
SiteXCoord
SiteYCoord
SiteWidth
SiteHeight
IC27-1
General
Advanced
Advanced
XandY
Fine
1.00
39.4mm
71.2mm
3.00mm
4.00mm
2DInspectRate
StencilInspectType
BoardInspectType
Pre-image
Min.Sites/Cycle
WarningLimit
BlockageAction
BlockageClean
SmearAction
SmearClean
LowPasteAction
InspectAfterClean
PostPrintAlignment
No.Sites
1
Advanced
Advanced
Every
10
3
Auto
Mode2
Manual
Mode1
Re-print
Enabled
Performed
30
GlobalInspectParameters
SiteParameters
2Di SETUP
Preparation For 2Di inspection functionality the machine requires 2D Inspection to be set to
enabled.
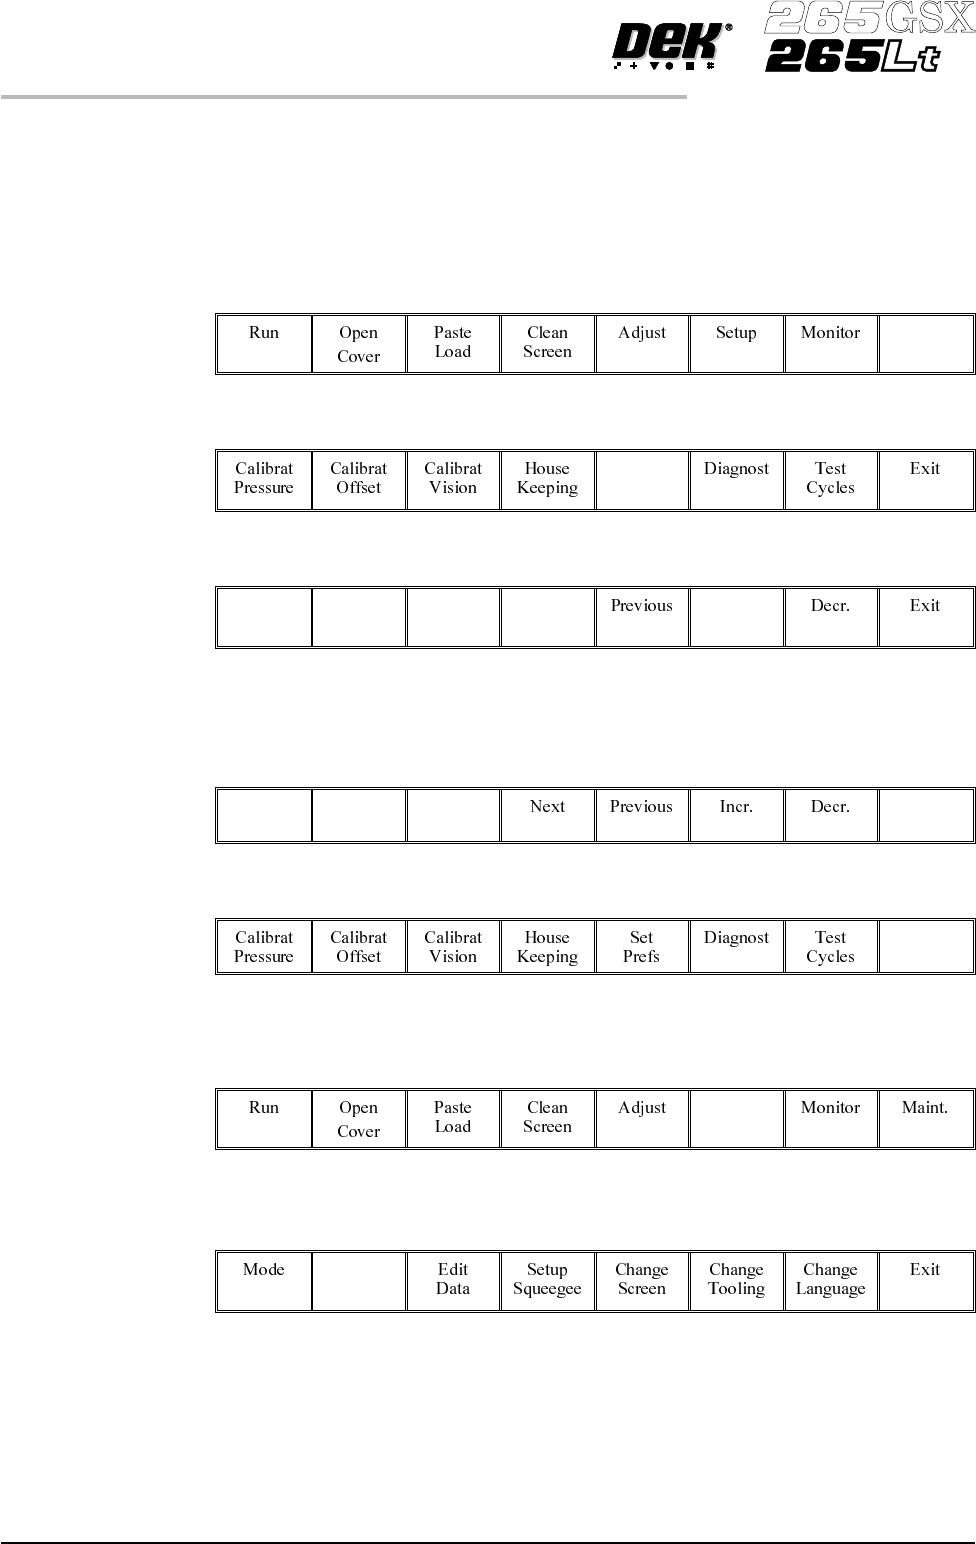
Set Preferences 1.
Select Maint.
Maint.
2.
Select Set Prefs.
Set
Prefs
3.
Set 2D inspection to enabled using the Next and Incr. keys.
Next Incr.
4.
Ensure under screen cleaner function selected, ie Vacuum or Standard.
5.
Select Exit. The message ‘Printer configuration data file saved’ is
displayed in the message prompt bar above the menu bar.
Exit
6.
Select Exit.
Exit
Load Product File 1.
Select Setup.
Setup
2.
Select Load Data. The message ‘Use keyboard to actionproduct search’
is displayed in the message prompt bar above the menu bar.
Load
Data
8.14 User Manual Software Version 6
2Di INSPECTION
2Di SETUP
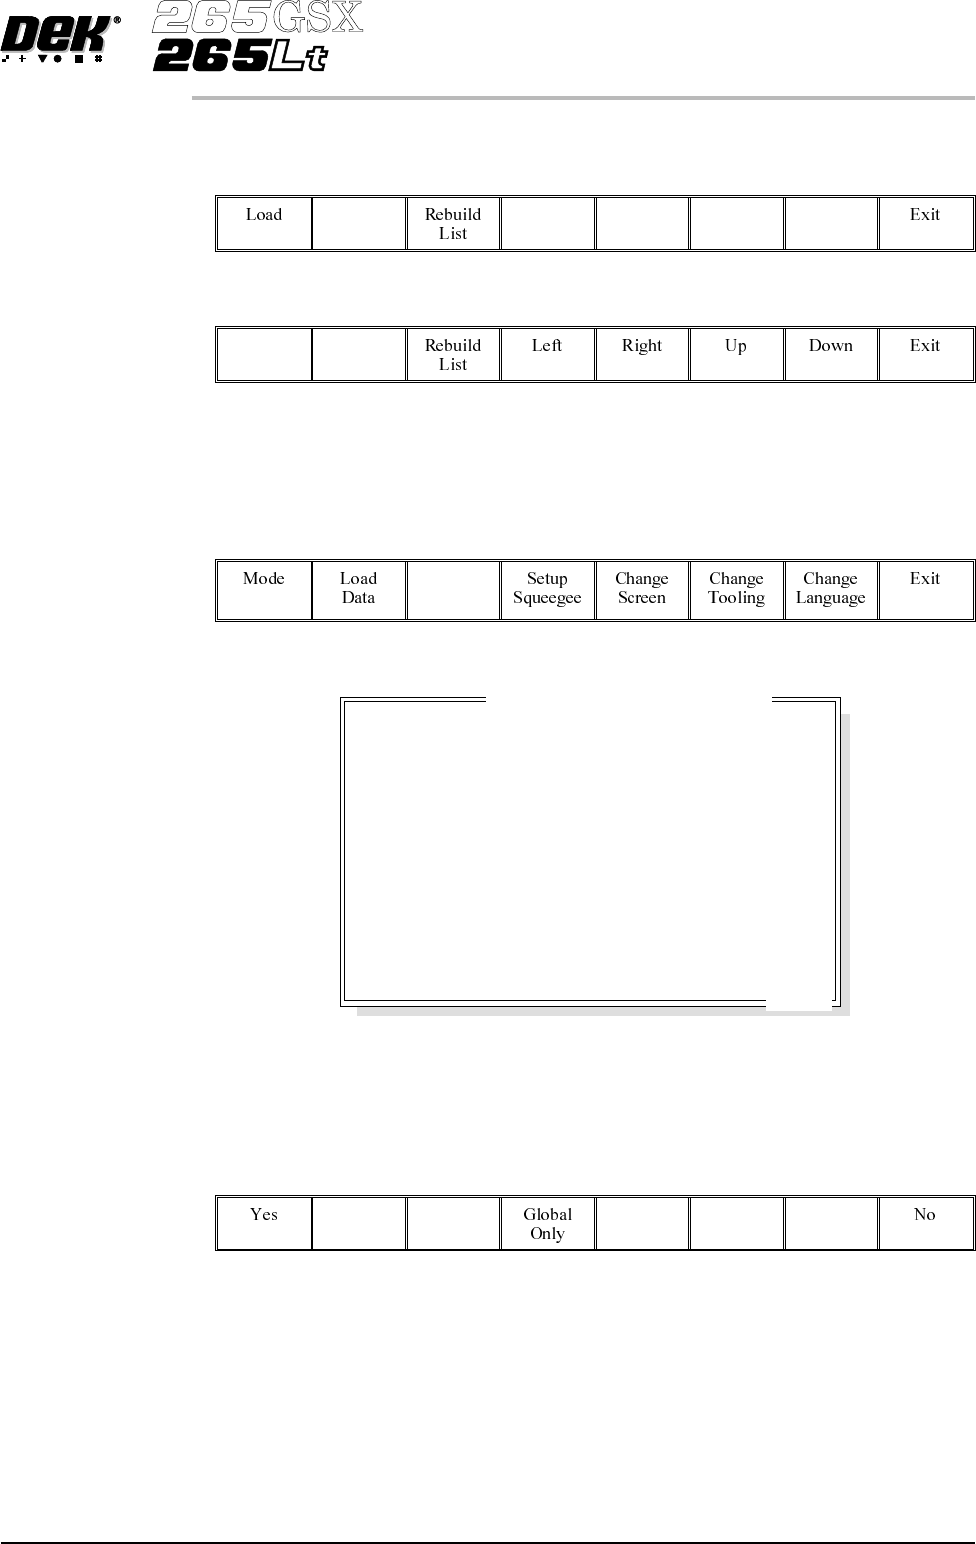
3.
Use the Left, Right, Up and Down keys to highlight a product file. If the
productto be setup is a new one, select anexistingproductfileandmodify it.
Left Right Up Down
4.
Select Load. The machine loads the product file and trains the fiducials.
Load
Edit Data 1. If the loaded product file is the correct one, go to Step 8. If the file needs to
be modified continue with Step 2.
2.
Select Edit Data.
Edit
Data
The following window is displayed:
3.
To change the product name; highlight product name using the Next and
Previous keys. Select Incr. type in required product name and press Enter
using the keyboard.
4.
If the product name is changed the message ‘Do you also want to create a
copy of the inspection file ?’ is displayed. Select one of the following:
Yes - All data is copied, including the site coordinates.
Global Only - The global parameters and limits are copied.
No - No inspection file is copied. Use when setting up an inspection file for the
first time.
Software Version 6 User Manual 8.15
2Di INSPECTION
2Di SETUP
Dek04
Dek04
30 mm
24 mm/s
NONE
EDGE
DISABLED
101.5 mm
152.5 mm
1.6 mm
150 mm/s
20 mm/s
0.0 mm
0.0 mm
PRODUCT NAME
PRODUCT ID
DWELL HEIGHT
DWELL SPEED
SCREEN ADAPTOR
SCREEN IMAGE
CUSTOM SCREEN
BOARD WIDTH
BOARD LENGTH
BOARD THICKNESS
PRINT SPEED
FLOOD SPEED
PRINT FRONT LIMIT
PRINT REAR LIMIT
Edit Current Process Parameters
..more