00198599-02_AI_Vacuumpump_X-Series-S-from-Hxxxx_DE_EN.pdf - 第134页
3 Installation 3.3 Converting the gantries 134 Assembly Instructions / Montageanleitung SIPLACE X-Series S (from/ab Hxxxx) Option Vacuum Pump 02/2021 3.3.1 Connecting the vacuum hoses to the placement head vacuum distrib…
3 Installation
3.3 Converting the gantries
Assembly Instructions / Montageanleitung SIPLACE X-Series S (from/ab Hxxxx) Option Vacuum Pump 02/2021 133
3.3 Converting the gantries
For conversion of the gantries to vacuum operation, you require the following upgrade kits:
●
1x upgrade kit vacuum X4i rotated [03075306‑xx] (gantry2 and4)
only for X4i S, one per gantry.
●
1x upgrade kit vacuum X-Series R10 [03075305] (gantries1 and3)
one per gantry on an X4i S
one per gantry on an X4S, X3S, X2S.
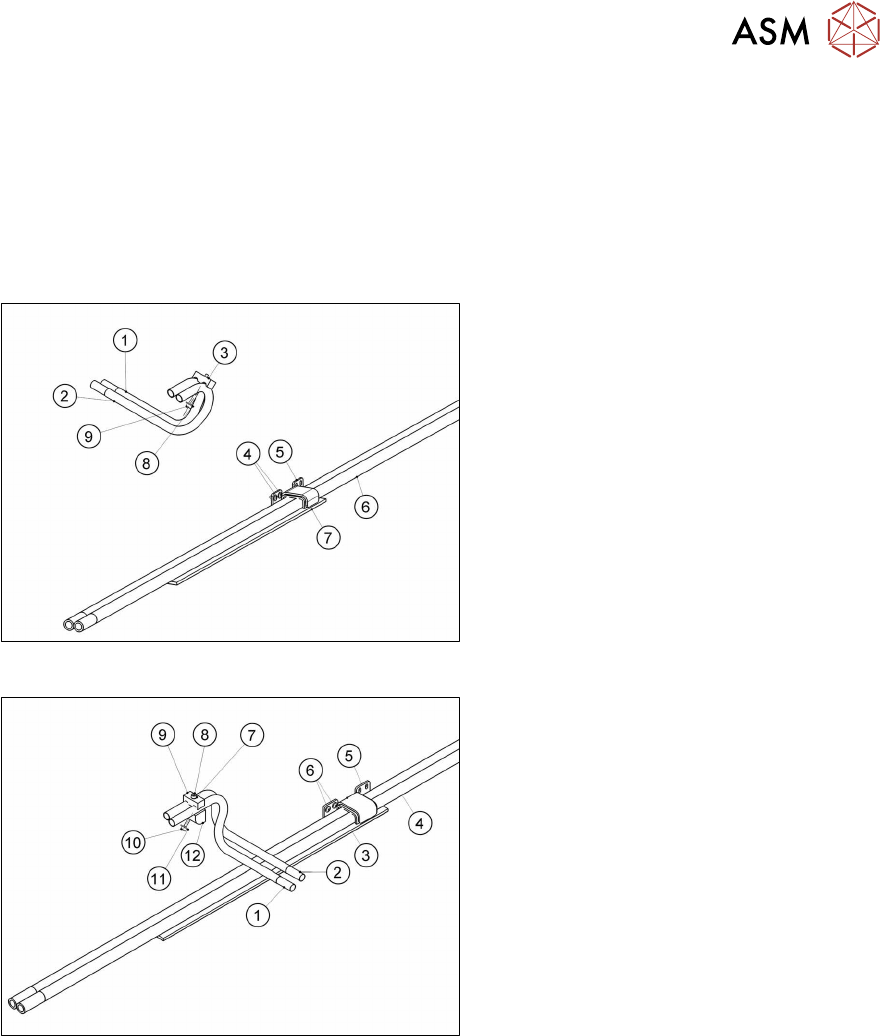
Fig.6: Upgrade kit vacuum X-Series R10
1. Tube for vacuum connection 1
2. Tube for vacuum connection 2
3. Clamping piece
4. Two screws (ISO7380-2 M3x6-A2-70)
(Loctite241)
5. Stabilizer damped
6. Duo hose
7. Foam rubber
8. One screw ISO7093-1-3-200HV-A2
9. One screw ISO4762-M3x35-A2-70
(Loctite241)
Fig.7: Upgrade kit vacuum X4i turned
1. Tube for vacuum connection 1 turned
2. Tube for vacuum connection 2 turned
3. Foam rubber
4. Duo hose
5. Stabilizer
6. Two screws ISO7380-2M3x6-A2-70
(Loctite241)
7. One screw ISO7089-2.5-200HV-A2
8. One screw ISO4762-M3x18-A2-70
(Loctite241)
9. Clamping piece
10. One screw ISO4762-M3x14-A2-70
(Loctite241)
11. One screw ISO7093-1-3-200HV-A2
12. Holder
The following section illustrates the conversion of a distributor for placement heads to vacuum
pump operation, using the example of gantry1/3.
See also
2 7.3 "Error message: 30356 Vacuum in holding circuit too low" [}183]
3 Installation
3.3 Converting the gantries
134 Assembly Instructions / Montageanleitung SIPLACE X-Series S (from/ab Hxxxx) Option Vacuum Pump 02/2021
3.3.1 Connecting the vacuum hoses to the placement head vacuum distributor
Also observe section 7.4.4 "Handling the hose unlocking tool" [}192].
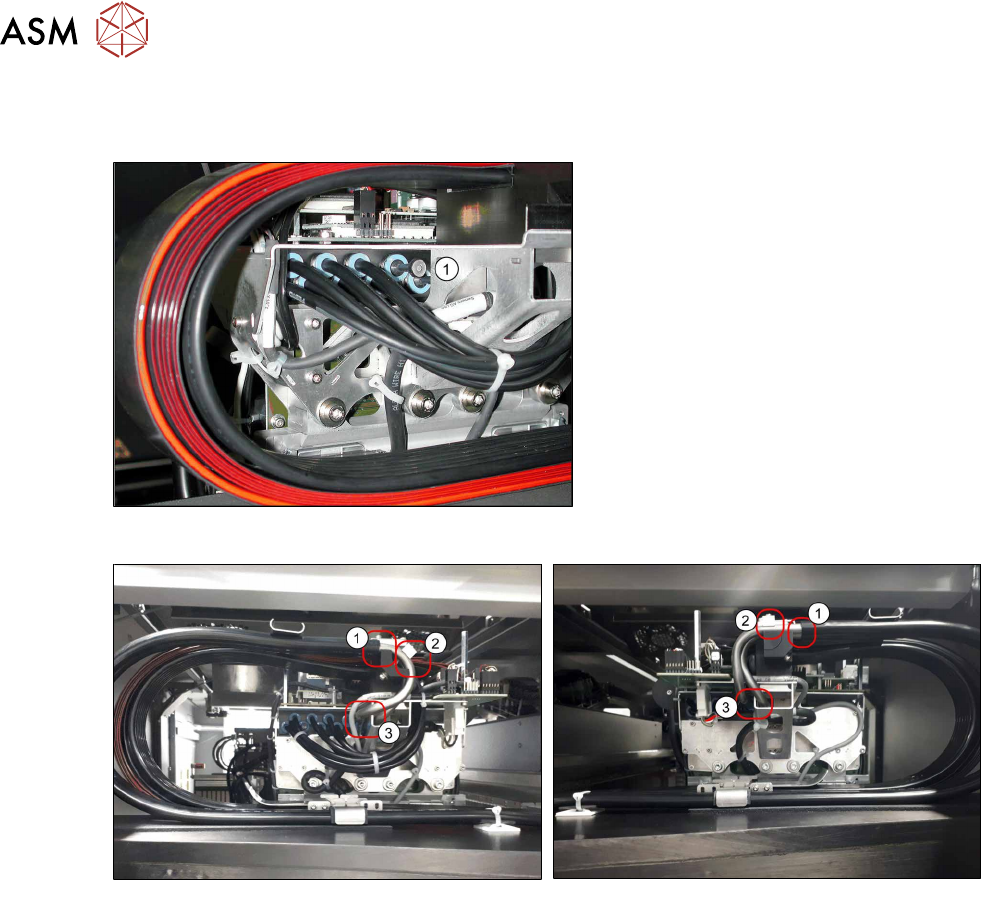
Fig.8: Dummy plugs
► Use the unlocking tool for Q8 to
remove both dummy plugs from the
vacuum distributor(1)
at all gantries to
be converted.
Fig.9: Standard gantry
Fig.10: Rotated gantry
► Attach the vacuum hoses to the two tubes for vacuum connection 1 und 2(1).
► Connect the two tubes to the placement head vacuum distributor(3).
► Fasten the vacuum connection tubes1 and2 using the clamping piece(2), with the help of an
M3x30mm screw and a washer (Loctite 241
).
3 Installation
3.3 Converting the gantries
Assembly Instructions / Montageanleitung SIPLACE X-Series S (from/ab Hxxxx) Option Vacuum Pump 02/2021 135
3.3.2 Connecting the tubes and hoses
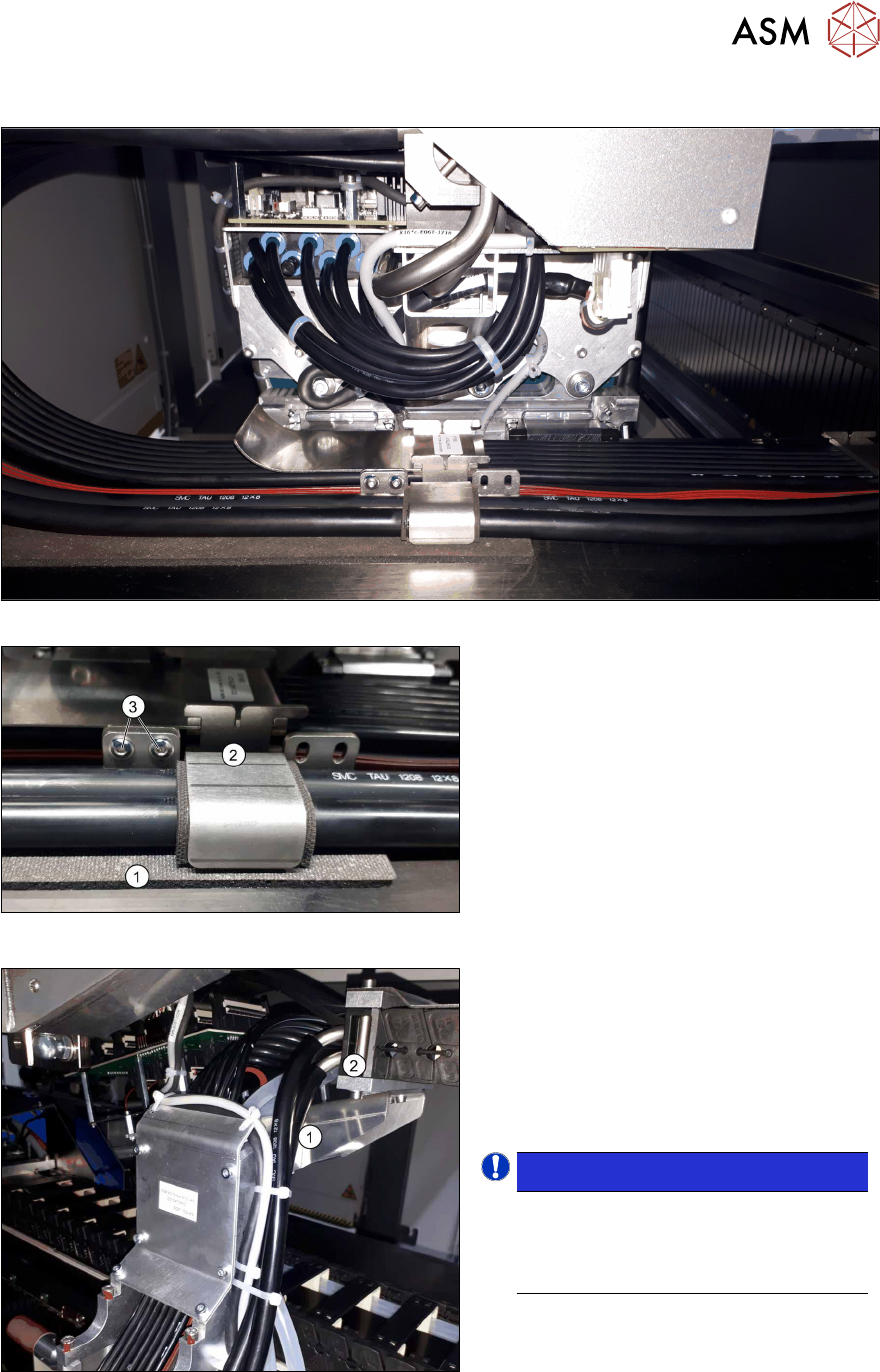
Fig.11: Overview of tube connections
Fig.12: Fastening the foam rubber and the downholder
► Fasten the foam rubber(1) as illus-
trated.
► Fit the downholder(2) using two
screws(3)
(Loctite 241).
Fasten the downholder at the opposite
gantry in the same way so that the
downholder is always positioned as
near as possible towards the inside of
the gantry.
Fig.13: Running and fastening the tubes
► Run the two new tubes to the trailing
cable at the gantry root.
► Run the tubes next to the guide plate
and upwards(1)
.
There may be differences here, due to
the different variants of the gantry trail-
ing cable.
NOTICE!
Use cable ties to fasten the tubes or
hoses where necessary.
Make sure that you do not restrict the
tube or hose width with the cable tie.
.
► Connect the two transparent hoses to
the connection(2).
See also
2 7.3 "Error message: 30356 Vacuum in holding circuit too low" [}183]