00198599-02_AI_Vacuumpump_X-Series-S-from-Hxxxx_DE_EN.pdf - 第155页
3 Installation 3.5 Installing the vacuum pump Assembly Instructions / Montageanleitung SIPLACE X-Series S (from/ab Hxxxx) Option Vacuum Pump 02/2021 155 3.5.6 Inserting the vacuum pump into the machine Select the relevan…
3 Installation
3.5 Installing the vacuum pump
154 Assembly Instructions / Montageanleitung SIPLACE X-Series S (from/ab Hxxxx) Option Vacuum Pump 02/2021
3.5.5.1 Fitting the vacuum valve or bypass converter
Machines with only one head at a vacuum pump require a vacuum valve or bypass converter to be
fitted for introduction of leaked air.
●
Bypass converter [03222472‑xx]
●
Vacuum valve Becker ST 613-0-2 [03109300‑xx]
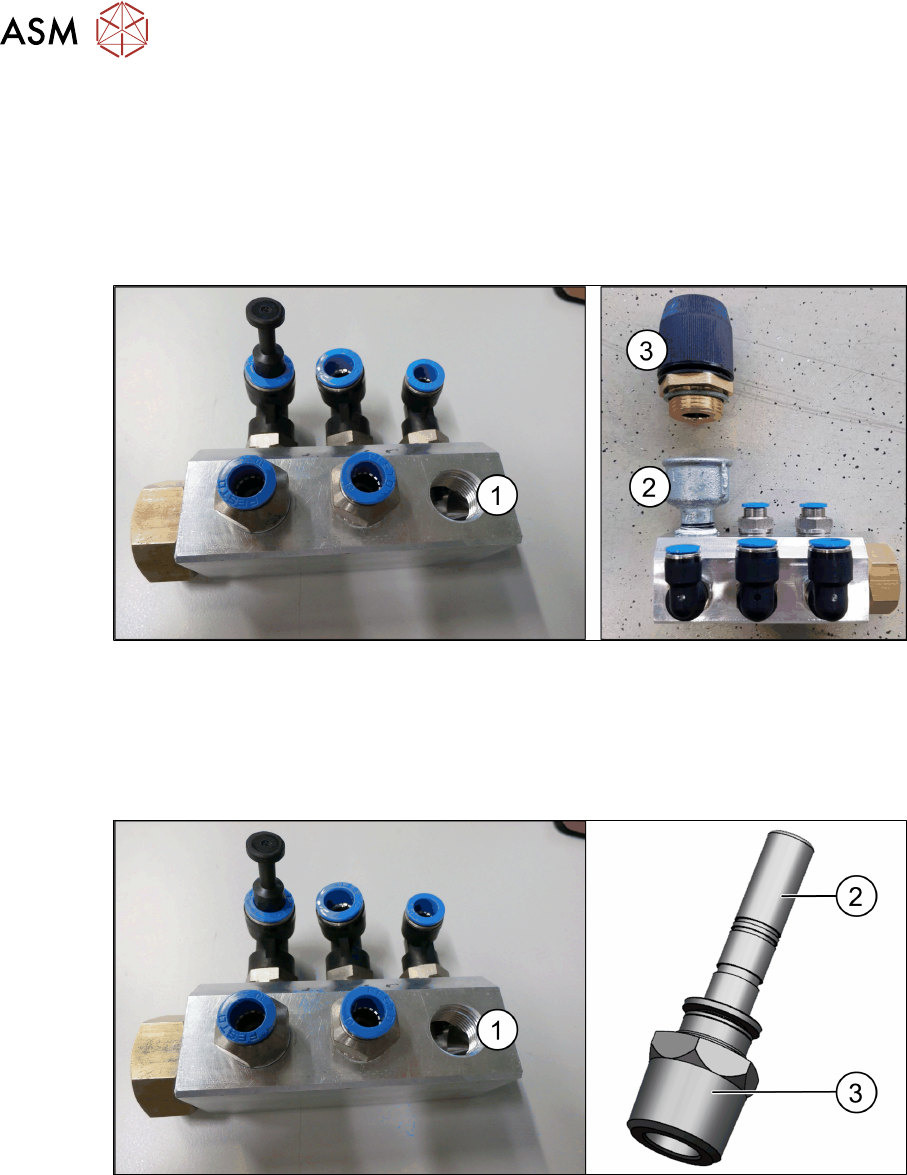
Installing the vacuum valve
Fig.46: Fitting the vacuum valve
► Unscrew a Festo screw joint(1).
► Fit the "reducing socket IG = 1 Rp AG = 1/2 R"(2) [03123422‑xx].
► Fit the "vacuum valve Becker ST 613-0-2"(3) [03109300‑xx]
Fitting the bypass converter
Fig.47: Fitting the bypass converter
► Unscrew a Festo screw joint(1).
► Fit the "push-in L-fitting QS-1/2-10"(2) [03038816‑xx].
► Fit the bypass converter(3) [03222472‑xx].
Setting
► Set the vacuum valve/bypass converter as follows:
– Equip the SIPLACE C&P20x with 4004/6004 nozzles.
The vacuum difference from open to closed should be 95mbar, the closed value should be
at least -750mbar.
The other head should be without nozzles.
3 Installation
3.5 Installing the vacuum pump
Assembly Instructions / Montageanleitung SIPLACE X-Series S (from/ab Hxxxx) Option Vacuum Pump 02/2021 155
3.5.6 Inserting the vacuum pump into the machine
Select the relevant chapter for your version of the vacuum pump:
●
3.5.6.1 "Inserting the vacuum pump into the machine (old)" [}155]
●
3.5.6.2 "Inserting the vacuum pump into the machine (new)" [}156]
3.5.6.1 Inserting the vacuum pump into the machine (old)
► Fix the cables or tubes to the machine base, above the place where the vacuum pump is to
be fitted.
► Connect the cables and tubes.
CAUTION
Do not bend or trap the cables and tubes
The vacuum pump is pushed so far into the machine that cables could be damaged. Take
care that there are therefore no cables behind the vacuum pump.
NOTICE
Mounting tool
The vacuum pump weights over 30 kg and should not be lifted by a single person alone.
Enlist the help of a second person when lifting or transporting the vacuum pump.
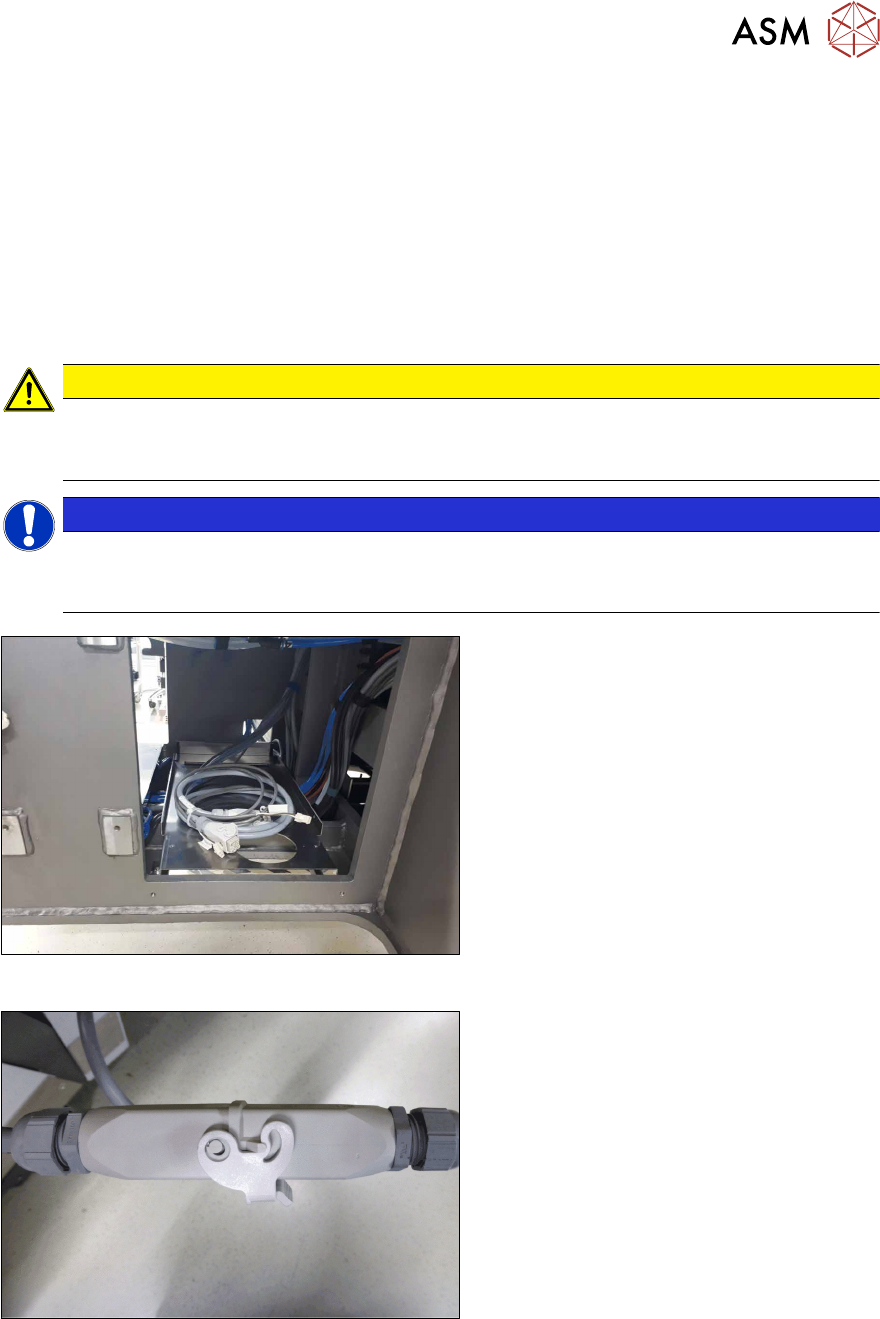
Fig.48: Vacuum pump installation location
Installation location of the vacuum pump
with connection cables for the vacuum pump
and the fan.
Fig.49: Connection to the power supply
► Connect the vacuum pump cable to the
corresponding connection in the
machine.
(See also 7.2.3.3
"Vacuum pump con-
nection (old)" [}178])
3 Installation
3.5 Installing the vacuum pump
156 Assembly Instructions / Montageanleitung SIPLACE X-Series S (from/ab Hxxxx) Option Vacuum Pump 02/2021
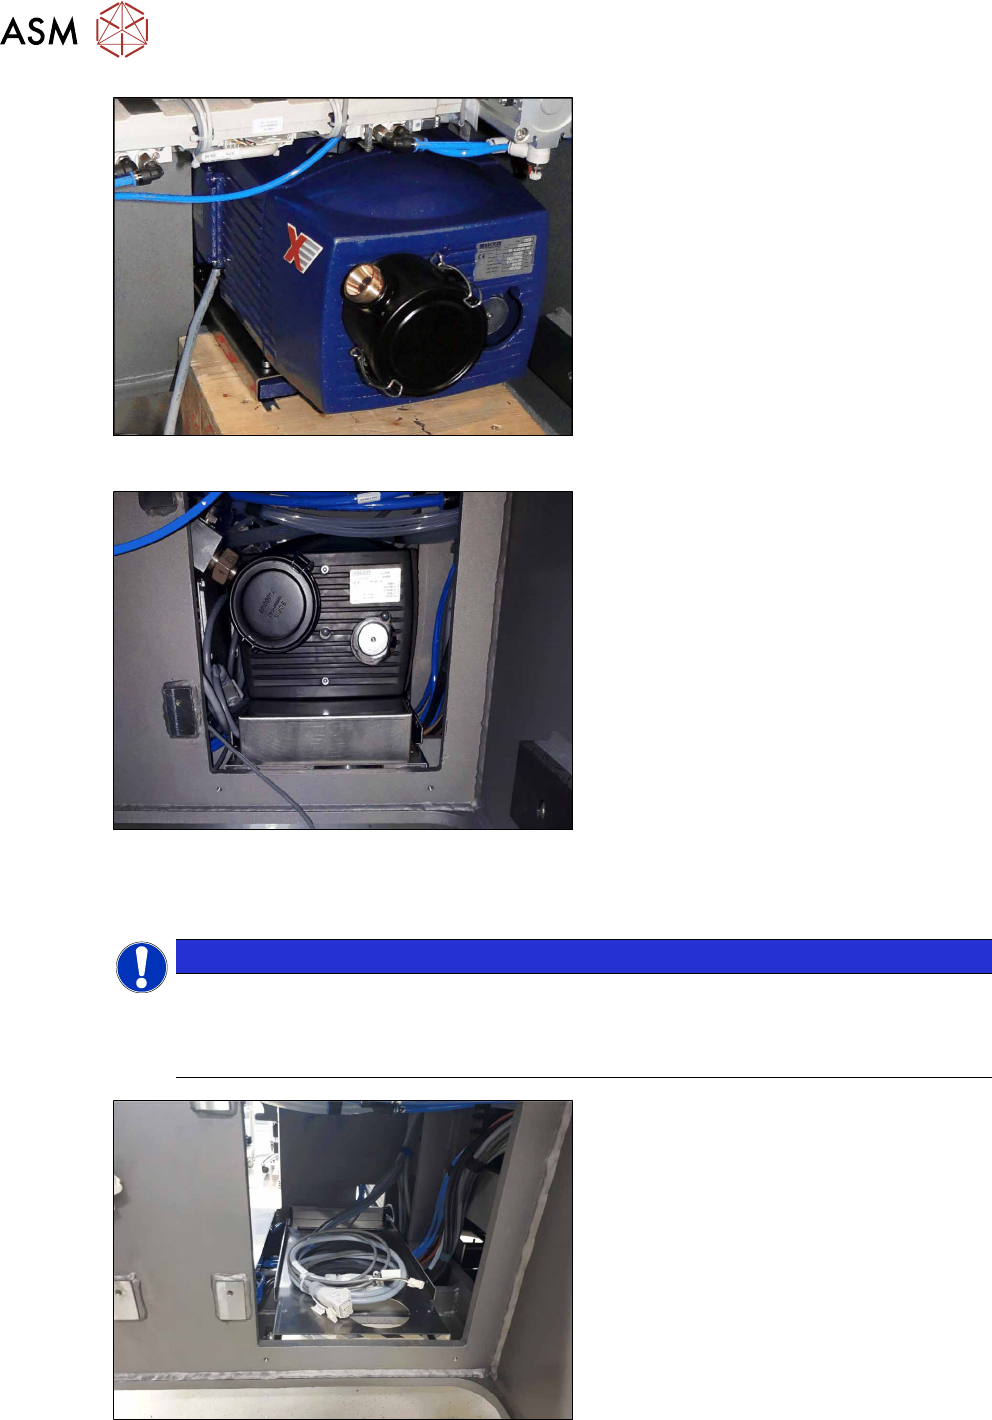
Fig.50: Inserting the vacuum pump
► Move the vacuum pump to the installa-
tion point. Use a suitable pallet jack
with pallet to lift the vacuum pump to
the required height.
Fig.51: Vacuum pump inserted
► Push the vacuum pump into the
machine.
3.5.6.2 Inserting the vacuum pump into the machine (new)
NOTICE
Second person or lifting aid
The vacuum pump weights over 30 kg and should not be lifted by a single person alone.
Enlist the help of a second person or use a suitable lifting aid when lifting or transporting
the vacuum pump.
Fig.52: Vacuum pump installation location
Prepared installation location for vacuum
pump with electrical and pneumatic connec-
tions